Bitwarden - Passwoerter abspeichern/en
| (2 dazwischenliegende Versionen desselben Benutzers werden nicht angezeigt) | |||
| Zeile 13: | Zeile 13: | ||
<br> | <br> | ||
* Click on '''"+ New"'''. | * Click on '''"+ New"'''. | ||
| − | |||
* Then click on '''"Login Details"''' to add a new password. | * Then click on '''"Login Details"''' to add a new password. | ||
| − | |||
<br clear=all> | <br clear=all> | ||
[[Datei:Bitwarden-05.png|links|mini|ohne|450px|Enter Login Details]] | [[Datei:Bitwarden-05.png|links|mini|ohne|450px|Enter Login Details]] | ||
| − | |||
<br> | <br> | ||
In this example, we'll create an entry for the login details for your university account. | In this example, we'll create an entry for the login details for your university account. | ||
| Zeile 32: | Zeile 29: | ||
Autofill Options | Autofill Options | ||
* Enter the website where you want to use the password. | * Enter the website where you want to use the password. | ||
| − | |||
* In this example, we use <code>https://uni-paderborn.de</code> | * In this example, we use <code>https://uni-paderborn.de</code> | ||
| − | |||
* We leave the matching setting on the default. This allows you to use this entry on all corresponding subdomains. For example: | * We leave the matching setting on the default. This allows you to use this entry on all corresponding subdomains. For example: | ||
** <code>https://serviceportal.uni-paderborn.de/</code> | ** <code>https://serviceportal.uni-paderborn.de/</code> | ||
** <code>https://paul.uni-paderborn.de/</code> | ** <code>https://paul.uni-paderborn.de/</code> | ||
| − | |||
* Click '''Save''' to apply the changes. | * Click '''Save''' to apply the changes. | ||
| − | |||
<br clear=all> | <br clear=all> | ||
| Zeile 48: | Zeile 41: | ||
[[Datei:Bitwarden-06.png|links|mini|ohne|450px|New Folder]] | [[Datei:Bitwarden-06.png|links|mini|ohne|450px|New Folder]] | ||
| − | |||
<br> | <br> | ||
* Click '''"+ New"'''. | * Click '''"+ New"'''. | ||
* Click on '''"Folder"'''. | * Click on '''"Folder"'''. | ||
| − | + | <br clear=all> | |
[[Datei:Bitwarden-07.png|links|mini|ohne|450px|New Folder]] | [[Datei:Bitwarden-07.png|links|mini|ohne|450px|New Folder]] | ||
| − | |||
* Enter the name for the folder. | * Enter the name for the folder. | ||
* Then click on '''"Save"'''. | * Then click on '''"Save"'''. | ||
| − | + | <br clear=all> | |
[[Datei:Bitwarden-08.png|links|mini|ohne|450px|New Folder]] | [[Datei:Bitwarden-08.png|links|mini|ohne|450px|New Folder]] | ||
* You can specify a folder when creating and editing entries. | * You can specify a folder when creating and editing entries. | ||
| − | + | <br clear=all> | |
==Subfolders== | ==Subfolders== | ||
| Zeile 70: | Zeile 61: | ||
* In this example, the folder '''"Certificates"''' already exists. | * In this example, the folder '''"Certificates"''' already exists. | ||
* By entering <code>Certificates/Email</code> as the folder name, we create a new folder '''"Email"''' as a subfolder of '''"Certificates"'''. | * By entering <code>Certificates/Email</code> as the folder name, we create a new folder '''"Email"''' as a subfolder of '''"Certificates"'''. | ||
| − | |||
<br clear=all> | <br clear=all> | ||
| Zeile 79: | Zeile 69: | ||
* Additionally, a folder named '''"Certificates"''' was created, which has two subfolders. | * Additionally, a folder named '''"Certificates"''' was created, which has two subfolders. | ||
* You can expand and collapse subfolders using the arrow icon. | * You can expand and collapse subfolders using the arrow icon. | ||
| − | |||
<br clear=all> | <br clear=all> | ||
== See also == | == See also == | ||
Link to other interesting articles on the same topic | Link to other interesting articles on the same topic | ||
Aktuelle Version vom 21. März 2026, 14:51 Uhr
Die deutsche Version finden Sie auf der Seite Bitwarden - Passwörter abspeichern
This article is only a draft. Information provided here is most possibly incomplete and/or imprecise. Feel free to help us by expanding it. |
Use Bitwarden to securely store your passwords in one central location.
Step-by-Step Instructions[Bearbeiten | Quelltext bearbeiten]
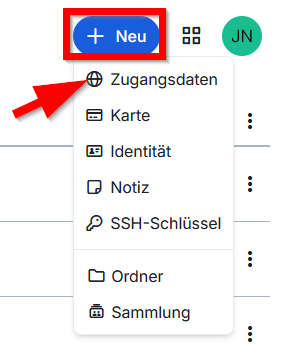
- Click on "+ New".
- Then click on "Login Details" to add a new password.
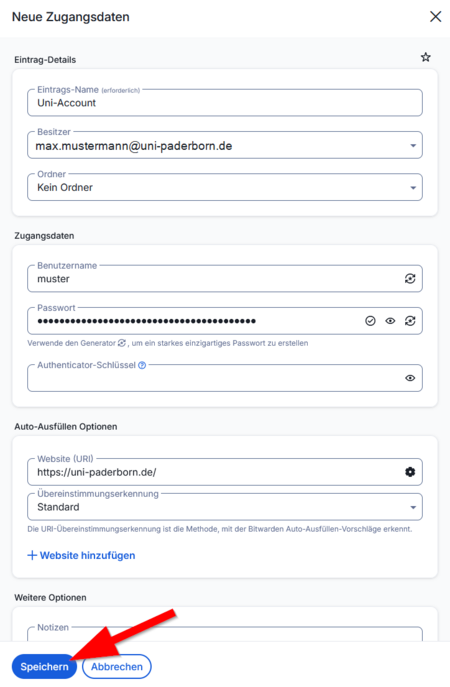
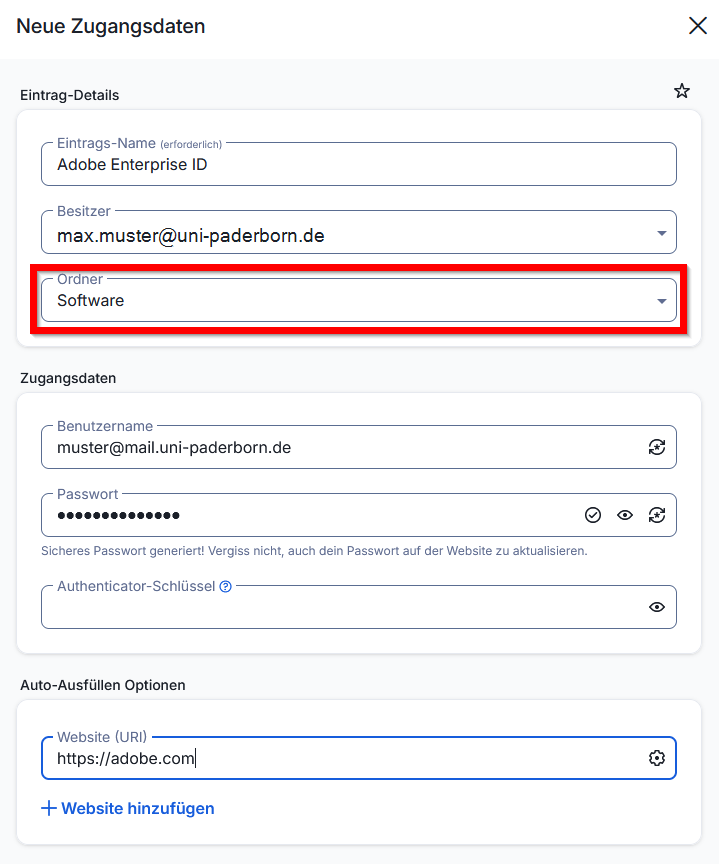
In this example, we'll create an entry for the login details for your university account.
- Enter a descriptive name under Entry Name.
- Choose an owner - In this example, the entry will be stored in your personal vault - Only you will have access to it.
Login Details
- Enter your username
- Enter your password
Autofill Options
- Enter the website where you want to use the password.
- In this example, we use
https://uni-paderborn.de - We leave the matching setting on the default. This allows you to use this entry on all corresponding subdomains. For example:
- Click Save to apply the changes.
Using Folders[Bearbeiten | Quelltext bearbeiten]
Use folders to organize your passwords.
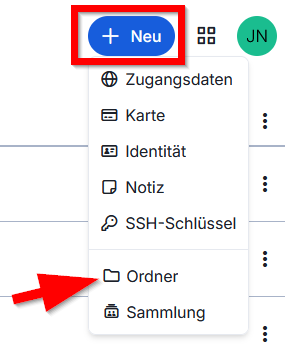
- Click "+ New".
- Click on "Folder".

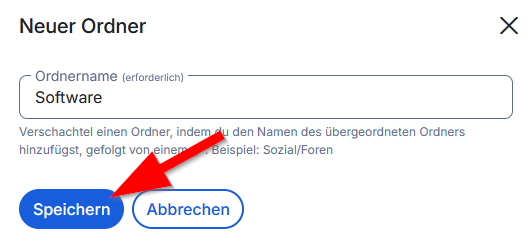
- Enter the name for the folder.
- Then click on "Save".

- You can specify a folder when creating and editing entries.
Subfolders[Bearbeiten | Quelltext bearbeiten]

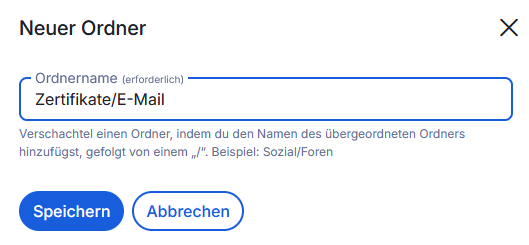
- Use
/to create a subfolder. - In this example, the folder "Certificates" already exists.
- By entering
Certificates/Emailas the folder name, we create a new folder "Email" as a subfolder of "Certificates".
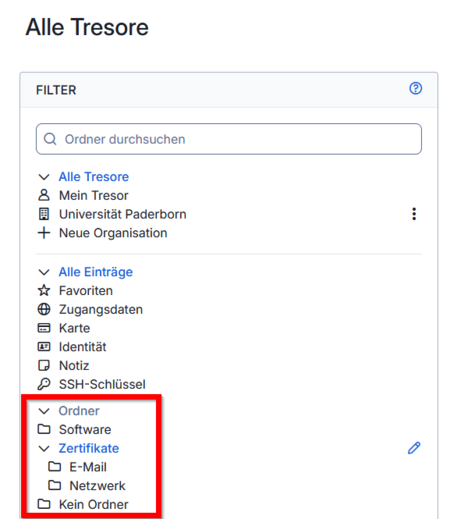
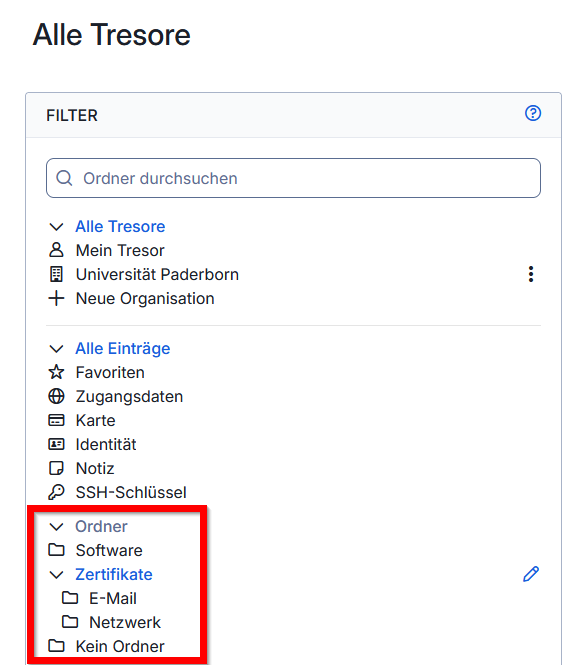
- You can see the folder structure in the vault overview on the left.
- In this example, a simple folder named "Software" was created.
- Additionally, a folder named "Certificates" was created, which has two subfolders.
- You can expand and collapse subfolders using the arrow icon.
See also[Bearbeiten | Quelltext bearbeiten]
Link to other interesting articles on the same topic
