Bitwarden - Erweiterungen und Apps installieren/en
| Zeile 23: | Zeile 23: | ||
[[Datei:Bitwarden-18.png|links|mini|ohne|450px]] | [[Datei:Bitwarden-18.png|links|mini|ohne|450px]] | ||
| + | <br> | ||
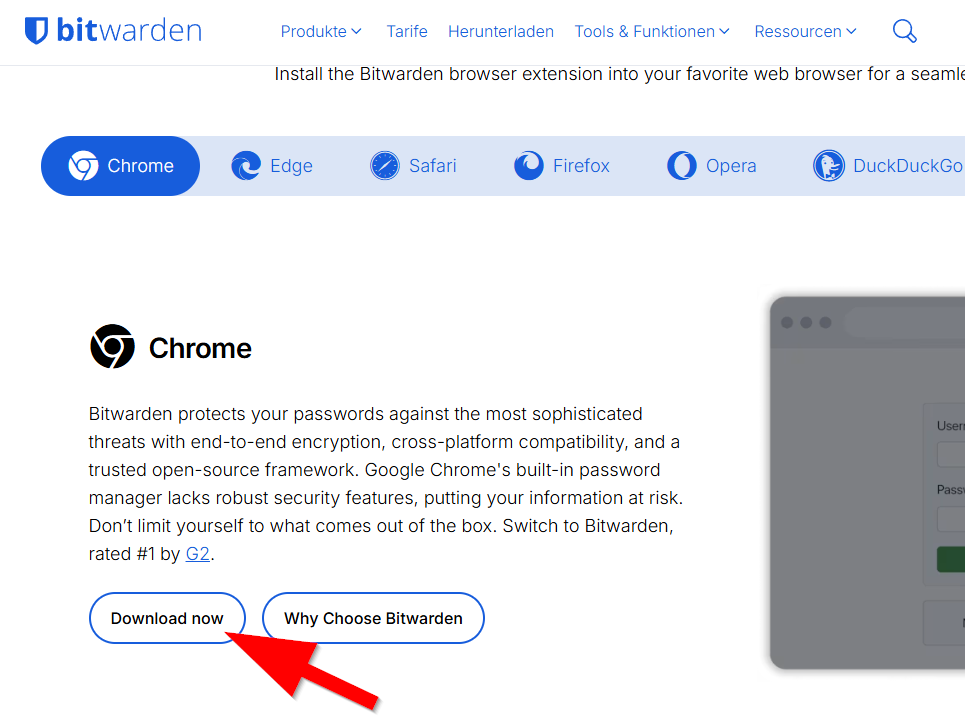
* Select your browser and click '''"Download now"''' | * Select your browser and click '''"Download now"''' | ||
* The correct browser is usually already pre-selected. | * The correct browser is usually already pre-selected. | ||
| Zeile 28: | Zeile 29: | ||
[[Datei:Bitwarden-19.png|links|mini|ohne|450px]] | [[Datei:Bitwarden-19.png|links|mini|ohne|450px]] | ||
| + | <br> | ||
* You will automatically be redirected to the Chrome Web Store. | * You will automatically be redirected to the Chrome Web Store. | ||
* Click '''"Add"'''. | * Click '''"Add"'''. | ||
| Zeile 33: | Zeile 35: | ||
[[Datei:Bitwarden-20.png|links|mini|ohne|450px]] | [[Datei:Bitwarden-20.png|links|mini|ohne|450px]] | ||
| + | <br> | ||
* Click '''"Add extension"'''. | * Click '''"Add extension"'''. | ||
| Zeile 38: | Zeile 41: | ||
[[Datei:Bitwarden-21.png|links|mini|ohne|450px]] | [[Datei:Bitwarden-21.png|links|mini|ohne|450px]] | ||
| + | <br> | ||
* Click the puzzle piece icon in the Chrome bar. | * Click the puzzle piece icon in the Chrome bar. | ||
* Click the pin icon to pin the Bitwarden app. | * Click the pin icon to pin the Bitwarden app. | ||
| Zeile 43: | Zeile 47: | ||
[[Datei:Bitwarden-22.png|links|mini|ohne|450px]] | [[Datei:Bitwarden-22.png|links|mini|ohne|450px]] | ||
| + | <br> | ||
* Click the Bitwarden icon. | * Click the Bitwarden icon. | ||
| Zeile 48: | Zeile 53: | ||
[[Datei:Bitwarden-23.png|links|mini|ohne|450px]] | [[Datei:Bitwarden-23.png|links|mini|ohne|450px]] | ||
| + | <br> | ||
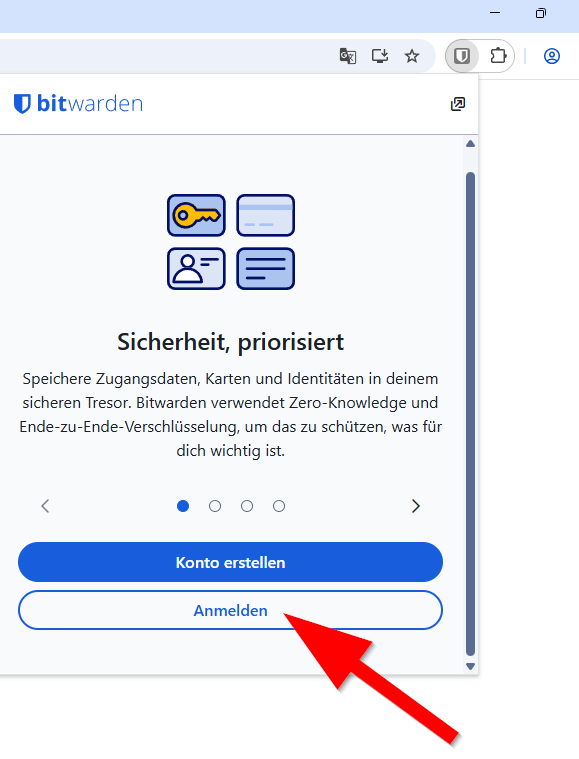
* Click "Sign in." | * Click "Sign in." | ||
| Zeile 53: | Zeile 59: | ||
[[Datei:Bitwarden-24.png|links|mini|ohne|450px]] | [[Datei:Bitwarden-24.png|links|mini|ohne|450px]] | ||
| − | + | <br> | |
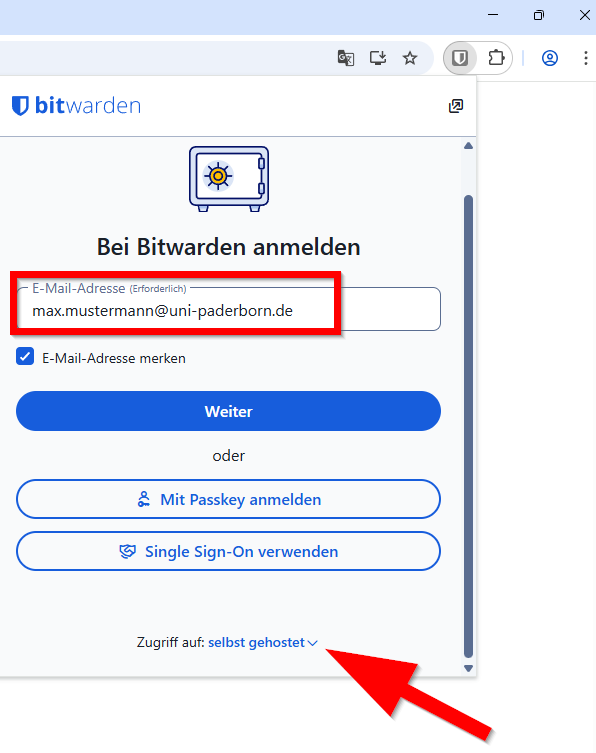
* Enter your preferred email address from the service portal - More information under [[E-Mail-Adresse - Eigene einsehen]] | * Enter your preferred email address from the service portal - More information under [[E-Mail-Adresse - Eigene einsehen]] | ||
| − | |||
* At the bottom, click on '''"Access to:'''" and select '''"self-hosted"'''. | * At the bottom, click on '''"Access to:'''" and select '''"self-hosted"'''. | ||
[[Datei:Bitwarden-25.png|links|mini|ohne|450px]] | [[Datei:Bitwarden-25.png|links|mini|ohne|450px]] | ||
| + | <br> | ||
* Enter the following server URL: <code>https://pw.uni-paderborn.de</code> | * Enter the following server URL: <code>https://pw.uni-paderborn.de</code> | ||
* Then click on '''Save'''. | * Then click on '''Save'''. | ||
| Zeile 67: | Zeile 73: | ||
[[Datei:Bitwarden-26.png|links|mini|ohne|450px]] | [[Datei:Bitwarden-26.png|links|mini|ohne|450px]] | ||
| + | <br> | ||
* If you have set an email address and "Access to: self-hosted": Click "Next". | * If you have set an email address and "Access to: self-hosted": Click "Next". | ||
[[Datei:Bitwarden-27.png|links|mini|ohne|450px]] | [[Datei:Bitwarden-27.png|links|mini|ohne|450px]] | ||
| + | <br> | ||
* Enter the "Master Password" for your Bitwarden account. | * Enter the "Master Password" for your Bitwarden account. | ||
* Click "Log In". | * Click "Log In". | ||
| Zeile 77: | Zeile 85: | ||
[[Datei:Bitwarden-28.png|links|mini|ohne|450px]] | [[Datei:Bitwarden-28.png|links|mini|ohne|450px]] | ||
| + | <br> | ||
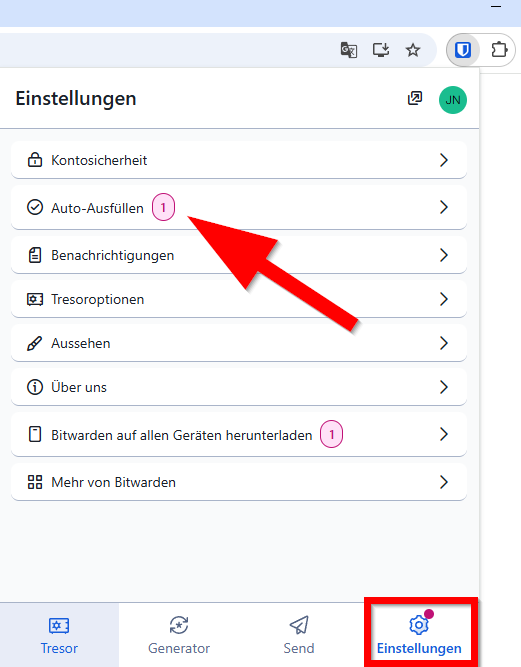
* Click "Settings". | * Click "Settings". | ||
* Click on ''"AutoFill"'''. | * Click on ''"AutoFill"'''. | ||
| − | |||
* Bitwarden will guide you through the necessary steps to activate autofill. | * Bitwarden will guide you through the necessary steps to activate autofill. | ||
| Zeile 88: | Zeile 96: | ||
[[Datei:Bitwarden-29.png|links|mini|ohne|450px]] | [[Datei:Bitwarden-29.png|links|mini|ohne|450px]] | ||
| − | |||
<br> | <br> | ||
* In the Service Portal, click on the username field. | * In the Service Portal, click on the username field. | ||
Version vom 20. März 2026, 15:46 Uhr
Die deutsche Version finden Sie auf der Seite Bitwarden - Erweiterungen und Apps installieren
This article is only a draft. Information provided here is most possibly incomplete and/or imprecise. Feel free to help us by expanding it. |
Bitwarden offers browser extensions and apps. These allow you to use the autofill password feature and access your entries without an internet connection.
Requirements[Bearbeiten | Quelltext bearbeiten]
- You cannot create a Bitwarden account at the University of Paderborn within an app. You have to register for a Bitwarden account first if you haven't already done so.
- You must be connected to the University of Paderborn network. If you are not on campus, you will need a VPN connection.
Step-by-Step Instructions[Bearbeiten | Quelltext bearbeiten]
Download Bitwarden programs only from the official Bitwarden website!
Here, we demonstrate the installation of the Bitwarden extension in the Chrome browser. Other extensions can be installed similarly.

- Select your browser and click "Download now"
- The correct browser is usually already pre-selected.
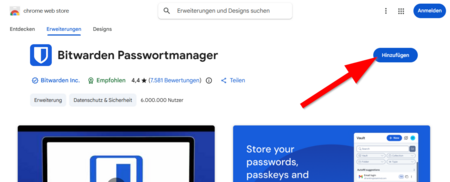
- You will automatically be redirected to the Chrome Web Store.
- Click "Add".

- Click "Add extension".
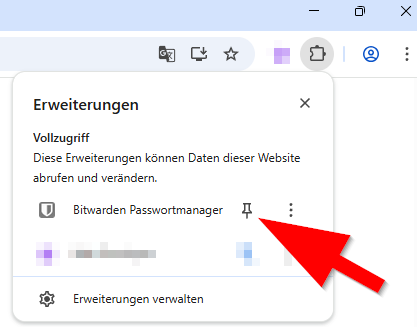
- Click the puzzle piece icon in the Chrome bar.
- Click the pin icon to pin the Bitwarden app.
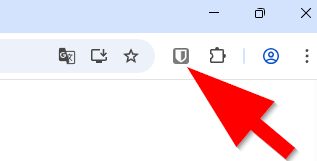
- Click the Bitwarden icon.

- Click "Sign in."
It is not possible to create an UPB account within the Bitwarden app.
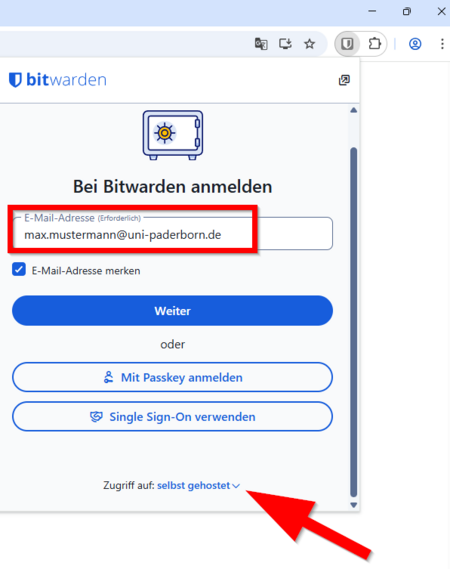
- Enter your preferred email address from the service portal - More information under E-Mail-Adresse - Eigene einsehen
- At the bottom, click on "Access to:" and select "self-hosted".
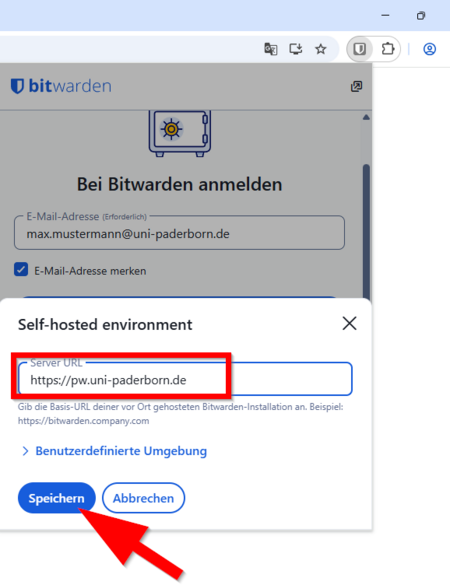
- Enter the following server URL:
https://pw.uni-paderborn.de - Then click on Save.
- Enter your preferred email address from the service portal - More information under E-Mail-Adresse - Eigene einsehen
- At the bottom, click on "Access to:'" and select "self-hosted"".
- Click on Save. ...
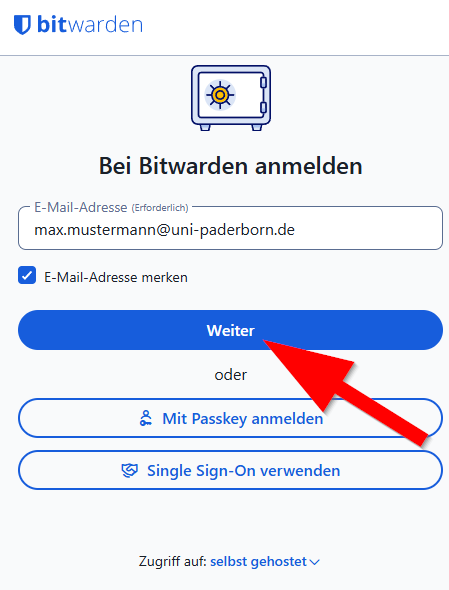
- If you have set an email address and "Access to: self-hosted": Click "Next".
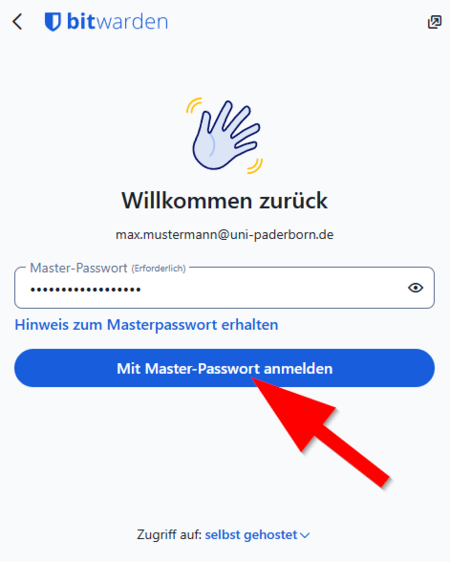
- Enter the "Master Password" for your Bitwarden account.
- Click "Log In".
You can now access your Bitwarden account in your browser. Further settings may be required for autofill to work. Bitwarden can assist you with this.

- Click "Settings".
- Click on "AutoFill"'.
- Bitwarden will guide you through the necessary steps to activate autofill.
Example[Bearbeiten | Quelltext bearbeiten]
Autofill with Bitwarden in the Service Portal.

- In the Service Portal, click on the username field.
- Select the login credentials you want to use.
- Bitwarden will now automatically fill in the username and password fields.
See also[Bearbeiten | Quelltext bearbeiten]
Link to other interesting articles on the same topic


