This article aims to show you how to organize and manage exams online using the PANDA exam organization.
What needs to be done?[Bearbeiten | Quelltext bearbeiten]
- Call up the desired course
- Activate editing
- Add test organisation
- Make settings
- Establish audit organization step by step
Create examination organization[Bearbeiten | Quelltext bearbeiten]
Select examination organization[Bearbeiten | Quelltext bearbeiten]
To start the exam organization, call up the desired course in which you want to organize the exam.
Important: Please make sure that you are only entered as a lecturer or assistant and not as a participant in the course at the same time!
- First switch on the Edit.
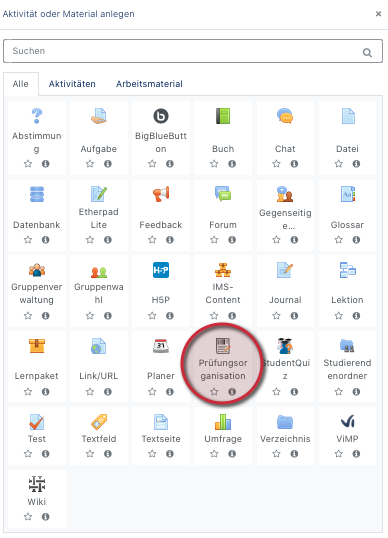
- Then click on "Create material or activity" under the desired topic/date.
- In the next step, select the exam organization and then click on "Add".
Setting options[Bearbeiten | Quelltext bearbeiten]
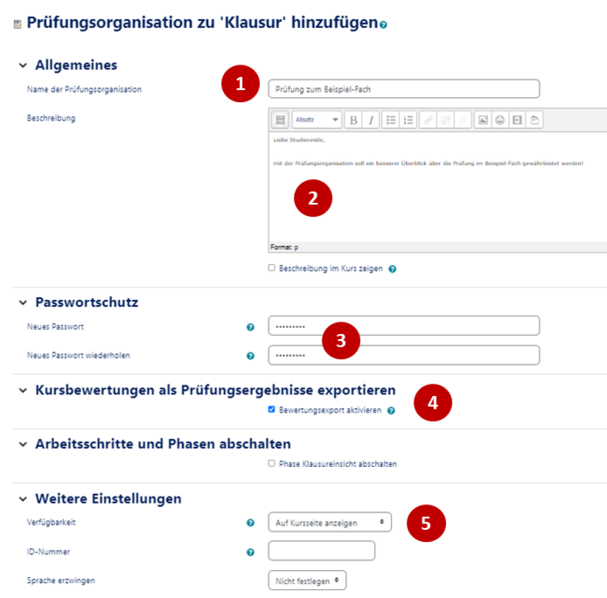
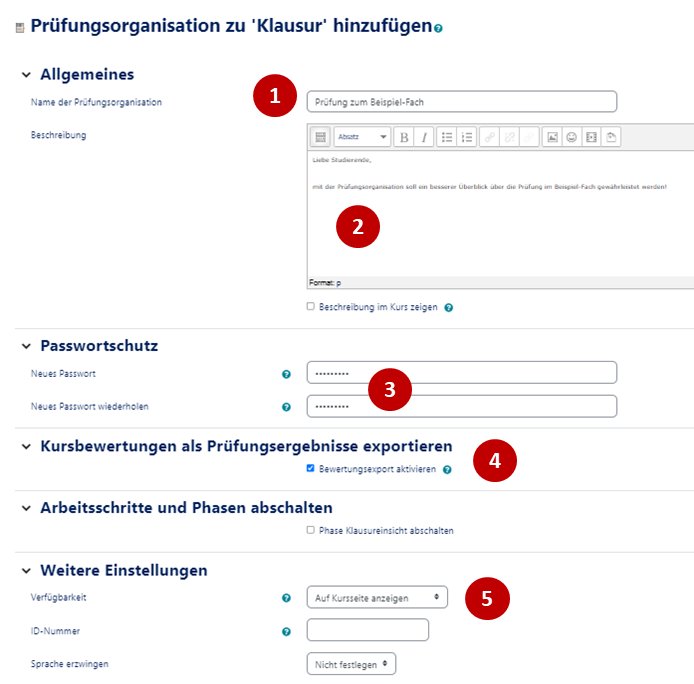
Now you have several options for making settings in your exam organisation.
- Exam organization (1): Enter the desired title here.
- Description (2): Enter a meaningful description.
- Additionally you can decide whether this description should be displayed in the course or not.
- Password protection (3): Enter a password here if you want to limit access to the exam organization to other teachers or assistant teachers (e.g. your student tutors) of this course. These staff members must then first enter the password before they can access the content.
- Clarification: Students will never be given access to critical content. At best, participants can only be granted access to the course date and their own results.
- Further Settings (4): Here you can decide whether the exam organization on the course page should be visible or hidden for all students.
- Then click on "Save and Show".
Set up examination organization[Bearbeiten | Quelltext bearbeiten]
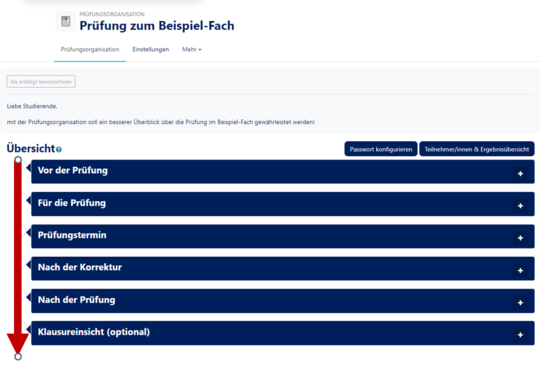
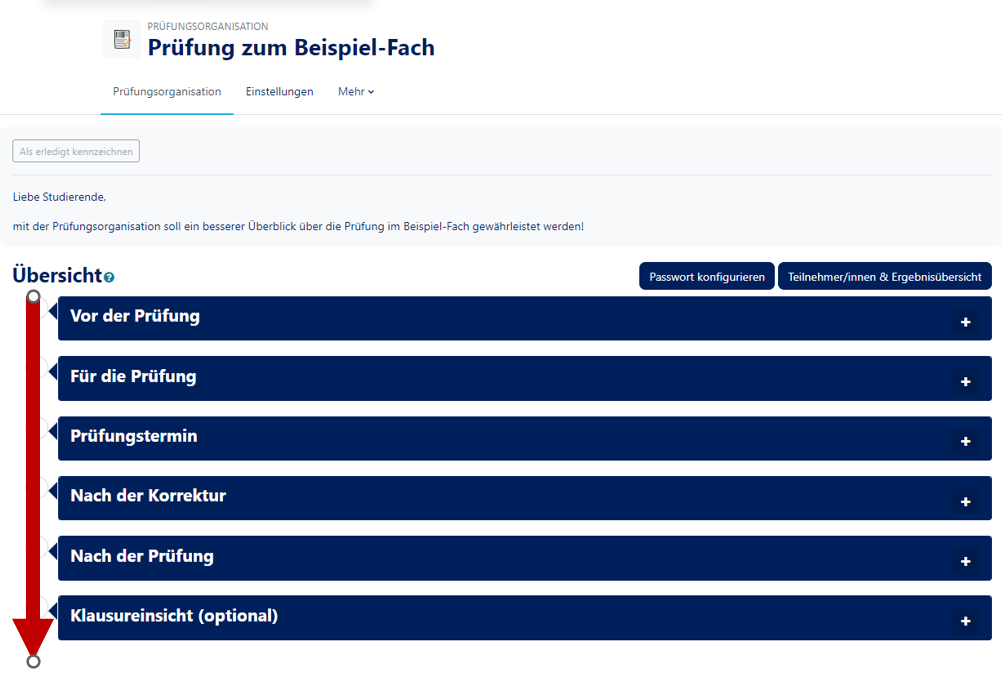
You will now be taken to an overview that automatically guides you through the necessary settings.
There are "Before the examination", "For the examination", "Examination date", "After the correction", "After the examination" and "Examination view (optional)". When you have made all the necessary settings, you will automatically proceed to the next point.
Before the examination[Bearbeiten | Quelltext bearbeiten]
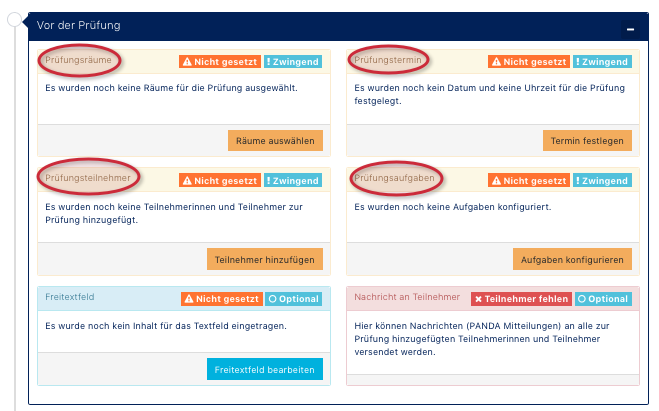
In the overview for "Before the examination" you can specify examination rooms, the examination date, the examination participants and the examination tasks.
Optionally you can write a free text field or a message to the students. Here you can also see which settings you still have to make mandatory.
Examination rooms[Bearbeiten | Quelltext bearbeiten]
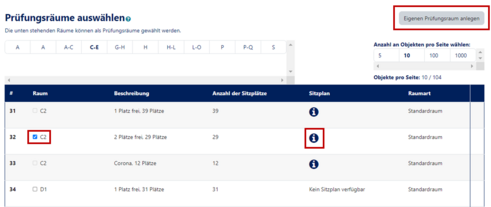
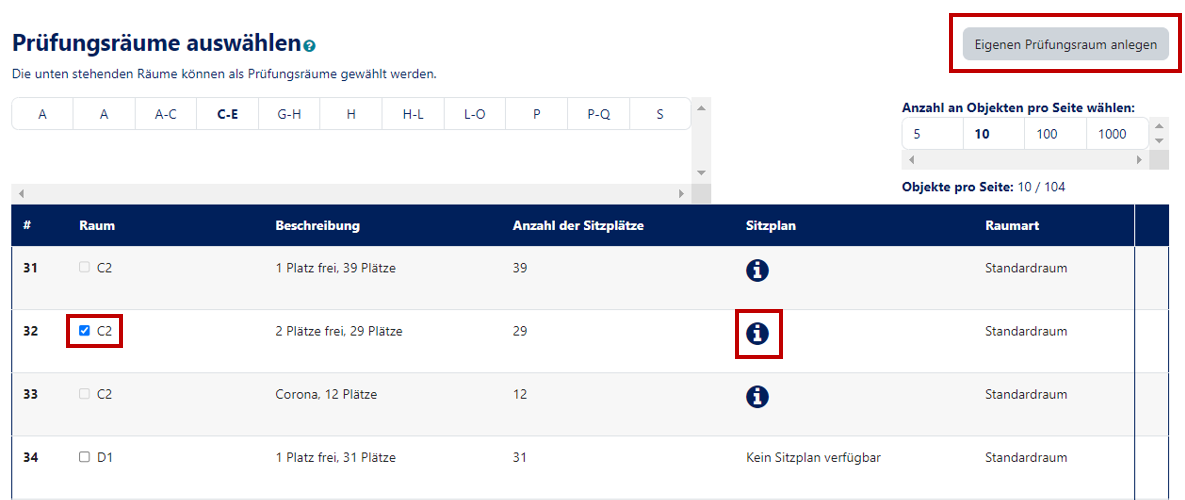
- To specify an examination room, click on "Select rooms".
- Thereupon an overview of all existing rooms opens.
- Select the desired room.
- If you click on the "I", a seating plan opens.
- Alternatively you can create your own examination room.
- Finally, click on "Select rooms".
Date of examination[Bearbeiten | Quelltext bearbeiten]
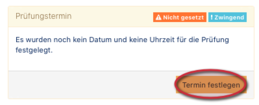
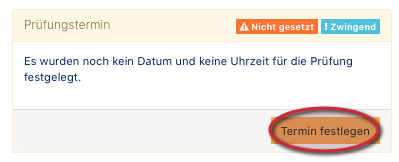
- To set a check date, click on "Set date".
- In the following overview you can set the date and time of the exam.
- Then click on "Save changes".
Examination participant[Bearbeiten | Quelltext bearbeiten]
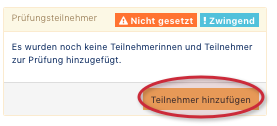
- To add participants, click on "Add participant".
- You now have two options:
- 1. You click on "Add participant from file (recommended)". This will import the participant list from PAUL.
- 2. You click on "Import Students (optional)" and add the students manually.
Examination tasks[Bearbeiten | Quelltext bearbeiten]
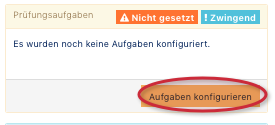
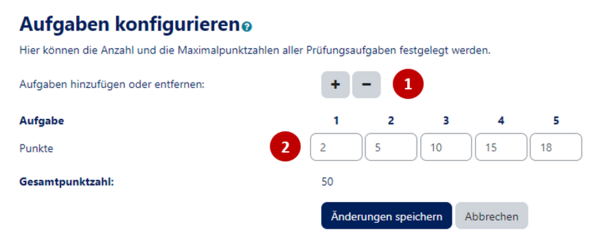
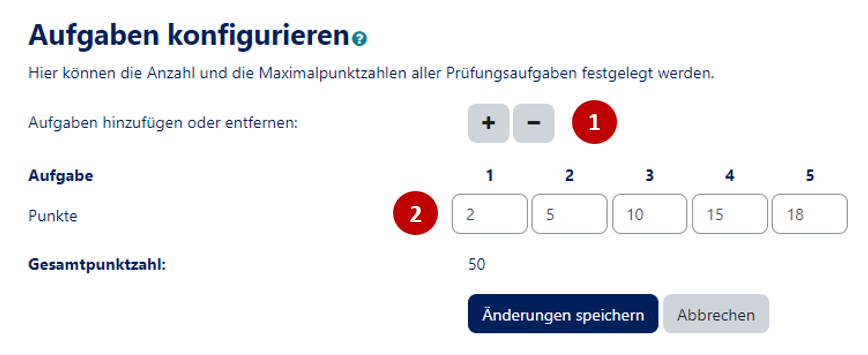
- To add the exam tasks, click on "Configure tasks".
- Under +/- you can increase or decrease the number of tasks, i.e. add or remove tasks (1).
- Under Points (2) you can set the number of points for each task.
- Under Total you can see the total number of points.
- Finally, click on "Save changes".
For the examination[Bearbeiten | Quelltext bearbeiten]
Now you will be automatically redirected to "For the examination".
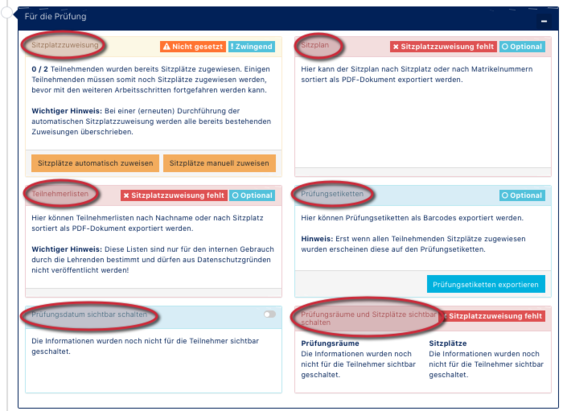
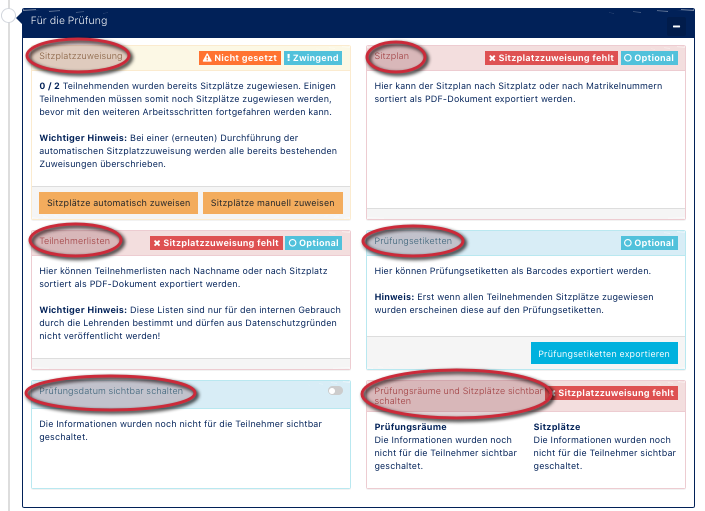
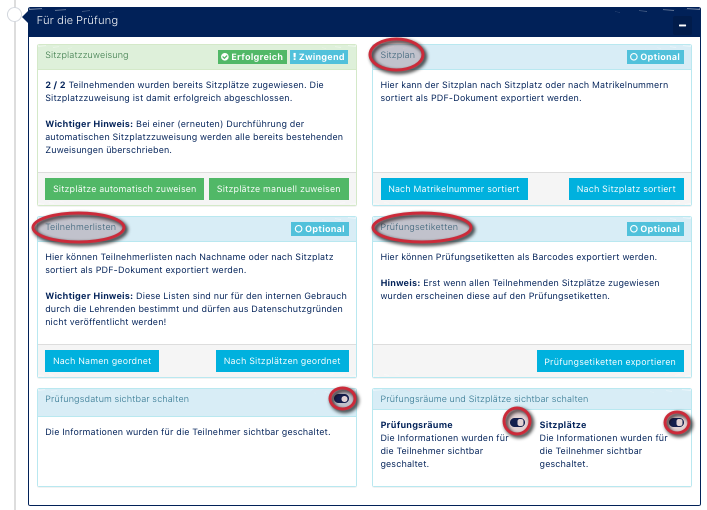
Here there is the Seat assignment, which is almost a requirement for all further settings, the seating plan, the visible switching of examination date and examination rooms, the examination labels and the participant lists.
Seat assignment[Bearbeiten | Quelltext bearbeiten]
- Seats can be assigned automatically or manually.
- If you select automatic seat assignment, you go directly to the next step "Examination date".
- If you select manual seat assignment, a table appears in which you can manually enter the desired seat.
- You can also view your students' results here and change them under "Edit".
- You can also configure the clef by clicking on the yellow "i".
Further settings[Bearbeiten | Quelltext bearbeiten]
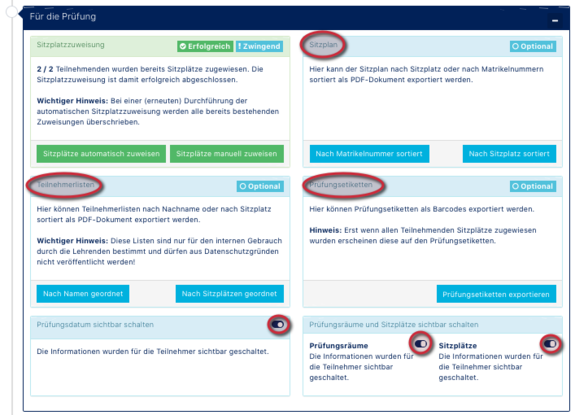
All other settings are optional:
- The seating plan can be exported either sorted by seat or by matriculation number.
- The exam date, the exam rooms and the seats can be made visible to the students by means of a slider.
- Exam Labels can be exported as barcodes.
- Participant lists can be exported.
Examination date[Bearbeiten | Quelltext bearbeiten]
Below the examination date you can only see when (date, time) and in which room the examination will take place.
After correction[Bearbeiten | Quelltext bearbeiten]
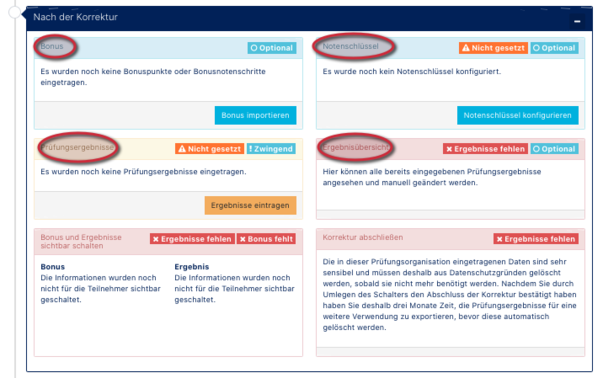
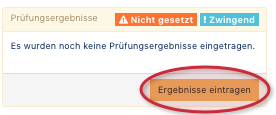
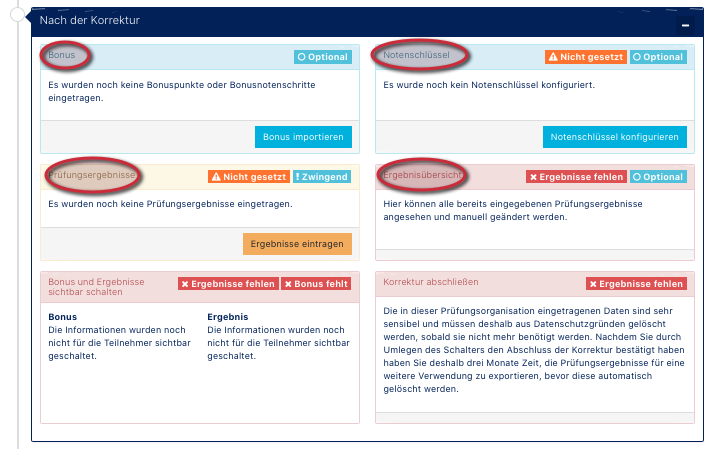
After correcting the examination, you can optionally enter the bonus note steps and the clef. The examination results must be entered.
Enter examination results[Bearbeiten | Quelltext bearbeiten]
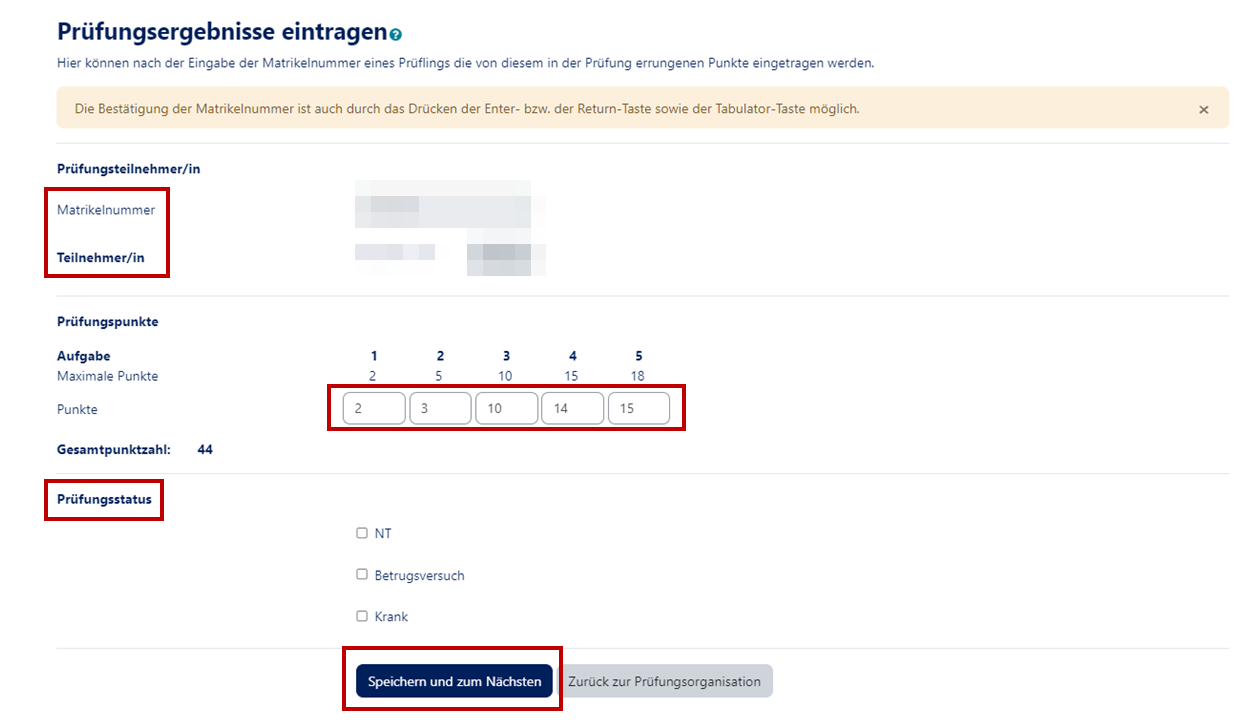
- On the following page you can enter the results using the student number or the barcode previously defined:
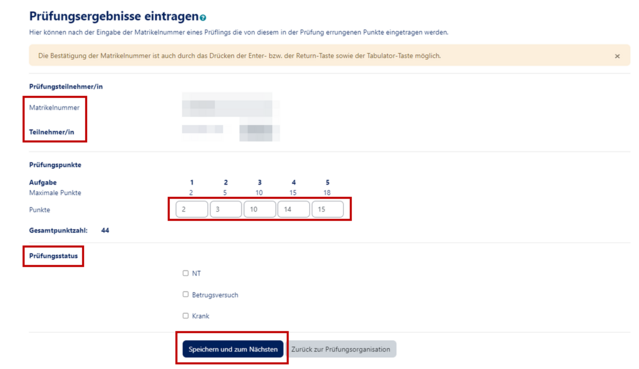
- Now you see the participant and the corresponding matriculation number. You can also change them again here.
- Under examination points you see the maximum points and can enter the achieved points of the participants.
- Under Examination Status you can also determine whether a participant did not take the examination, whether there was an attempt to cheat or whether the participant was ill.
- Then click on "Save and go to next".
Finish correction[Bearbeiten | Quelltext bearbeiten]
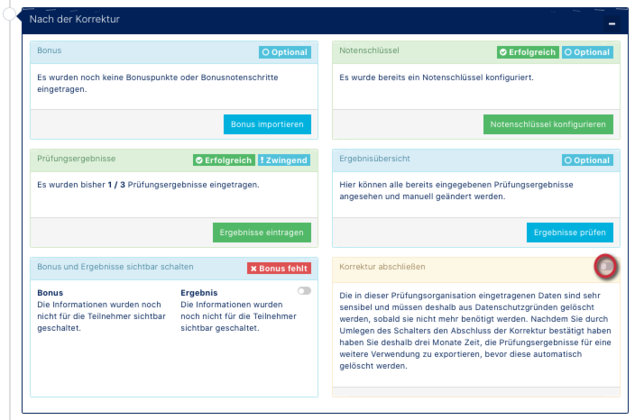
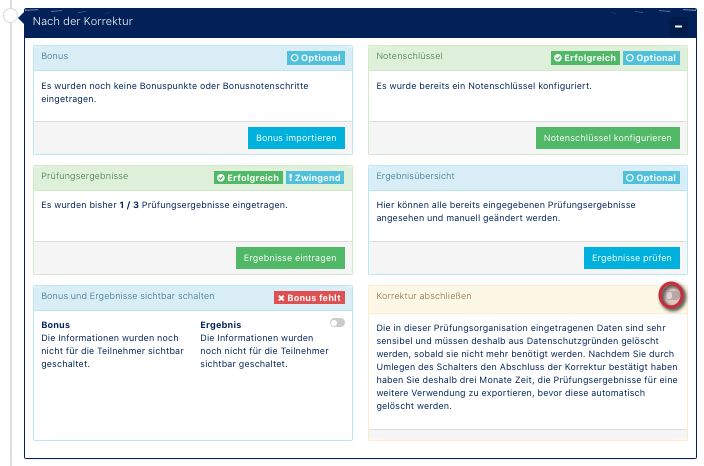
- ! The data of the examination organisation is very sensitive and will be deleted automatically after three months ! You have only three months to export the examination results.
- To complete the correction, you have to move the marked switch.
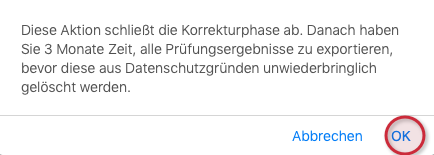
- After moving the switch, you will be asked again in a new window whether you want to complete the correction. To do this, click on "OK".
After the examination[Bearbeiten | Quelltext bearbeiten]
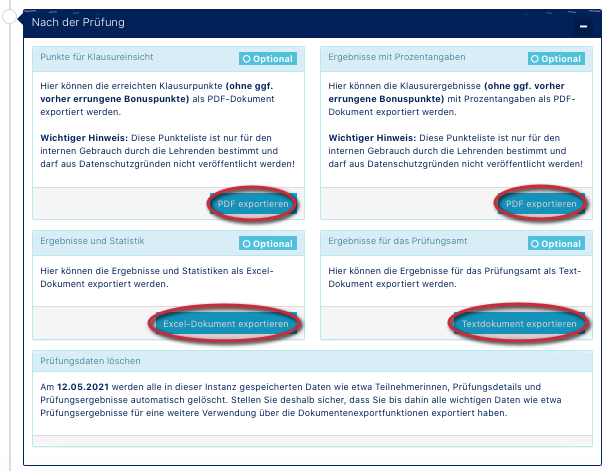
- After the examination, you can export the data in various ways:
1. Points for exam review (PDF)
2. Results with percentages (PDF)
3. Results and statistics (Excel document)
4. Results for the examination office (PAUL text document)
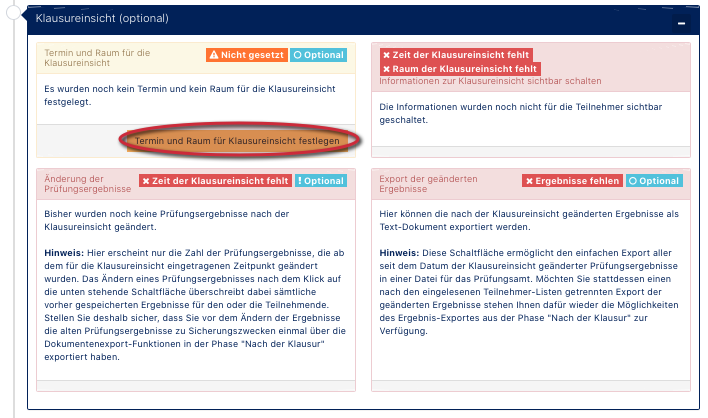
Inspection of examination (optional)[Bearbeiten | Quelltext bearbeiten]
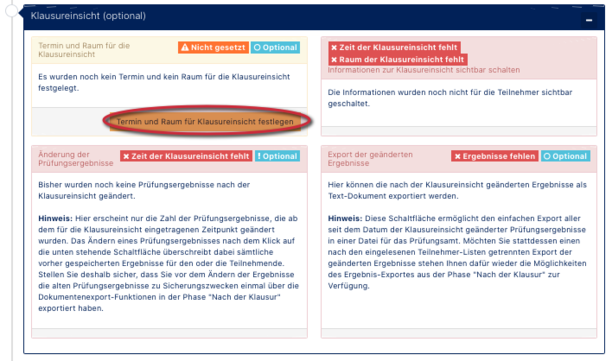
- Under the examination inspection you have the option of setting up an inspection for the completed examinations.
- To do this, click on "Date and rooms for exam viewing".
- In the following view you can set the date, time and room.
- Then click on "Save changes".
Your exam organisation is now complete!
Video Instructions[Bearbeiten | Quelltext bearbeiten]
Video - General[Bearbeiten | Quelltext bearbeiten]
Video -Before the examination[Bearbeiten | Quelltext bearbeiten]
Video - For the examination[Bearbeiten | Quelltext bearbeiten]
Video - After correction[Bearbeiten | Quelltext bearbeiten]
Video - After the correction[Bearbeiten | Quelltext bearbeiten]
Video - Inspection of examination[Bearbeiten | Quelltext bearbeiten]
