Kurs: Planer/en
Die deutsche Version finden Sie auf der Seite Kurs: Planer
The planner helps you to plan appointments with your participants.Lecturers set time slots for meetings, participants then choose one of them in Moodle. Lecturers can also enter meeting results and optional evaluations in the planner. In the following we will explain the activity "Planner" in more detail.
What needs to be done?[Bearbeiten | Quelltext bearbeiten]
- Activate editing
- Select planner
- Make settings
Preparation[Bearbeiten | Quelltext bearbeiten]
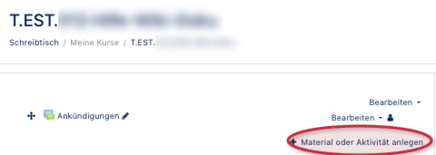

- To add a planner, you must first select the course you wish to add and then click on Enable Edit at the top right.
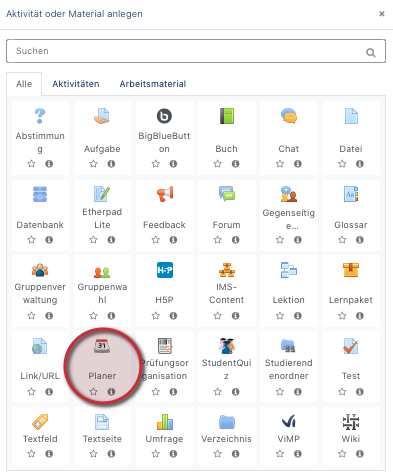
- Then click on Add material or activity for the topic or date you wish to add.
- In the opening window you will find the planner under "Activities". Select it and then click on "Add".
Planner settings: Basic settings[Bearbeiten | Quelltext bearbeiten]
Now the various setting options will be explained.
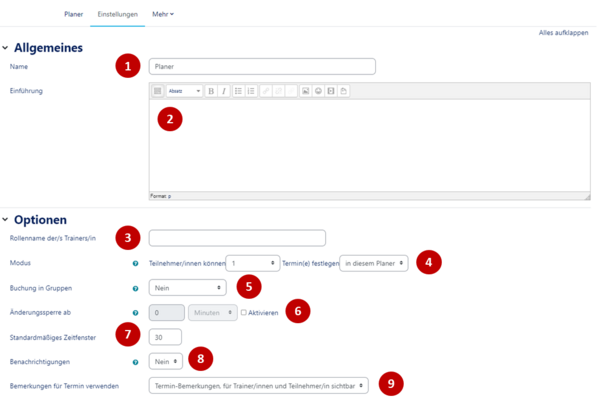
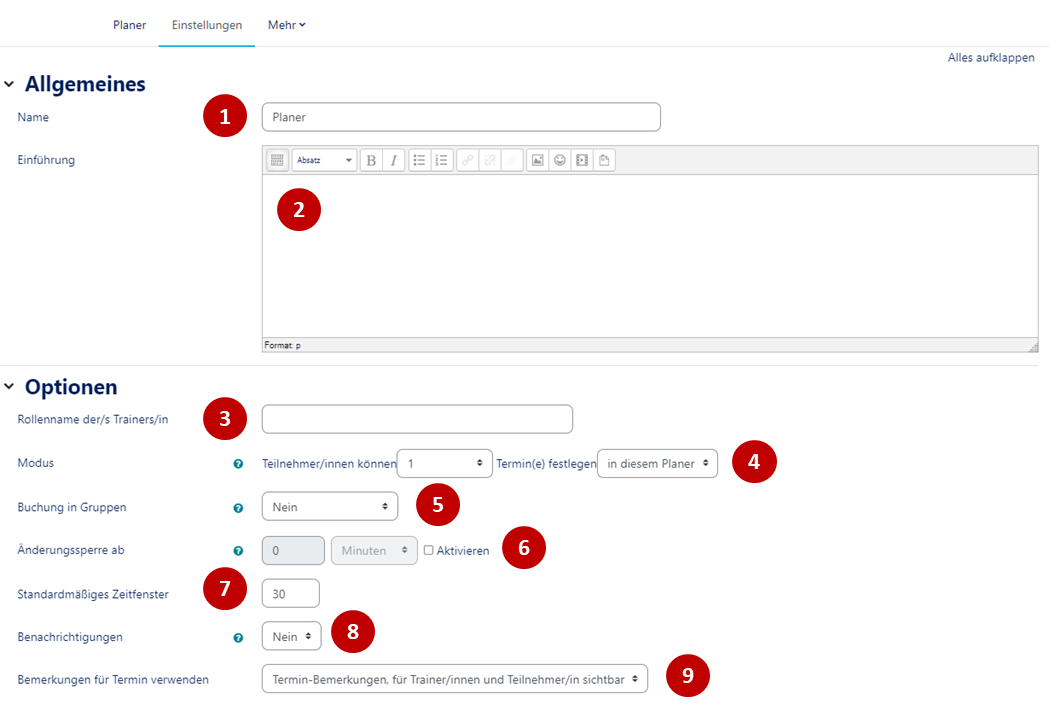
- Name (1): Here you can name your planner.
- Introduction (2): Here you can add a description.
- Role name of the teacher (3): Here you can enter the name of the role that will supervise the students.
- Mode (4): This mode offers different ways of making appointments:
- a) Set n appointment(s) in this planner: Here students can only book a fixed number of appointments in this activity. Students cannot book more dates than are fixed.
- Tip: Set unlimited in this mode of operation!
- b) n set date(s) at once: Participants can book a fixed number of dates. Once the meeting is over and the teacher marks the student as "seen", students can book more dates.
- Booking in groups (5): This function allows students to book a time slot for the whole group.
- Blocked time (6): This function allows you to prevent students from cancelling their booking shortly before the deadline. For example, if the Blocked Time is set to two hours, students will not be able to book an appointment that starts in less than two hours. They will also not be able to delete an appointment if it starts in less than 2 hours.
- Default duration time slot (7): Here you can set the duration of an appointment.
- Notifications (8): If this option is checked you and the students will be notified when appointments are requested or cancelled.
- Use remarks for appointment (9): Here you can set whether you want to add a comment to your appointment.
Planner settings: Evaluation and posting[Bearbeiten | Quelltext bearbeiten]

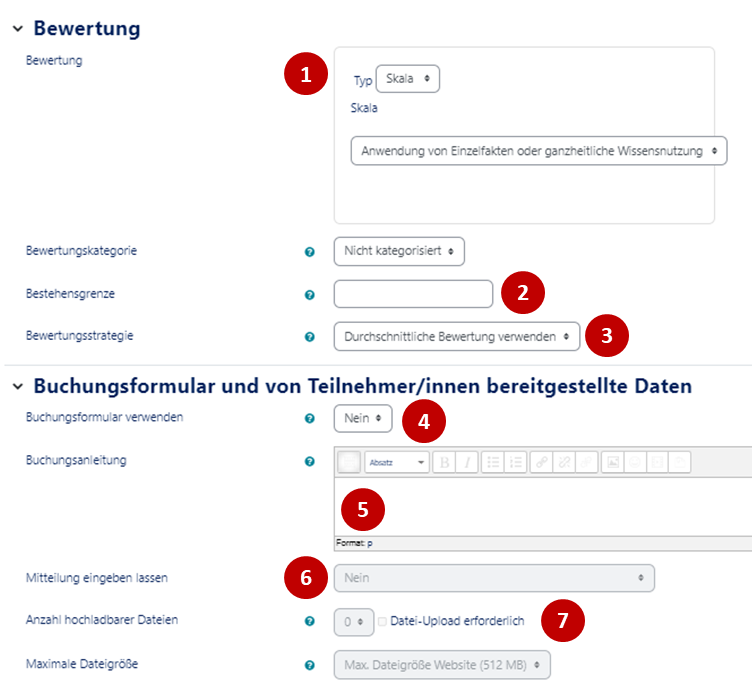
- Evaluation (1): Here you can select the type of rating (scale or point). For the scale, a drop-down field with a scale is available for selection. In the case of the point rating, you can specify a maximum number of points in this field.
- Grading to pass (2): Here you enter the points that students must achieve to pass. A pass will be marked in green and a fail will be marked in red.
- Assessment strategy (3): In a planner where students can have more than one meeting, you choose how the assessments are merged. The assessments can show either the average grade or the best grade that the students have achieved.
- Use booking form (4): If this option is enabled, students will see a separate booking screen before they can book a meeting. This can require students to enter data, upload files, etc.
- Booking Instructions (5): The text you enter here will be displayed to your students before booking. This text can, for example, instruct which files can be uploaded.
- Let me enter a message (6)': This will add a message box to the student's booking screen in which you can enter a message. In the "Booking Instructions" you can refer to the information required to do this.
- Number of uploadable files (7): This sets the maximum number of files that students can upload.
- Then click on Save!
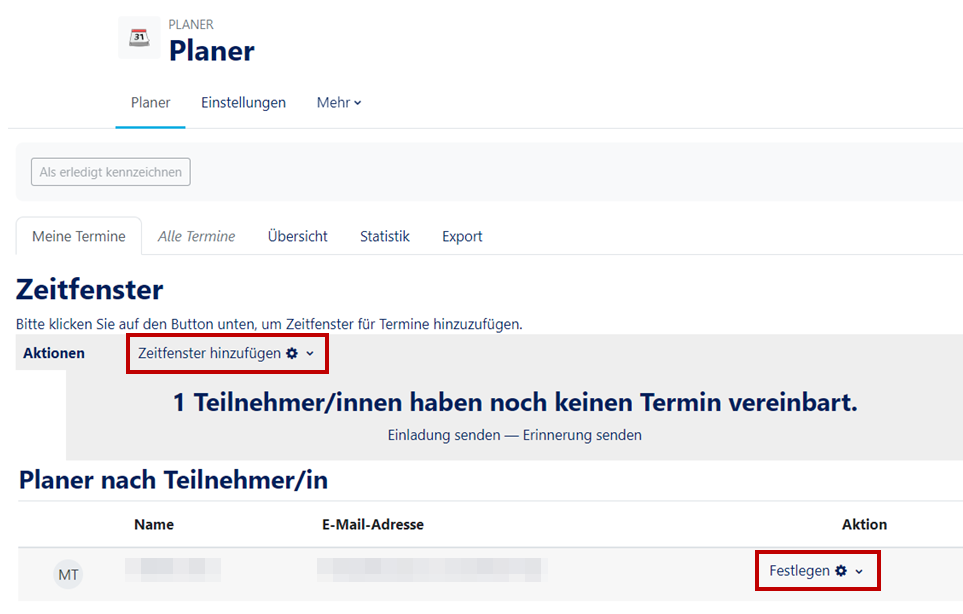
Create appointments[Bearbeiten | Quelltext bearbeiten]

When you have now created your planner, you can create appointments or time windows. You can create either repeating time windows or a single time window. Alternatively, you can create a time slot for the participant directly.
Repeating time windows[Bearbeiten | Quelltext bearbeiten]
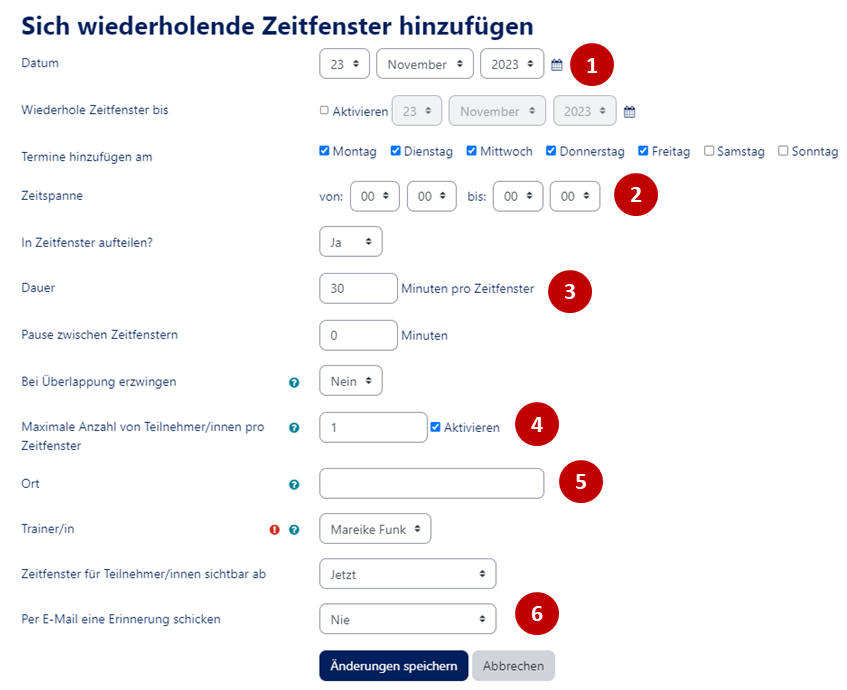
Now you can make various settings.

- The Date and Repeat time window until (1) determine the time period in which the time windows are to take place. In the example the period is from 29.05. to 29.06.2018. Here you can also set the weekdays on which you want to offer time windows. Wednesday is marked here.
- With the Time range (2) you define at which time your time windows take place. In the example the time windows are from 9 to 11 o'clock.
- The Duration (3) determines how long an appointment should last.
- With the Maximum number of students per time slot (4) you determine whether one or more people are admitted to a time slot.
- With the Location (5) you specify where the appointment should take place.
- With the setting Send a reminder by email (6) you can specify if and when students should be reminded of the appointment.
- Then click on Save.
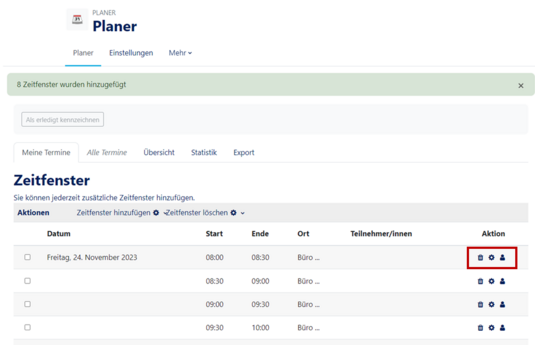
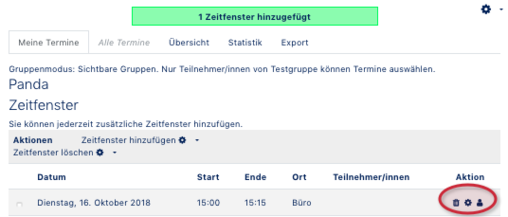
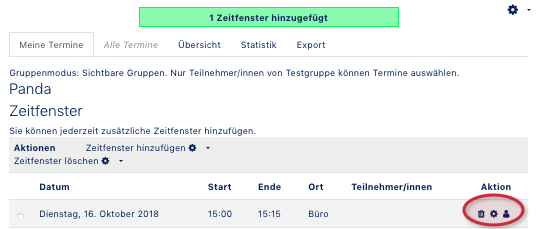
- After you have saved your settings, you will be taken to this page. The number of time slots added is displayed at the top.
- Your time slots are now displayed below each other. If a participant has chosen a time slot, you can see this here.
- You can also edit each of your time slots by clicking on the Setting Options to the right of the students.
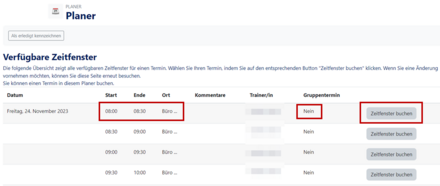
- As a participant, you see the available time windows here.
- You can select the date and time.
- You can also see whether the appointments are group appointments. By clicking on Book time slot you can sign up for the corresponding appointment.
Single time slot[Bearbeiten | Quelltext bearbeiten]

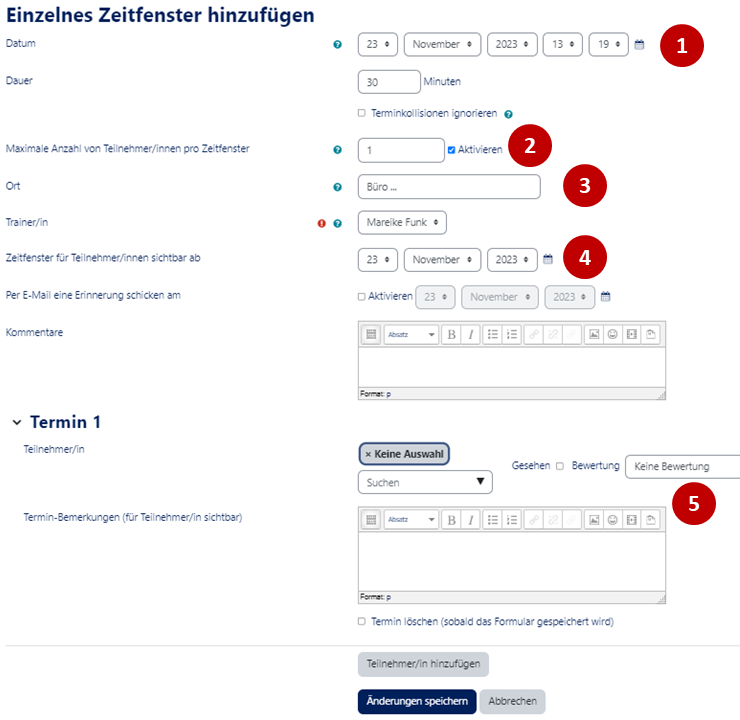
- The date (1) determines the time of the time window. The duration determines how long the time window should be.
- The Maximum number of students per time slot (2) determines whether one or more students are admitted to a time slot.
- With the Location (3) you specify where the appointment should take place.
- With Show time slot for students from (4) you specify from when the time slot is shown to students.
With Student (5) you can select the student for whom the time slot is intended.
- Then click on Add student.
- Now you can see above that you have added a time window.
- You can also see when the event will take place and which participants have been invited.
- Under Action you can edit the time slot or cancel the appointment.
Video Planner Features[Bearbeiten | Quelltext bearbeiten]


