Exchange einrichten mit Android/en
| Zeile 74: | Zeile 74: | ||
<div class="tleft" style="clear:none">[[Datei:Exchange einrichten mit Android 10.png|links|mini|without|250px]]</div> | <div class="tleft" style="clear:none">[[Datei:Exchange einrichten mit Android 10.png|links|mini|without|250px]]</div> | ||
<div class="tleft" style="clear:none">[[Datei:Exchange einrichten mit Android 11.png|links|mini|without|250px]]</div> | <div class="tleft" style="clear:none">[[Datei:Exchange einrichten mit Android 11.png|links|mini|without|250px]]</div> | ||
| − | <br> | + | <br clear=all> |
* You will now be informed about which rights will be activated for remote control. | * You will now be informed about which rights will be activated for remote control. | ||
* Swipe to the bottom of the page and confirm the notification with '''Activate'''. | * Swipe to the bottom of the page and confirm the notification with '''Activate'''. | ||
Version vom 11. September 2024, 22:34 Uhr
Die deutsche Version finden Sie auf der Seite Exchange einrichten mit Android
ATTENTION: The Outlook app for Android is blocked for use because login data and mailbox contents are cached on external servers at Microsoft USA and this contradicts the GDPR. |
If you set up your Exchange account on your smartphone, you can easily use emails and calendars even when you're on the go. There are numerous email apps on Android that you can use for this. In this guide we will use Gmail as an example. Other apps can be set up similarly.
What to do?[Bearbeiten | Quelltext bearbeiten]
- Open the desired email app.
- Add new account.
- Set up an Exchange account with the technical email address "Username@ex.uni-paderborn.de".
Step-by-step instructions[Bearbeiten | Quelltext bearbeiten]
In these instructions we use the App Gmail from Google. This is already preinstalled on most smartphones with the Android operating system. Other apps have a similar setup.
Basic settings[Bearbeiten | Quelltext bearbeiten]
- Open the "Gmail" app.
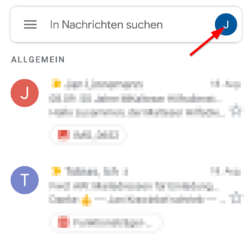
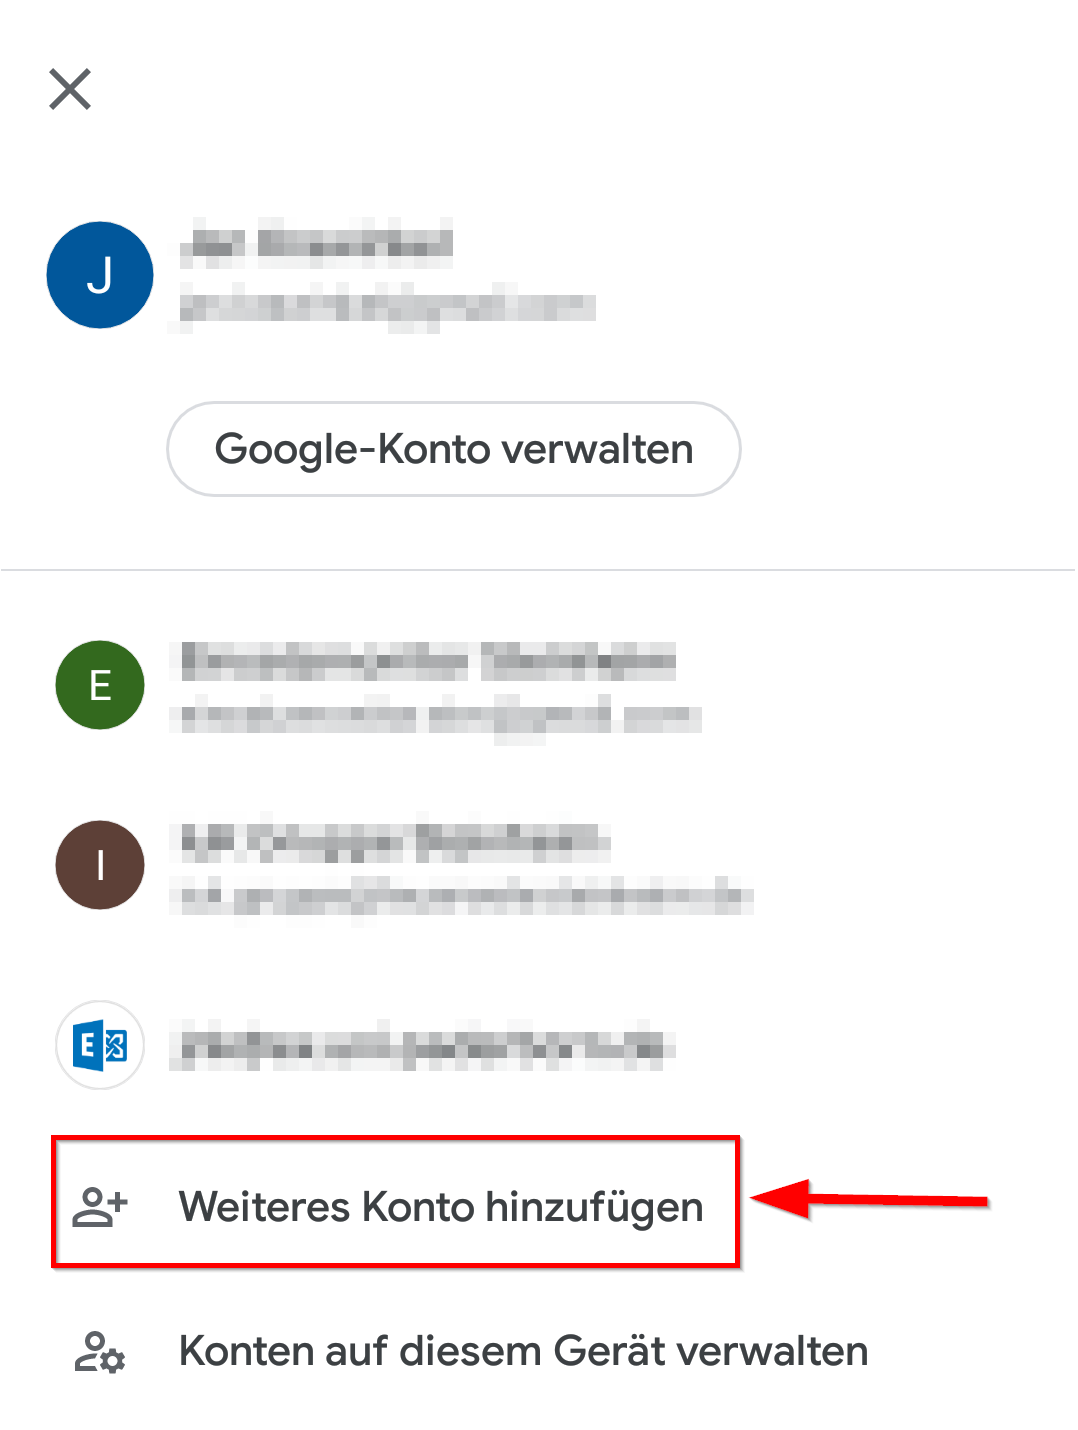
- Tap the icon in the top right.

- The Gmail account overview will now open.
- All email accounts that are already set up in Gmail are displayed here.
- We click '"Add another account".

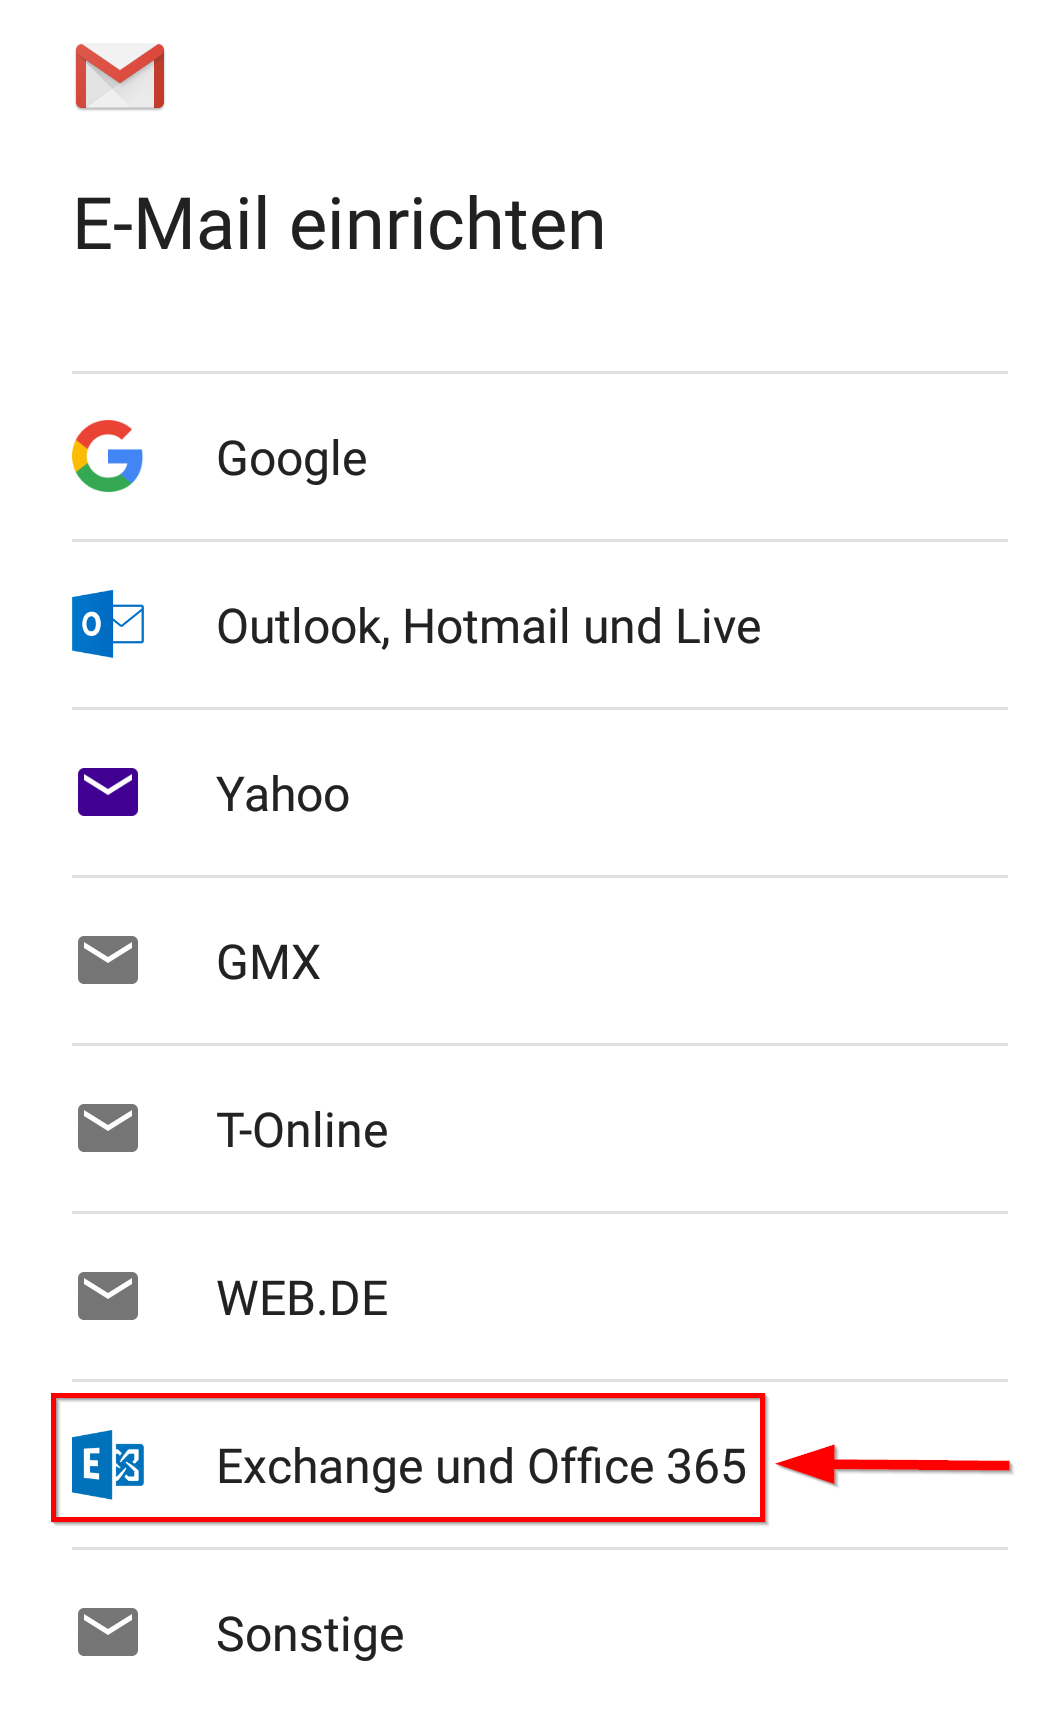
- You will now receive a selection of possible email accounts that you can set up.
- Select Exchange and Office 365.

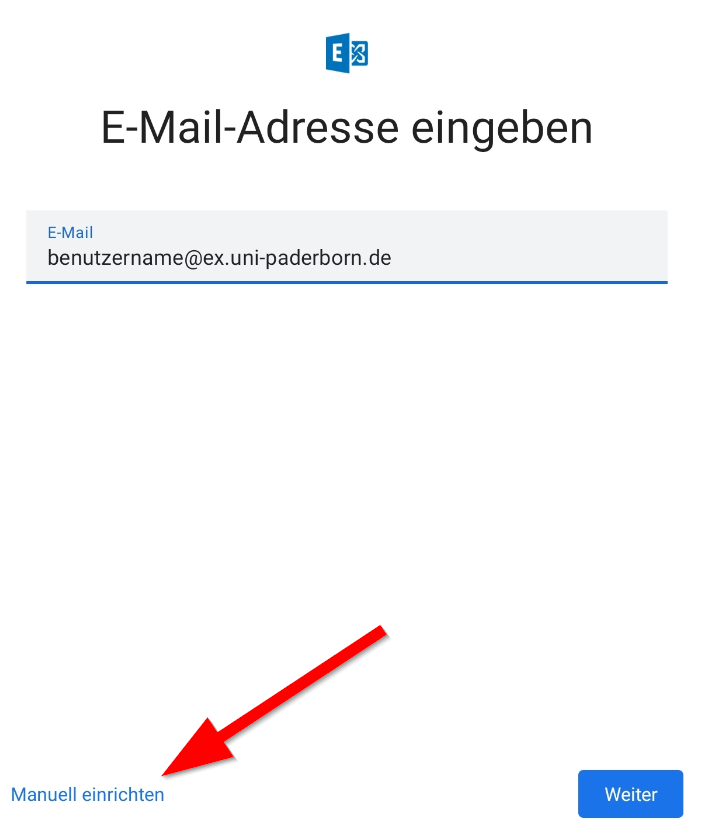
- Enter <username>@ex.uni-paderborn in the email address field.
- Replace <username> with your personal username from your university account.
- Then click "Set up manually.
- Info: This is the technical email address for the Exchange setup. This is not intended for sending and receiving emails. You only need this for setup.
- Exchange always uses your preferred email alias. You can set this in the service portal under email settings.
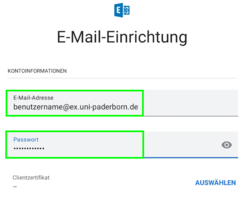
- Enter your password for your university account here.
- Scroll down for further settings.

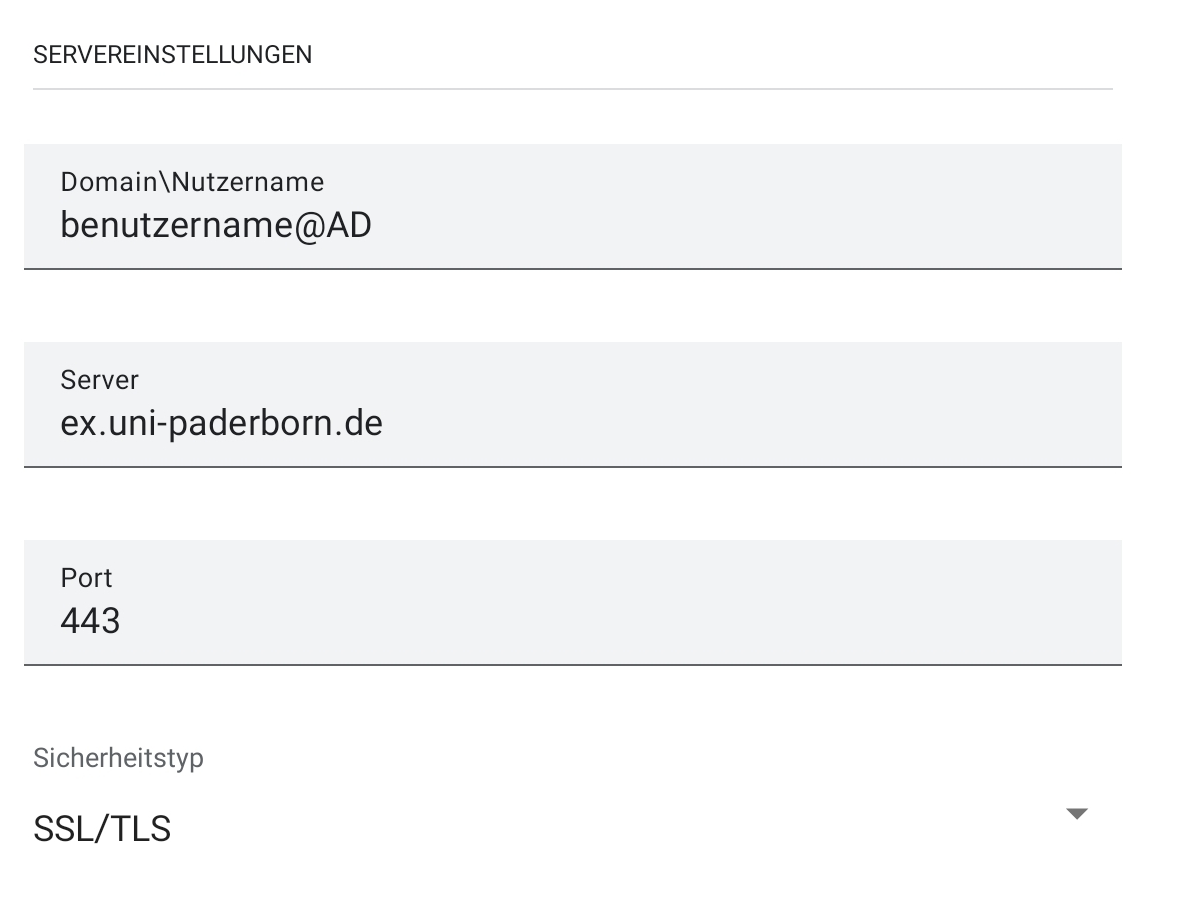
- Fill out the "Domain\Username" field with "username@AD".
- Here too, replace “username” with your personal username from your university account.
- The remaining settings should be as follows:
- Server: ex.uni-paderborn.de
- Port: 443
- Security type: SSL/TLS
- Click 'Next to finish.
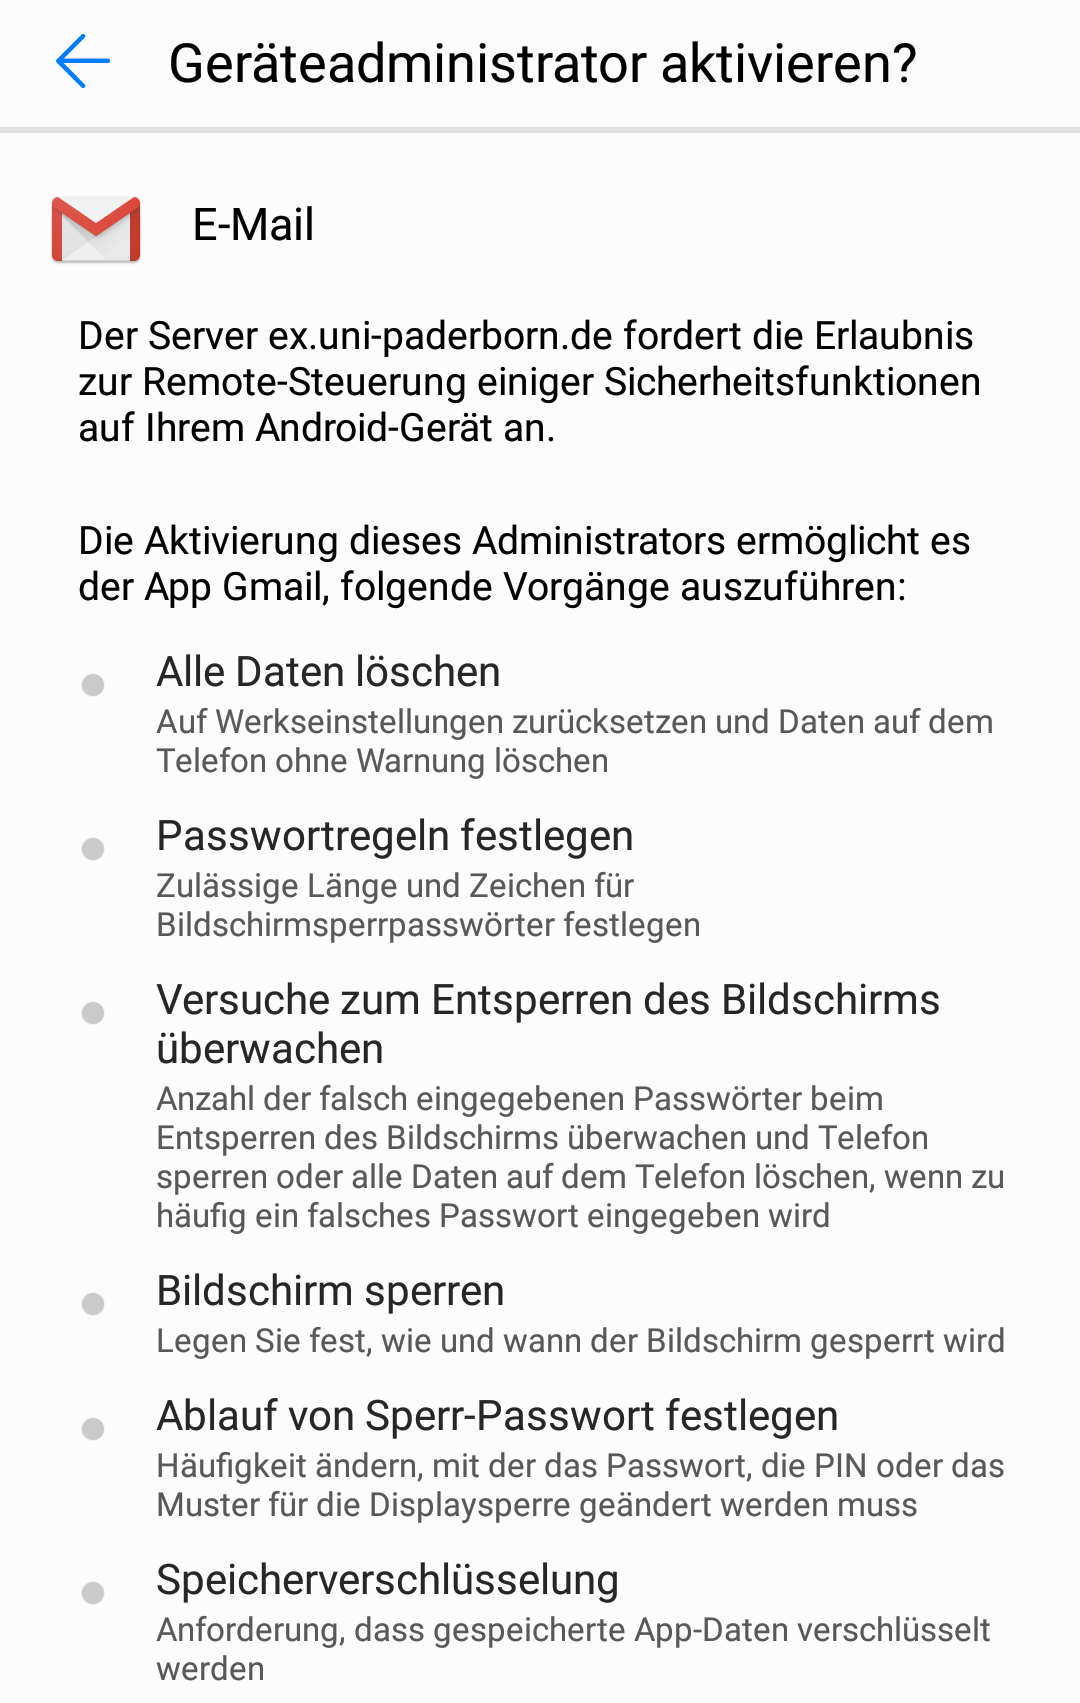
Remote Security Management[Bearbeiten | Quelltext bearbeiten]
This is an Exchange security feature that allows you to delete profiles on smartphones via OWA. This is intended in the event of the smartphone being lost (theft, lost, etc.) and can be controlled by you via the OWA interface.
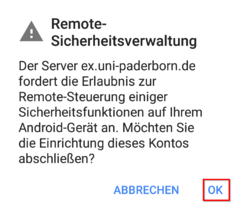
- Confirm the warning about remote security management with "OK".

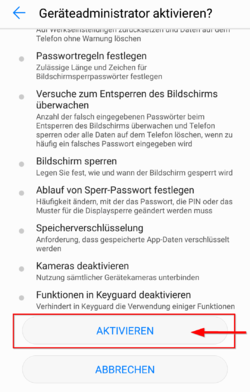
- You will now be informed about which rights will be activated for remote control.
- Swipe to the bottom of the page and confirm the notification with Activate.
Final steps[Bearbeiten | Quelltext bearbeiten]
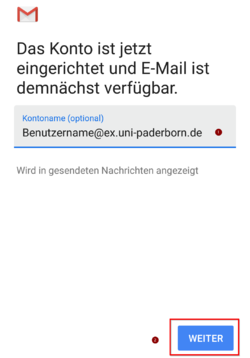
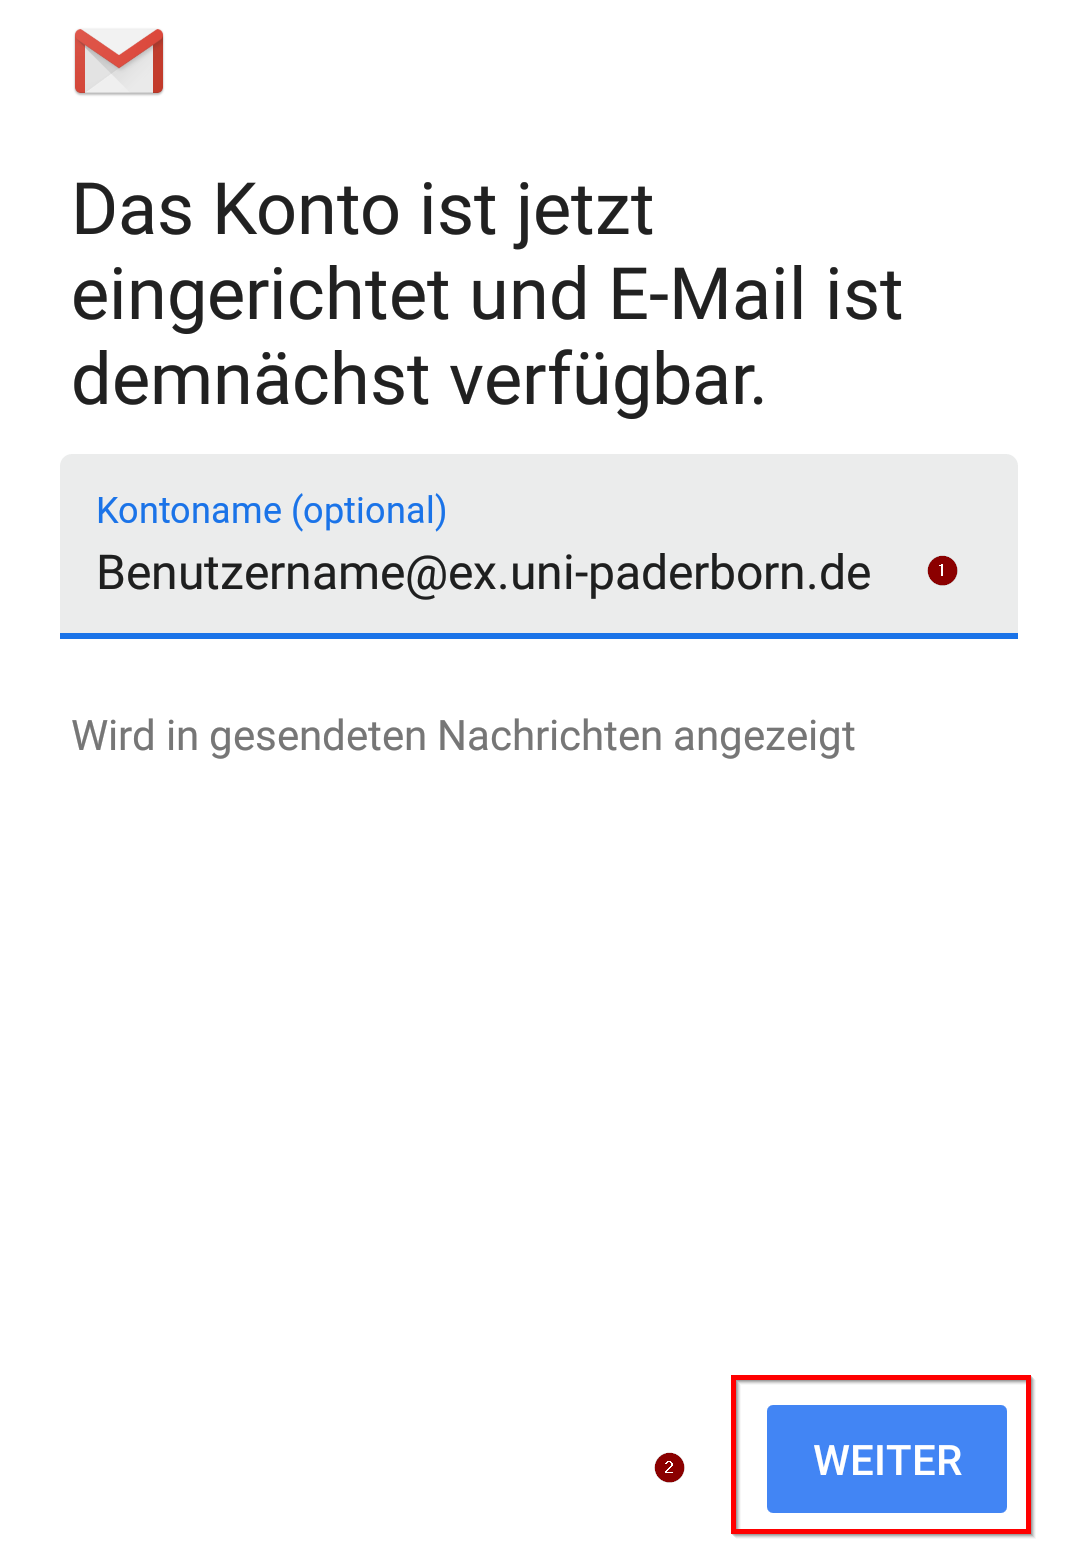
- We will now be notified that the Exchange account has been set up.
- If you would like, you can assign an optional account name for your email account here.
- Use this to customize how the account appears on this device.
- An example would be “E-Mail Uni Paderborn”.
- Then click '"Next".
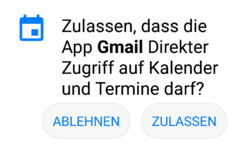
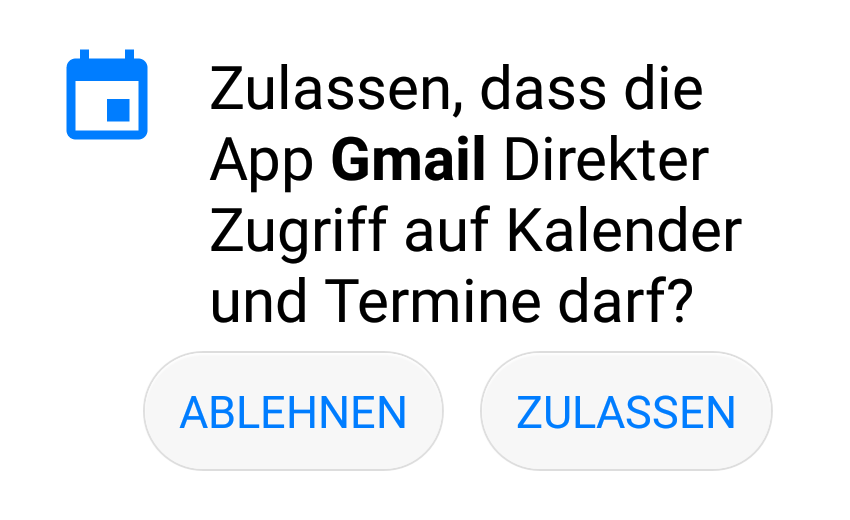
- You will now be informed that Gmail wants to access your calendar and appointments.
- With Exchange you can receive and accept appointment invitations. These appointments can be added directly to your calendar on your smartphone.
- Click Allow if you want to use this feature.
- Your Exchange account is now set up and your inbox is displayed.
- You can use the icon at the top right to switch between your email accounts if you have set up more than one.


