The "Etherpad Lite" activity allows multiple people to collaborate on a text. The text is then automatically synchronized while writing. The following article shows how to create and edit the activity.
Create[Bearbeiten | Quelltext bearbeiten]
- To create the activity, go to the desired course and then click on Enable editing.
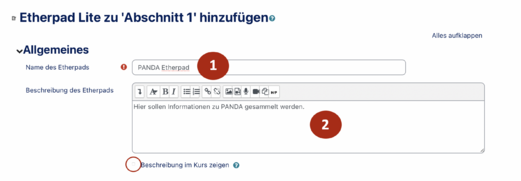
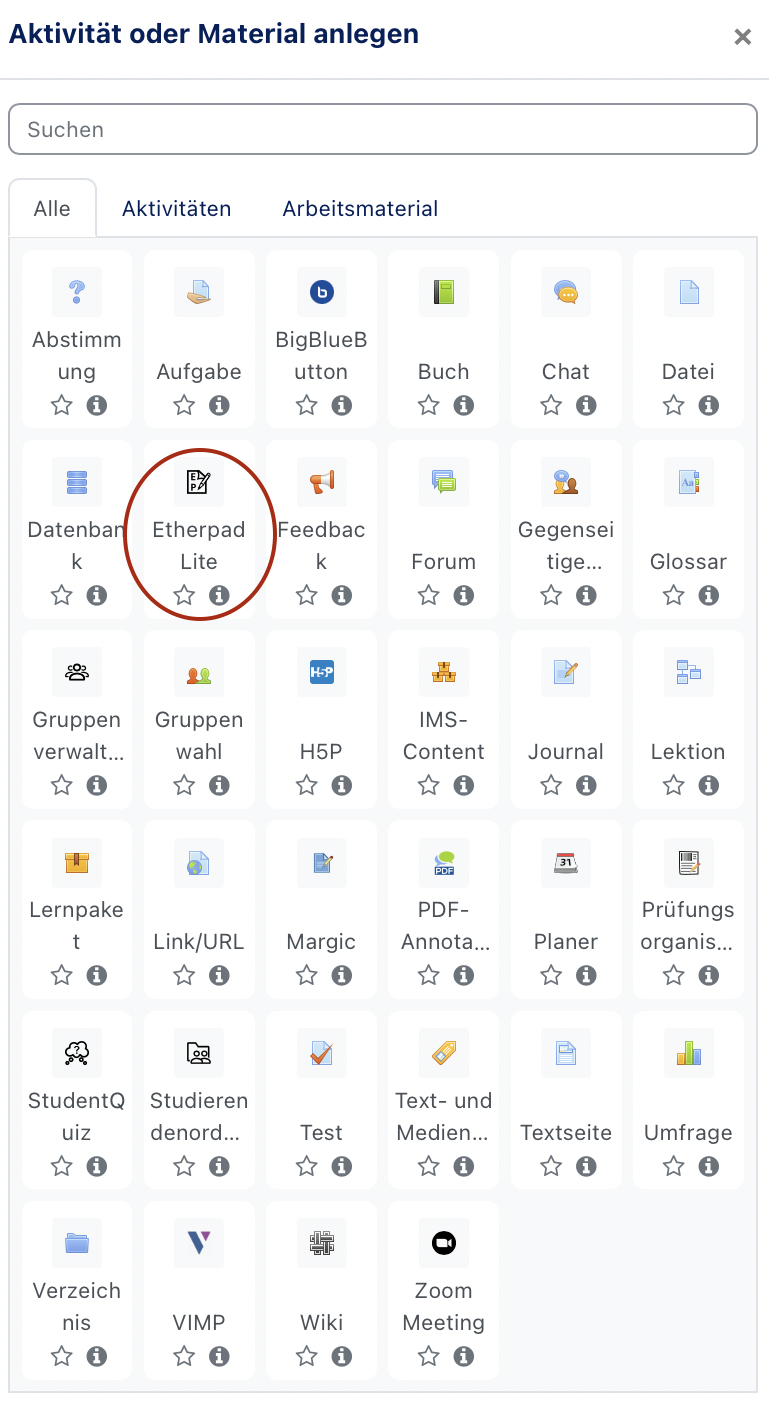
- Then select your desired topic or date and then click on Create material or activity. Then click on "Etherpad Lite" and then on Add.
Now you can edit your Etherpad Lite:
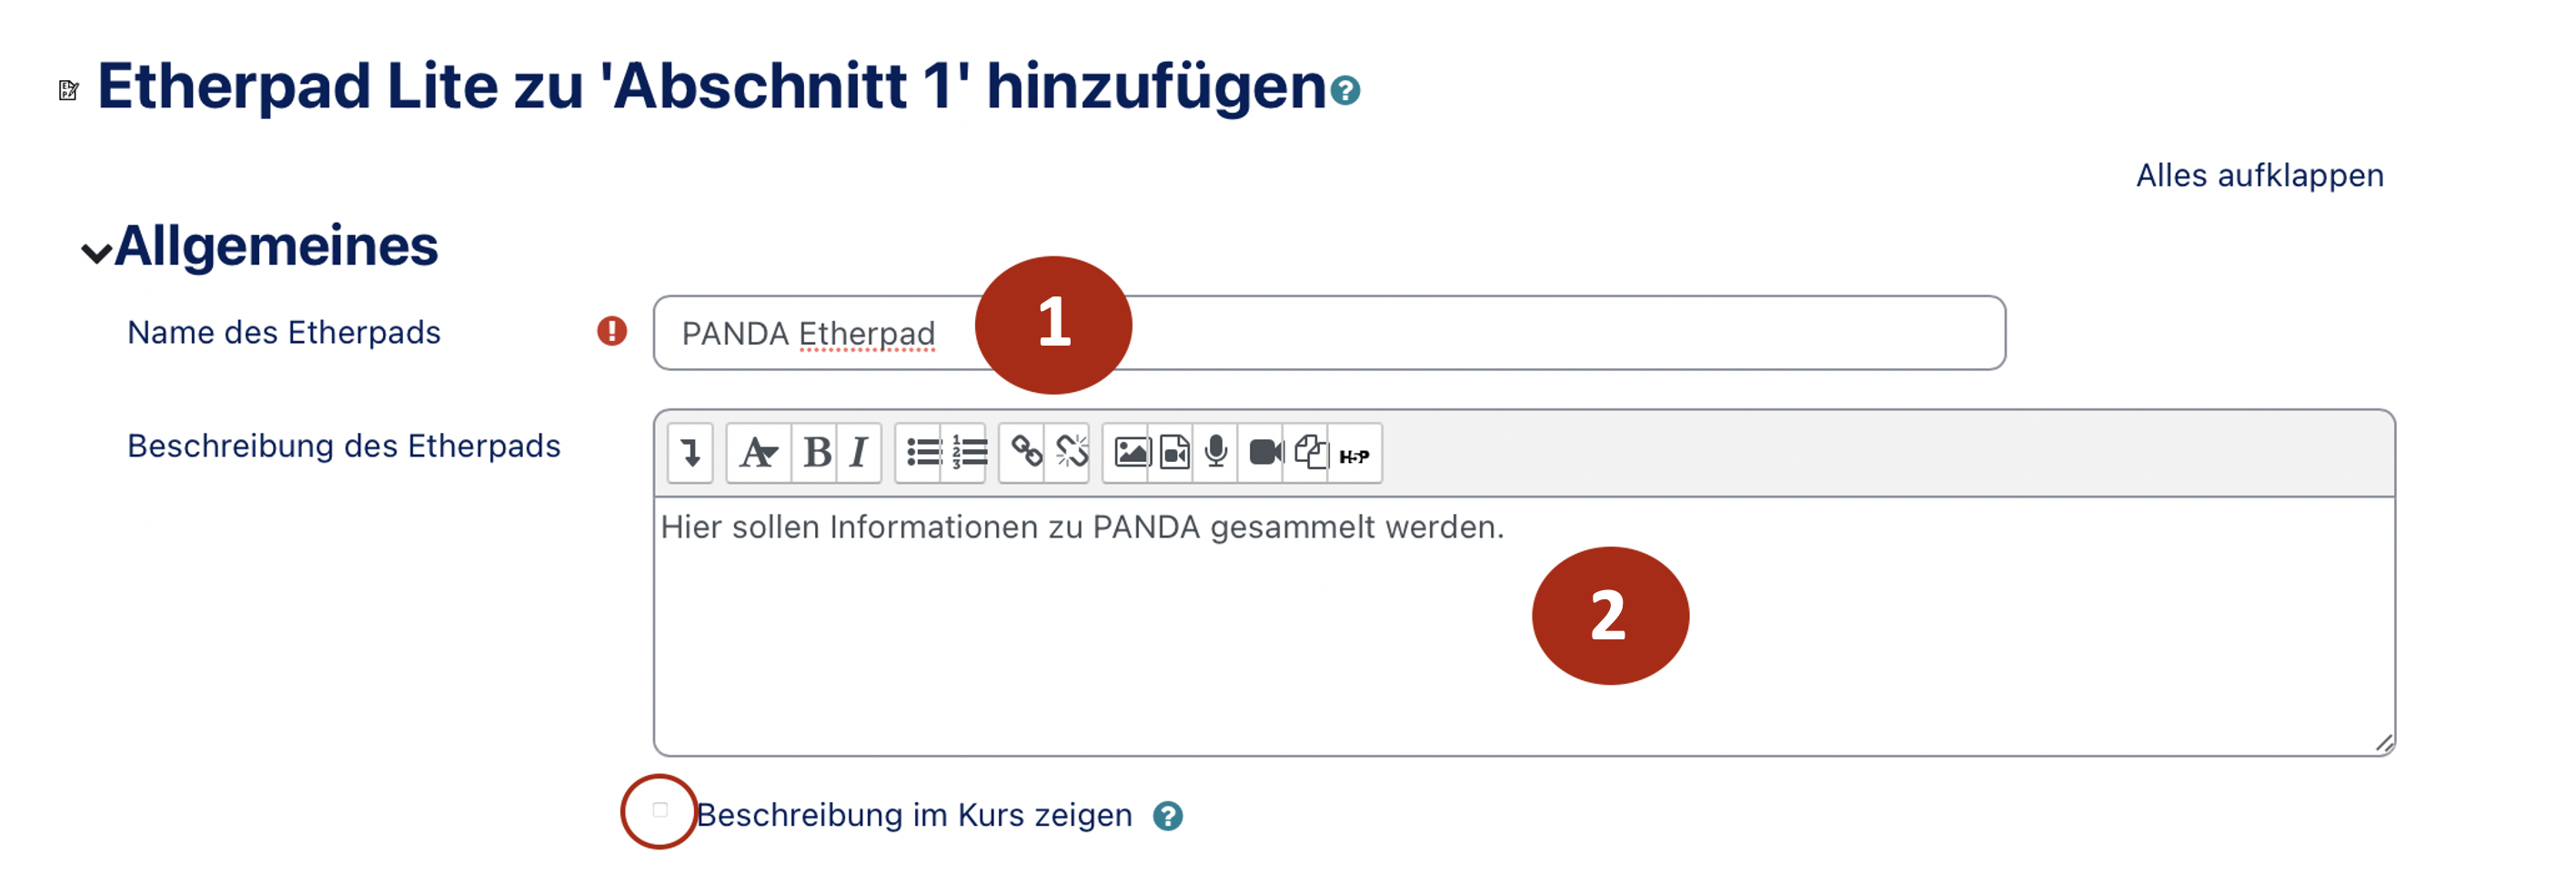
- Name of the Etherpad (1): Enter a name for your Etherpad here (here: Panda Etherpad)
- Description (2): Enter a description here, e.g. what you want to achieve with your Etherpad. You can also make the description visible for the course.
- Then click on 'Save and display to work directly on your Etherpad.
Edit[Bearbeiten | Quelltext bearbeiten]
- You can learn more about Etherpad Lite by using the link displayed in the text box.
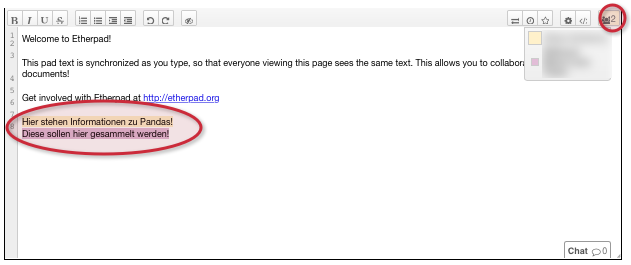
- Your text will be displayed in color.
- You can also see in the top right corner how many users are currently working on the Etherpad. The text is immediately synchronized for all students.
Other functions[Bearbeiten | Quelltext bearbeiten]
Import/ Export[Bearbeiten | Quelltext bearbeiten]
In Etherpads it is possible to import existing texts from different formats (e.g. HTML). In the same way, the Etherpad itself, i.e. the jointly developed text, can be exported and then further processed.
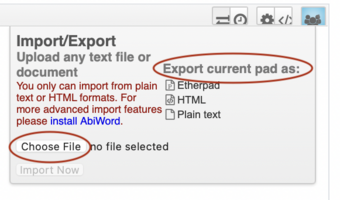
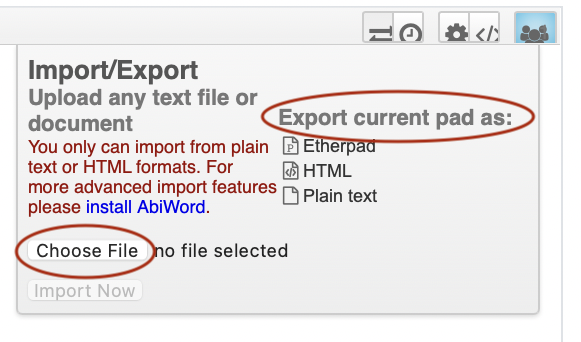
- To import or export something, you need to open your desired Etherpad Lite and then click on the highlighted icon in the upper right corner. Another window will open where you can import or export.
- To import a text, click on Select file and select the desired text. Then click on Import now.
- To export the text you have created, click on the format in which you want to process your Etherpad Lite (Etherpad/ HTML/ Text).
Timeslider[Bearbeiten | Quelltext bearbeiten]
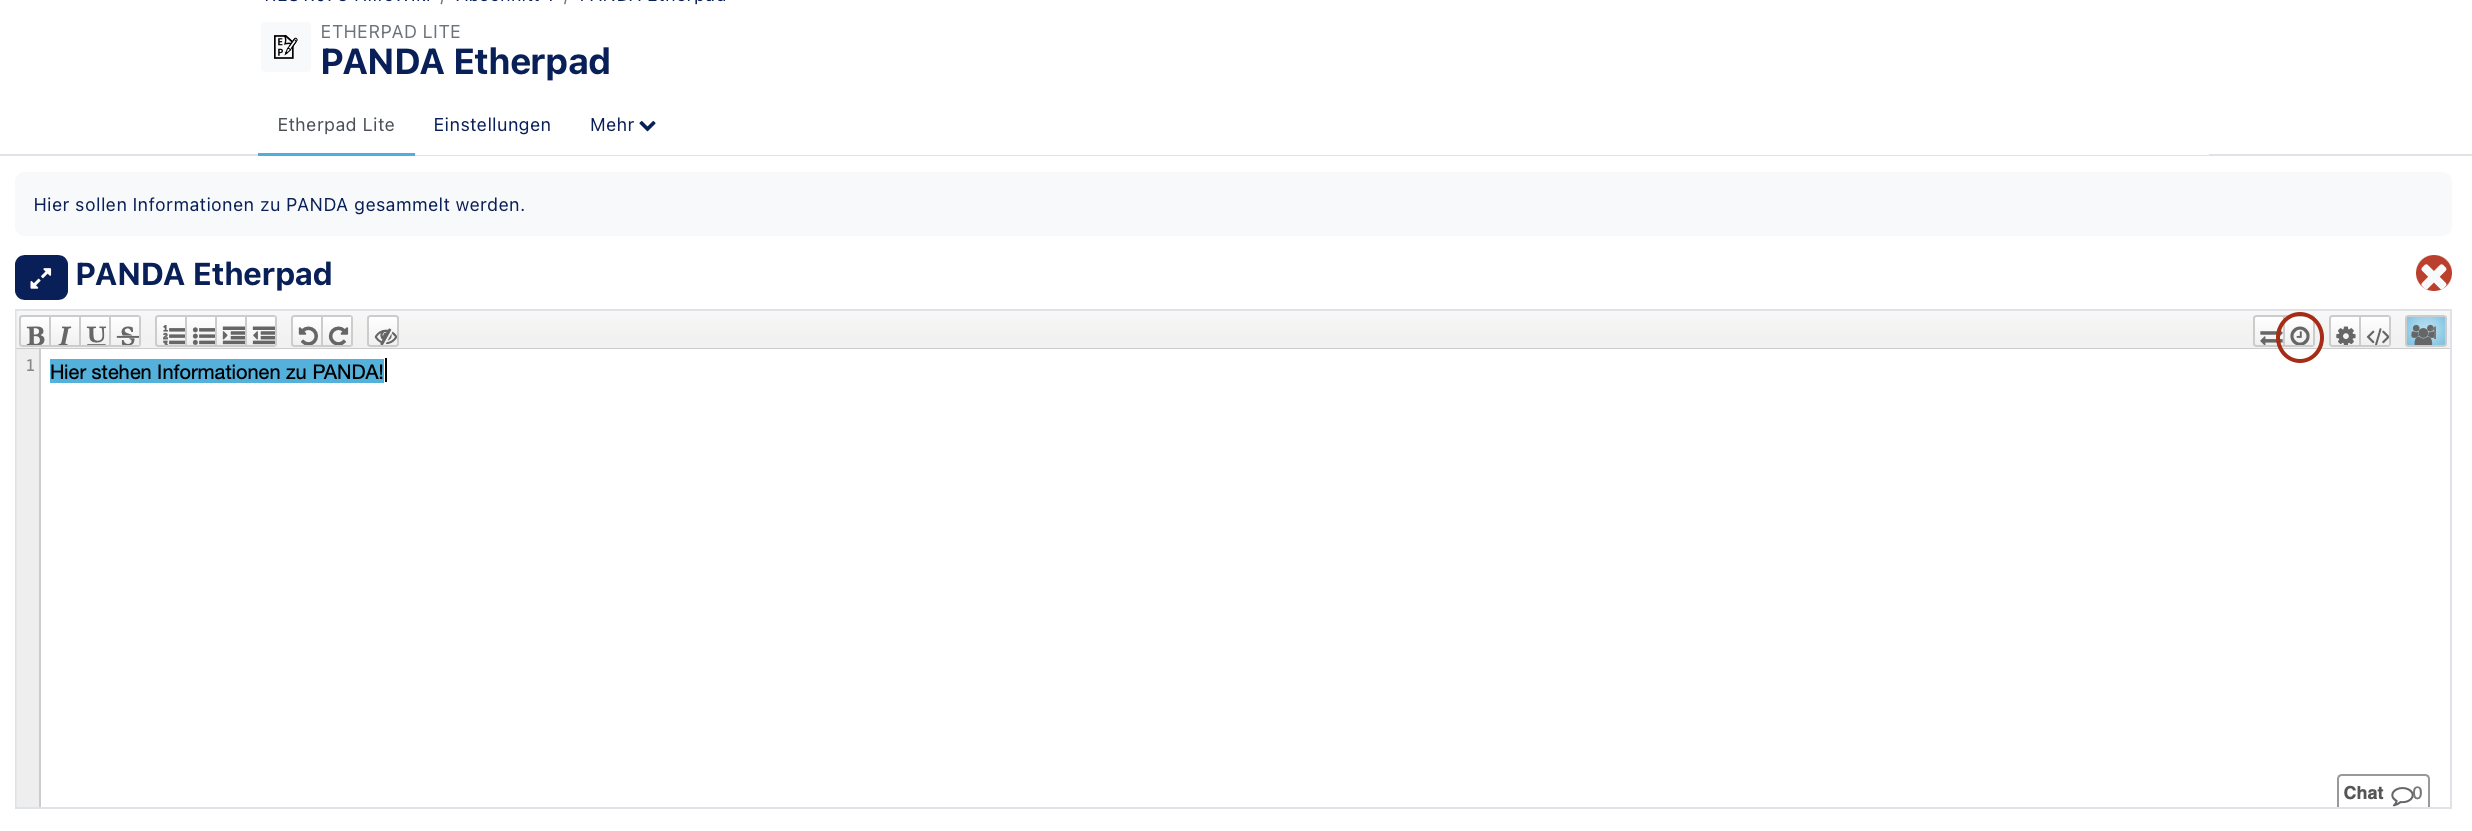
The Timeslider is a kind of "slider" and thus offers the possibility to trace the origin of the document:
- To activate the timeslider, you must select it in the upper right corner of your Etherpad.
- Now you can either use the "play icon" to view the history of your EtherPad, or you can view the history manually by moving the "slider" (centered here).
- In this example, the 28th version of August 29 is displayed. It shows who wrote what and when.
Clear Autorship[Bearbeiten | Quelltext bearbeiten]
With the function Clear Autorship the author colors are reset. This means that it is no longer possible to trace which author has written which text. Important: This setting cannot be undone!
- If you still want to use this function, click on the marked symbol in the top left-hand corner of the right-hand margin.
- You will then be asked again whether you really want to reset the author colors. Confirm this to complete the process.
Change color[Bearbeiten | Quelltext bearbeiten]
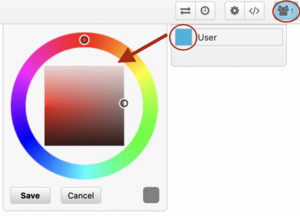
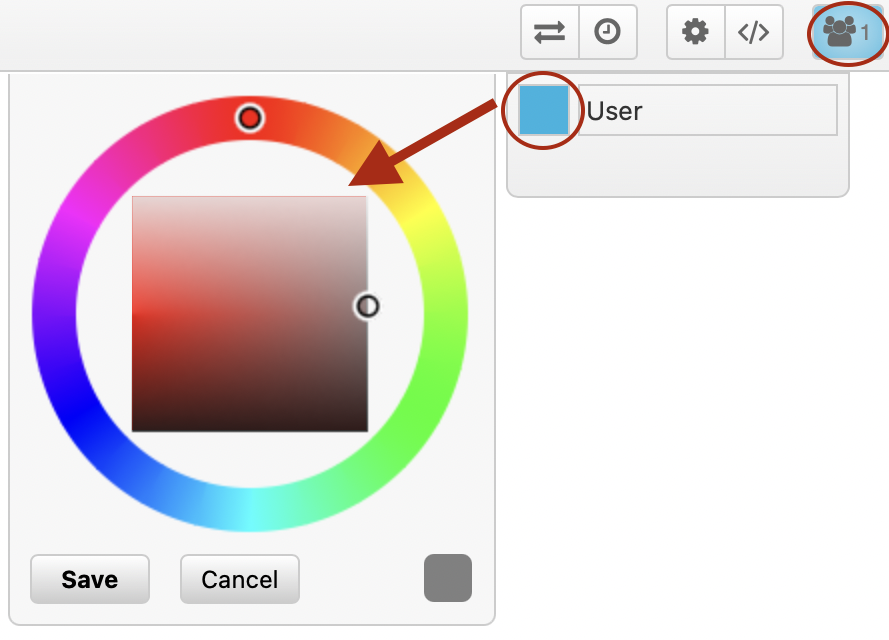
Each author is assigned a color by default. If the colors are very similar or the author wants to change the color for other reasons, this is also possible:
- Click again on the icon in the upper right corner of the ether pad.
- Your name and color will be displayed.
- To change the color, click on your color field.
- This will open a color palette from which you can choose your own color.
- Then click on Save.

