This article explains how to send messages to groups. Please make sure you observe the necessary default settings.
What needs to be done?[Bearbeiten | Quelltext bearbeiten]
- Call up list of participants
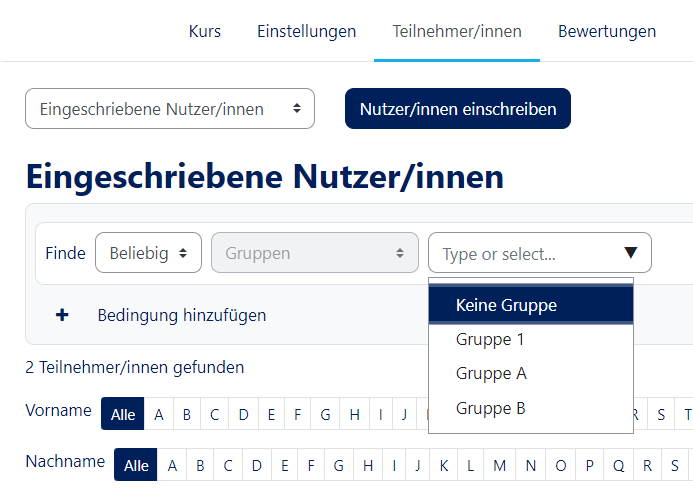
- Select group
- Select all members of the group
- Compose and send message
Step-by-step instructions[Bearbeiten | Quelltext bearbeiten]
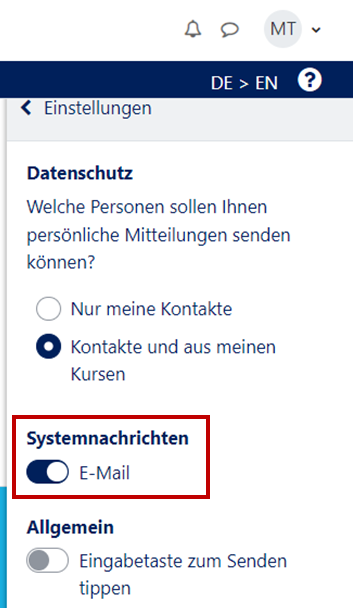
| Important: E-mails will only be sent if the participants are NOT online at that time! |
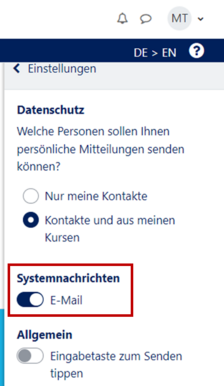
However, this can be managed by each user in his settings:
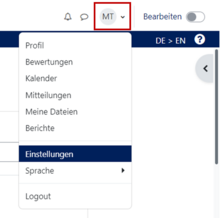
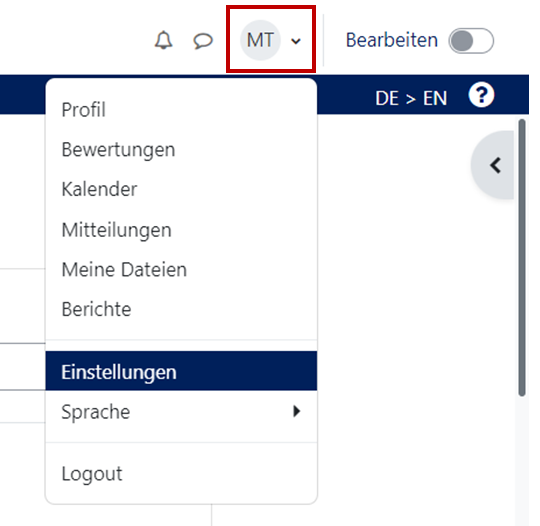
- Click on the arrow next to your name and then click Settings.
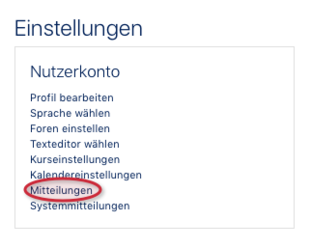
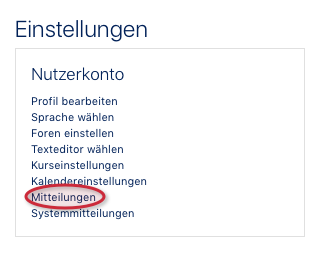
- Then go to Messages.
- Now you can change the setting by clicking on the icon (red/green).
Call up list of participants[Bearbeiten | Quelltext bearbeiten]
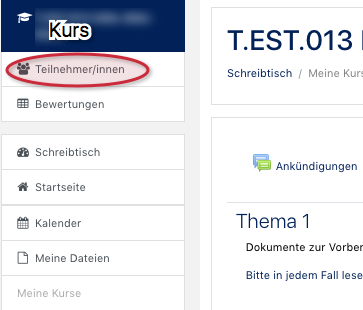
Select Students in the navigation bar on the left below the course.
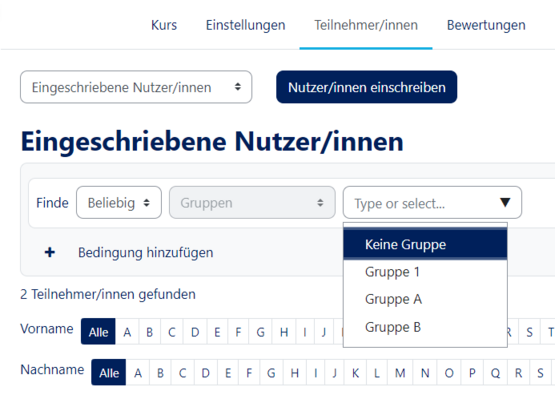
All students in the course will be displayed. To display only the students in a particular group, select the appropriate group under Visible Groups. If you do not see an item with Visible Groups displayed, go to Step 3.
You now have 2 possibilities to write to the group members.
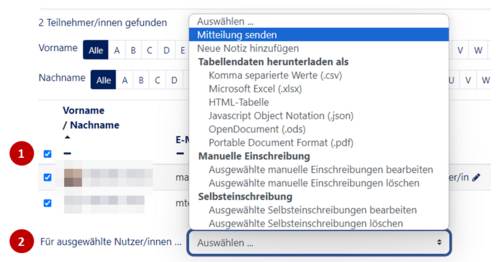
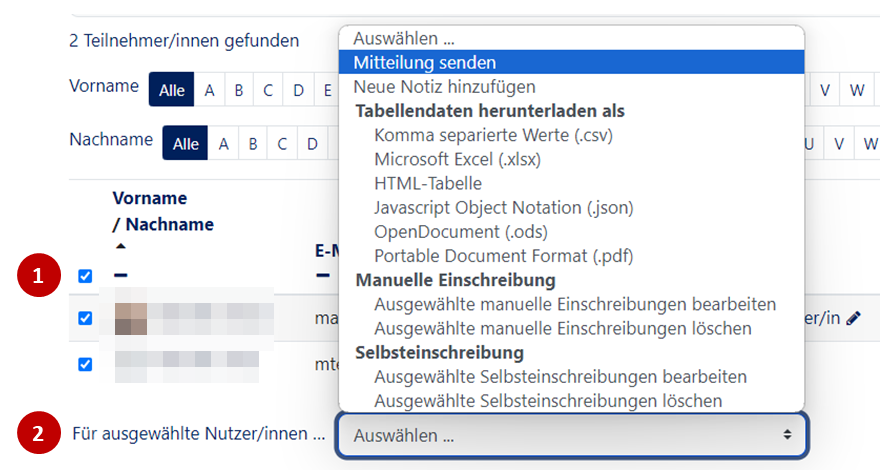
- If you only want to write to certain group members, select the corresponding Checkbox (1).
- To write to all members of the group, press the Select all (2) button
Now select Send message (3) from the list. The PANDA text editor will open.
Write message[Bearbeiten | Quelltext bearbeiten]
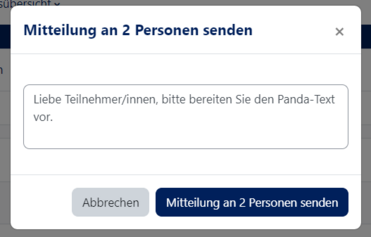
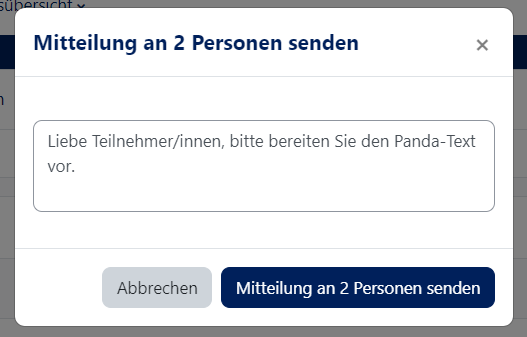
Now compose the message. The following window will open. Here you can enter your message and then send it by clicking on Send message to X people.
Necessary presettings[Bearbeiten | Quelltext bearbeiten]
Show visible groups[Bearbeiten | Quelltext bearbeiten]
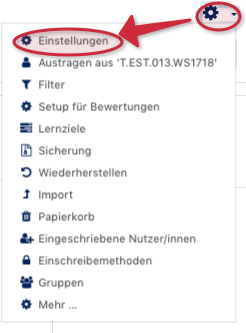
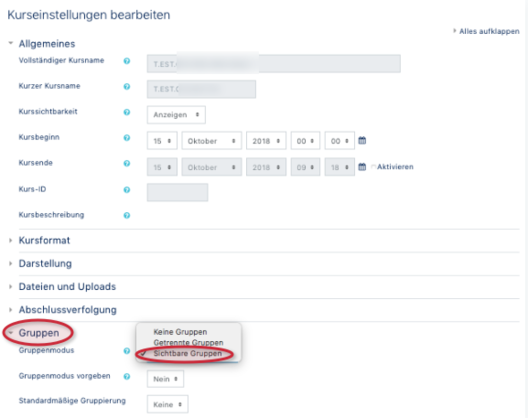
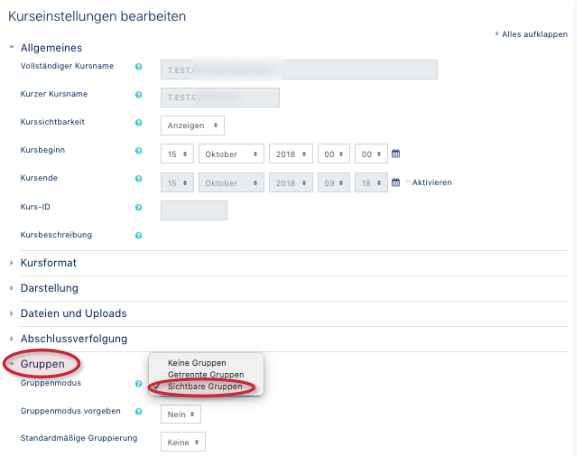
By default, a course in PANDA is set so that the filtering option by group is not displayed. To activate it, select the wheel icon on the right and then Settings. Once you have selected the settings, you will find the Groups section below. Unfold it and change the Group mode from "No groups" to "Visible groups". Now you should be able to sort by groups in the participant list.
