With the learning activity Database it is possible to provide participants with a collection point for data. This collection point consists of a table whose data fields you define as course administrator.
What needs to be done?[Bearbeiten | Quelltext bearbeiten]
- Activity Create database
- Configure database
- Define field views
Step-by-step instructions[Bearbeiten | Quelltext bearbeiten]
Switch on editing[Bearbeiten | Quelltext bearbeiten]
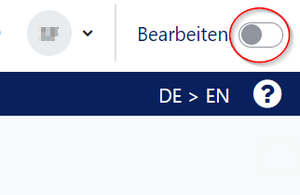
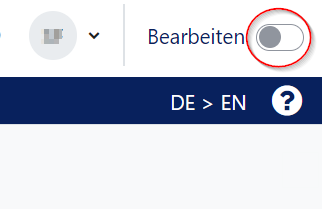
In most cases you will need to activate the edit mode in your course. Only then you will have the appropriate buttons to create materials and activities in your course or to edit the settings.
- Above your course content you will also find a button "Activate editing".
After having activated the editing mode you will have all editing options at your disposal.
Create activity
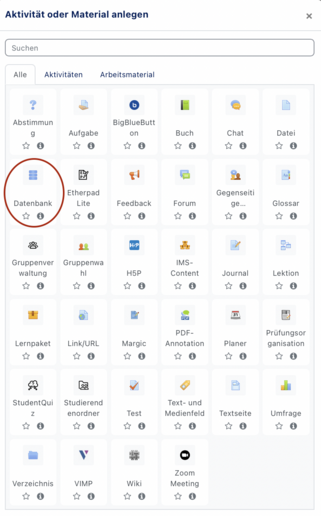
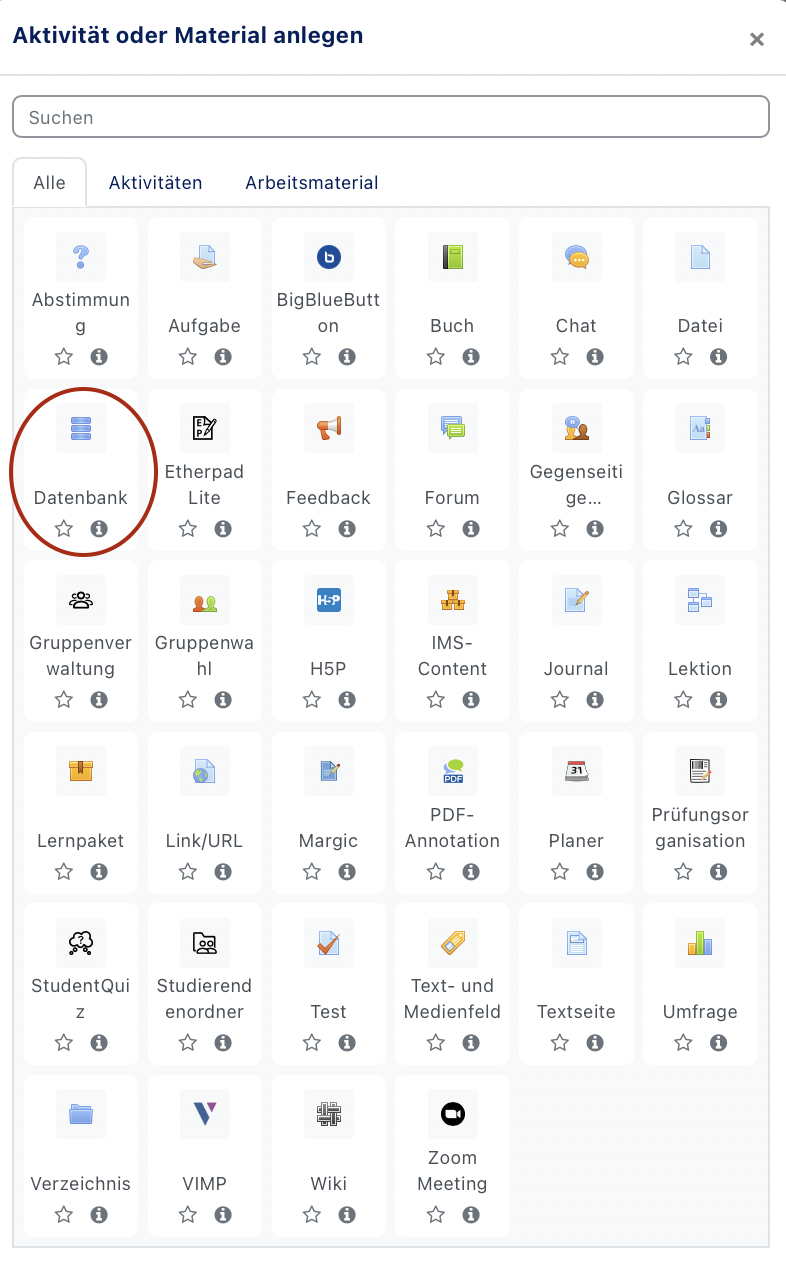
Select an appropriate topic (default) or week in the week view and click on "Add material or activity". It does not matter if the topic is empty or already contains other activities or materials.
In the following selection dialogue select Database and click on "Add". This creates a database in the current section and redirects to the settings page.
Edit settings
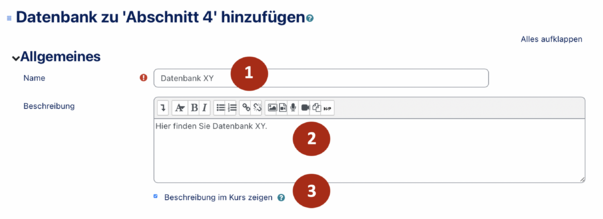
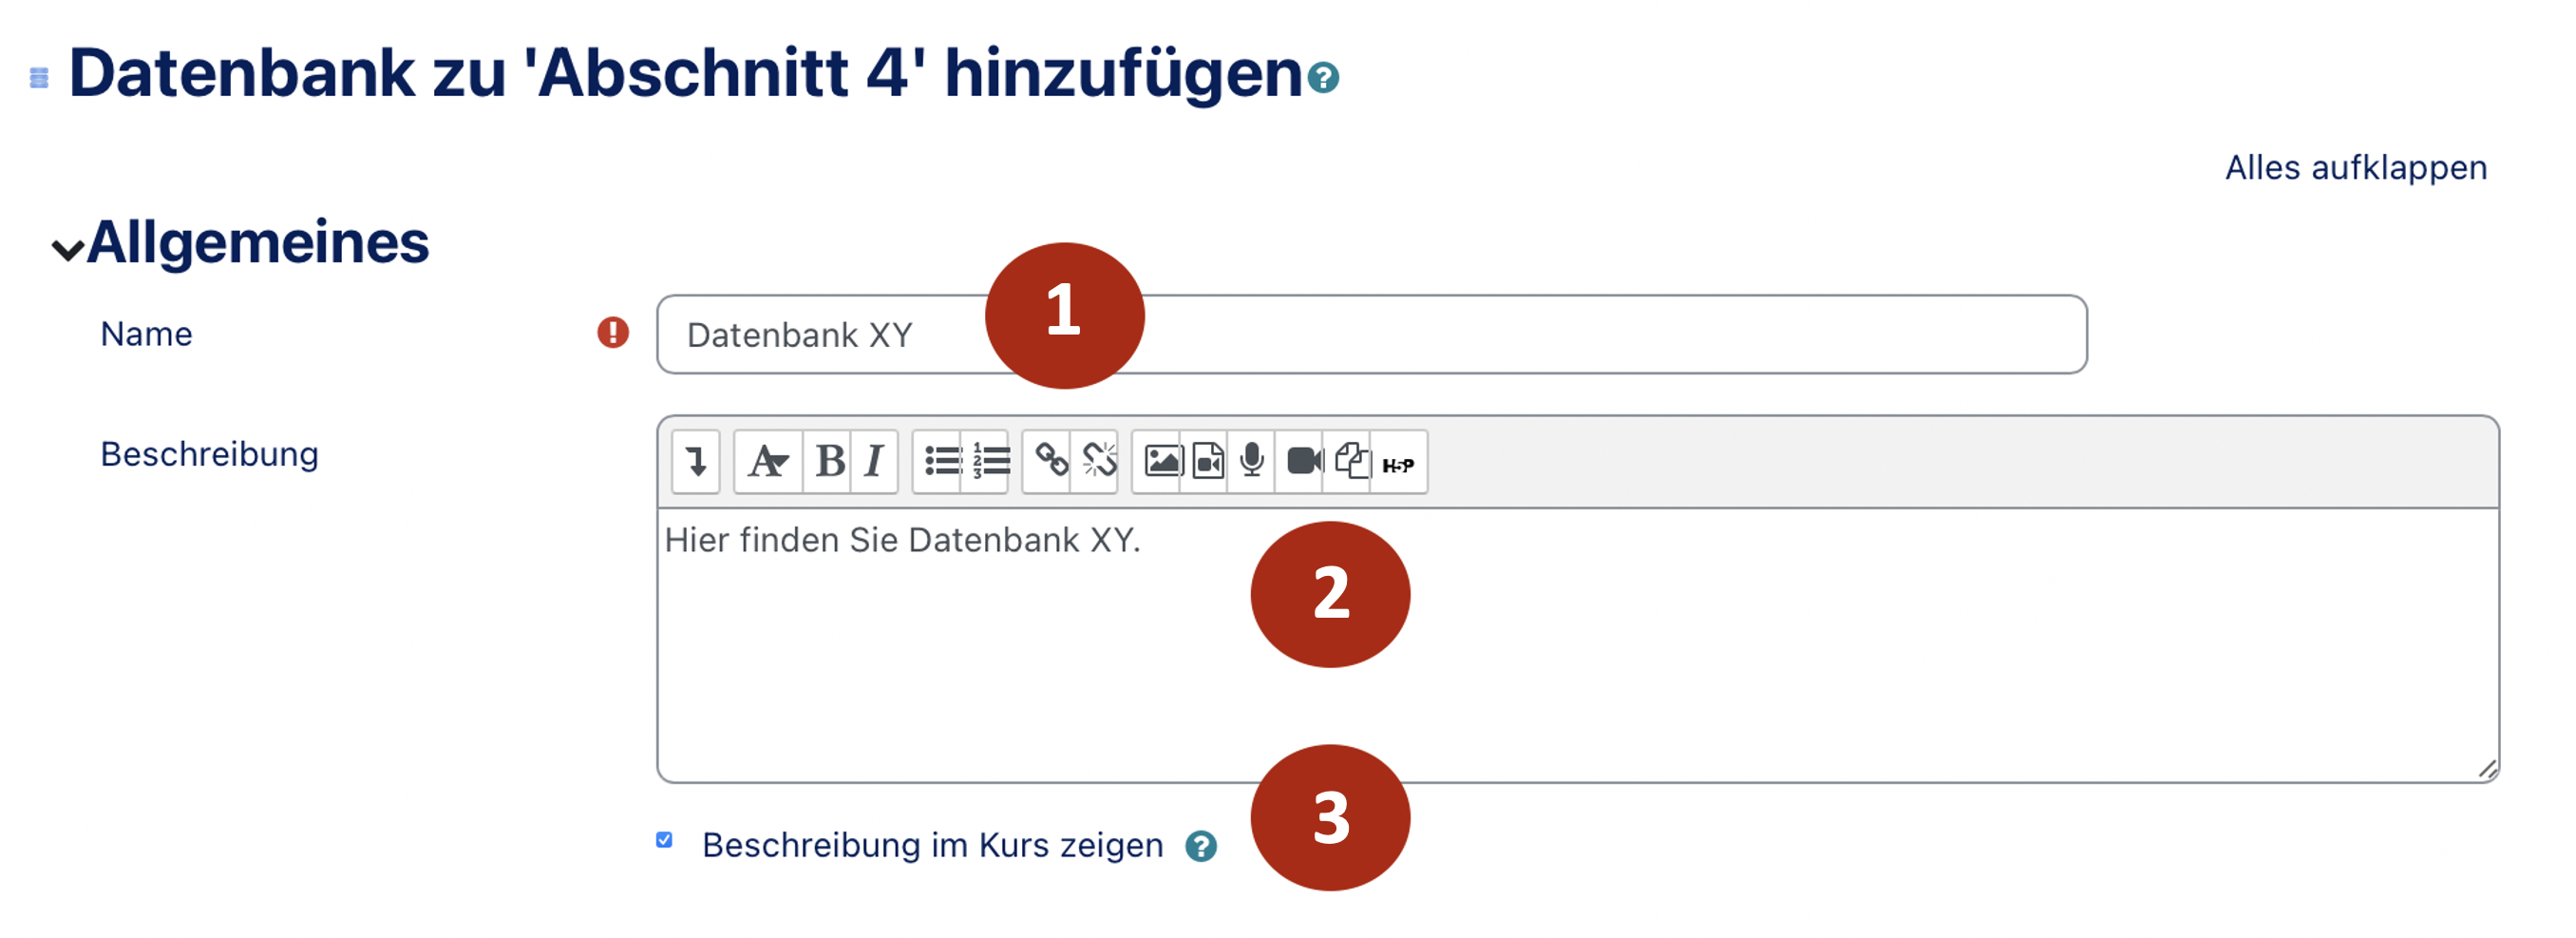
Next, you define the settings and behavior of the database. Options marked with a red * are mandatory.
Basic entries[Bearbeiten | Quelltext bearbeiten]
- Name (1)
- The name of the database. This is displayed on the overview page.
- Description (2)
- A meaningful description.
- Show description in course (3)
- Determines whether the description entered above is displayed on the course page (under the test name).
Click on Save and Display to configure the database.
Configure[Bearbeiten | Quelltext bearbeiten]
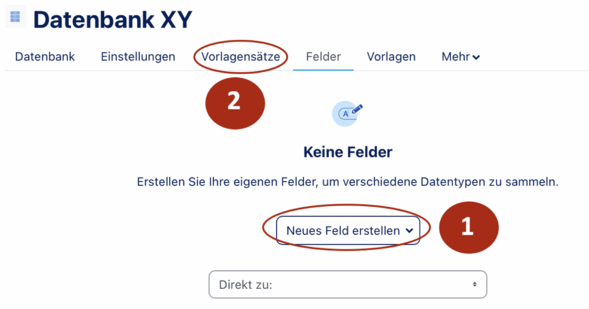
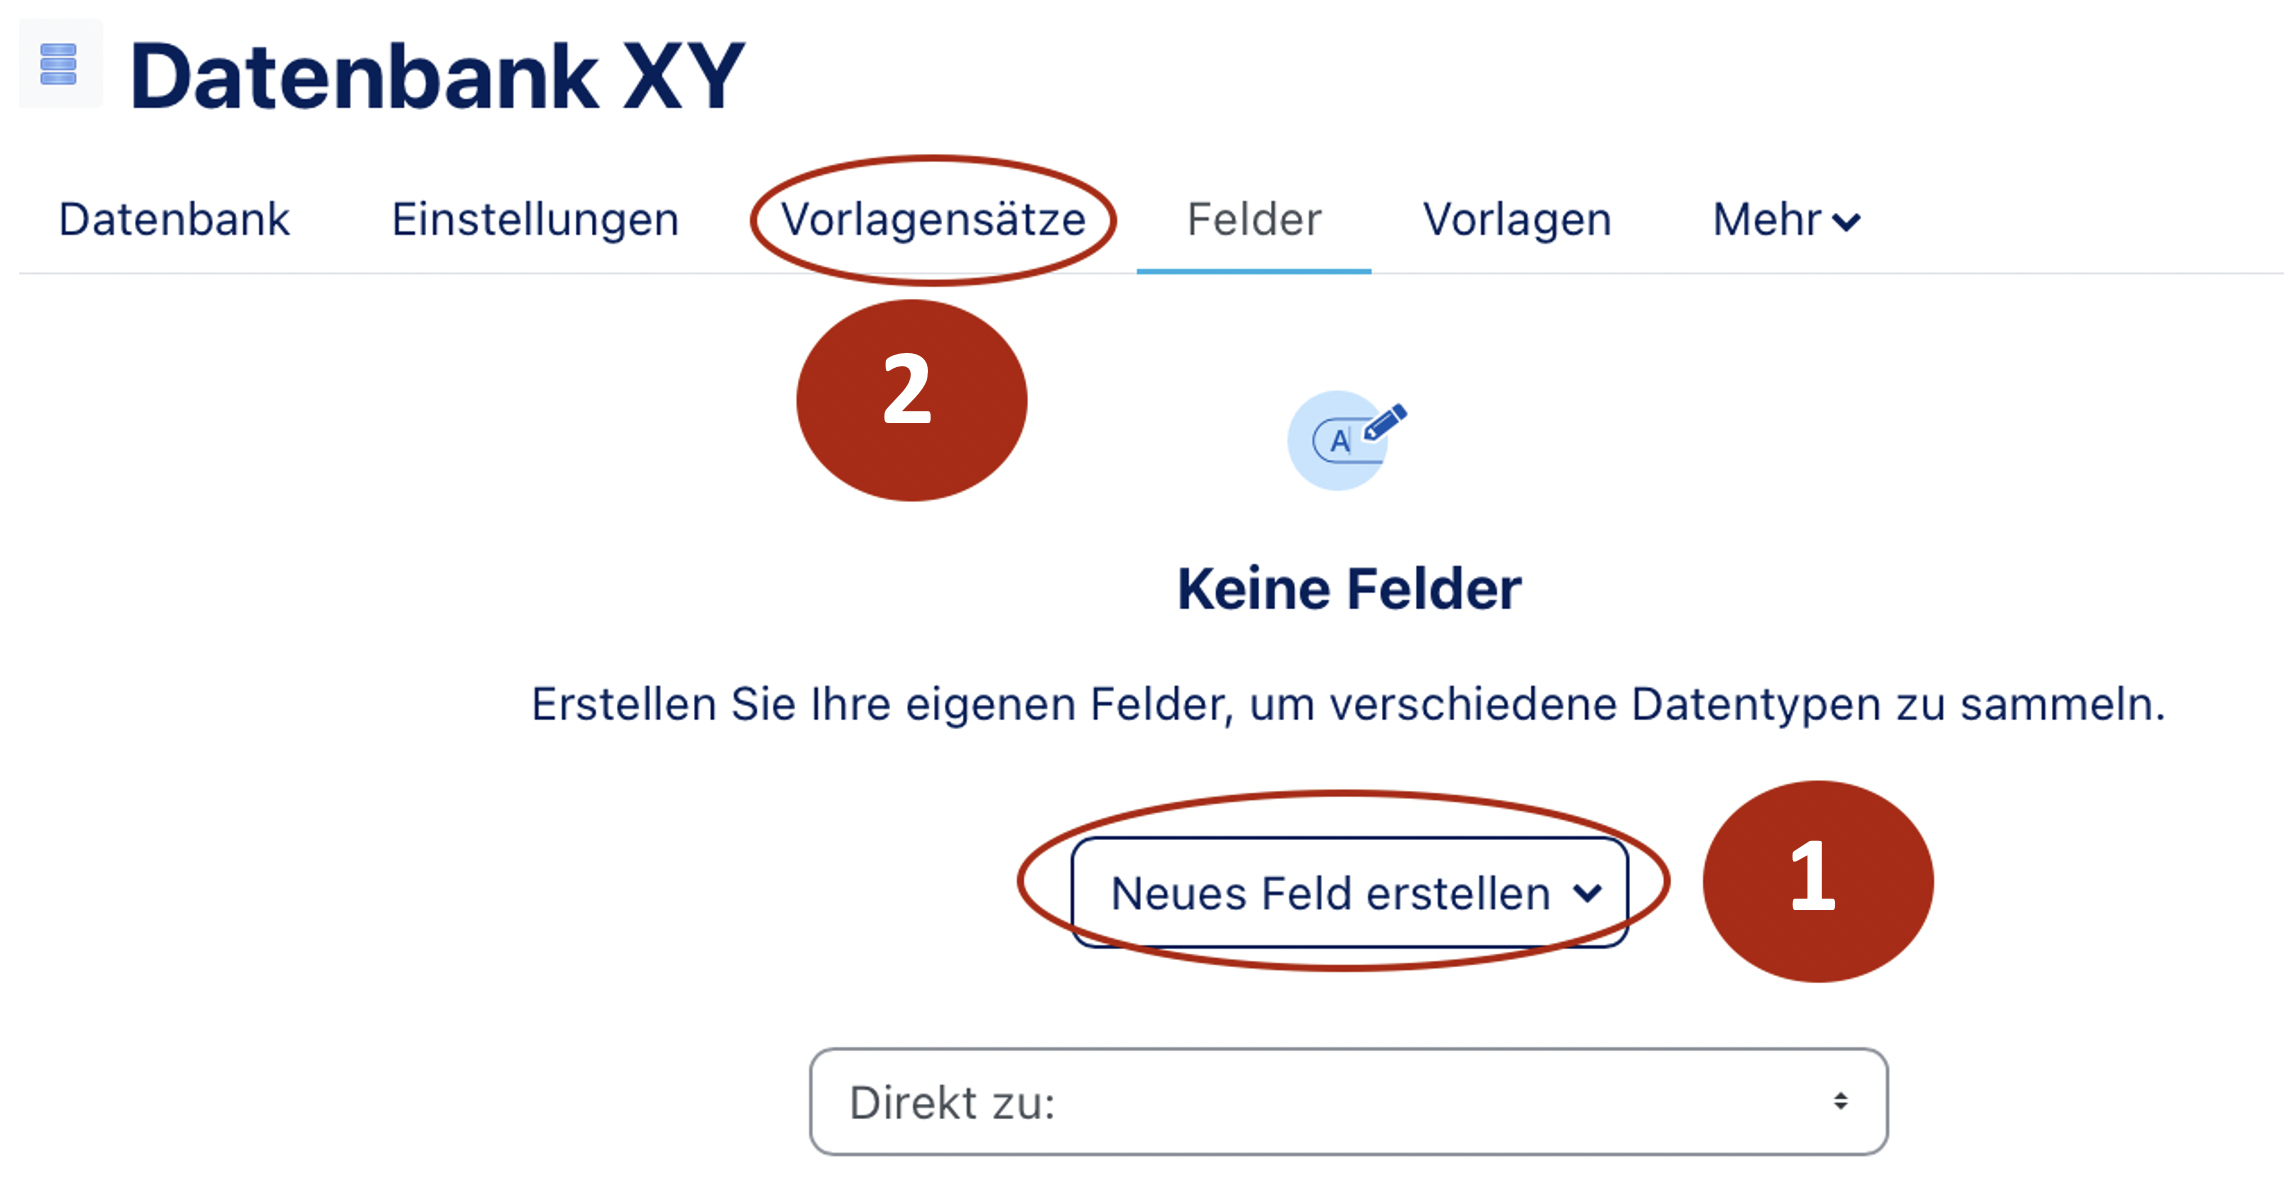
There are two ways to configure the database:
- Create new fields
- Click on (1) to create a new field
- Restore fields from an existing template set
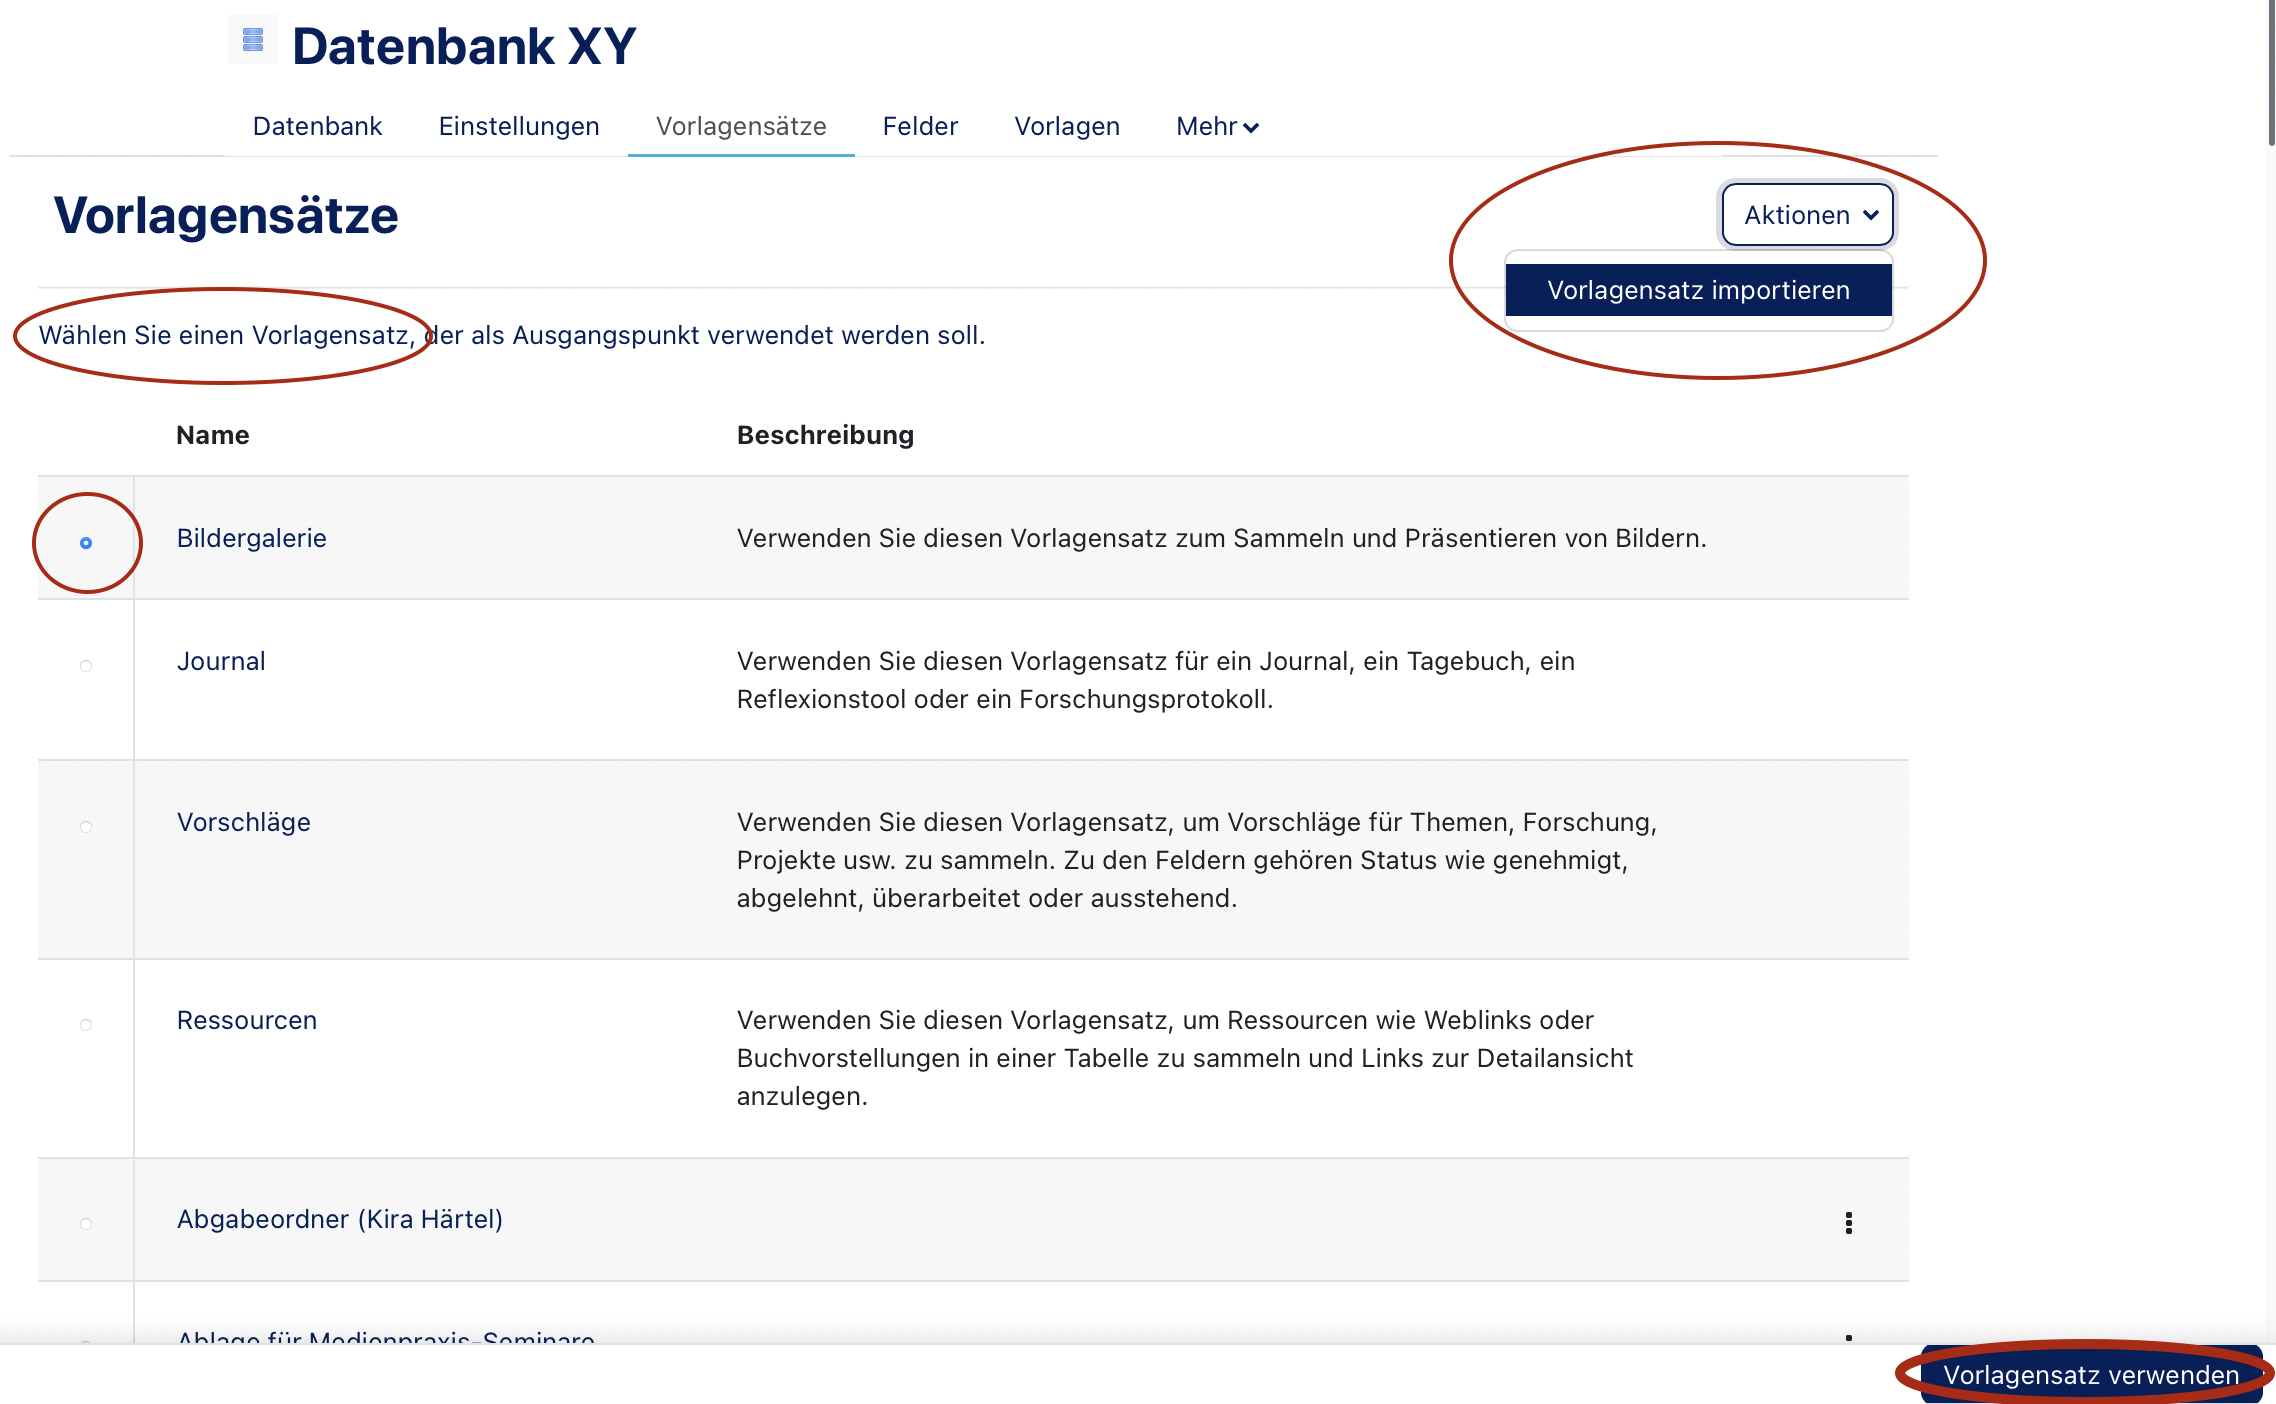
- Click on (2) to open the recovery dialog.
Create new field[Bearbeiten | Quelltext bearbeiten]
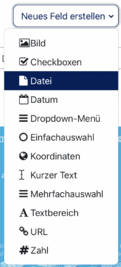
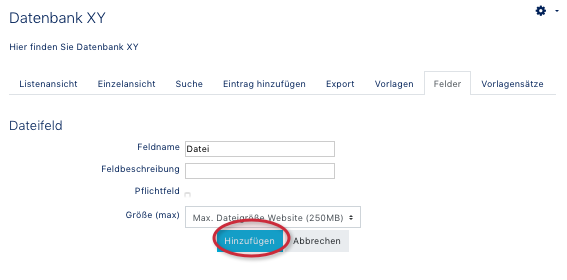
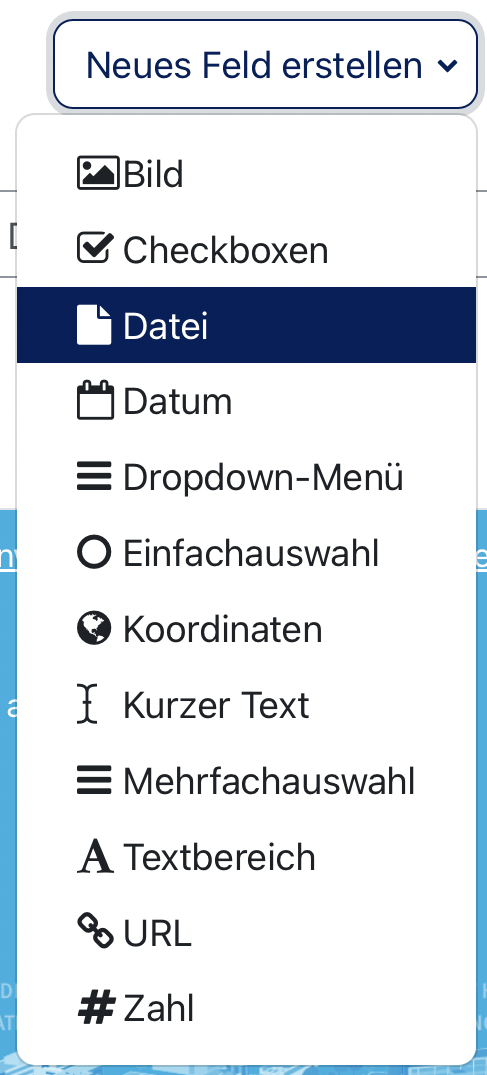
In the following we will use the database as a file storage. To do this, select the File from the drop-down menu under "Create new field". In the following dialog you have to give the file field a suitable name. Then click on Add. Proceed in this way for each field that you want to create.
Select template set[Bearbeiten | Quelltext bearbeiten]
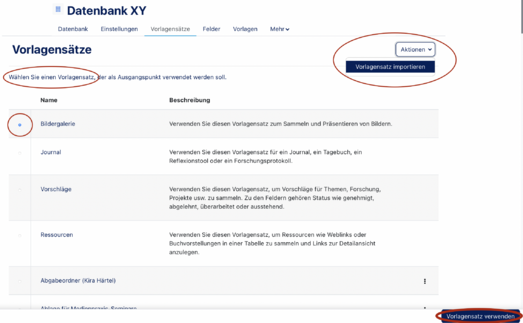
You can import fields from an existing template set. You can do this from a record previously exported to a file (import) or from a globally stored record. Click Import or Selection and click Next in the next overview dialog. The template record is now transferred to the current database.
Create document store[Bearbeiten | Quelltext bearbeiten]
You can easily set up a document repository for students to share files. To do this, use the existing template set Document repository.
Define field views
If the template set already has field views defined, you can skip this step.
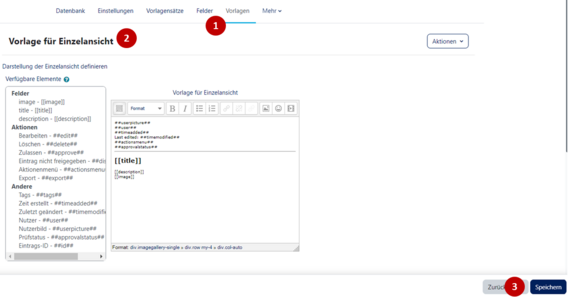
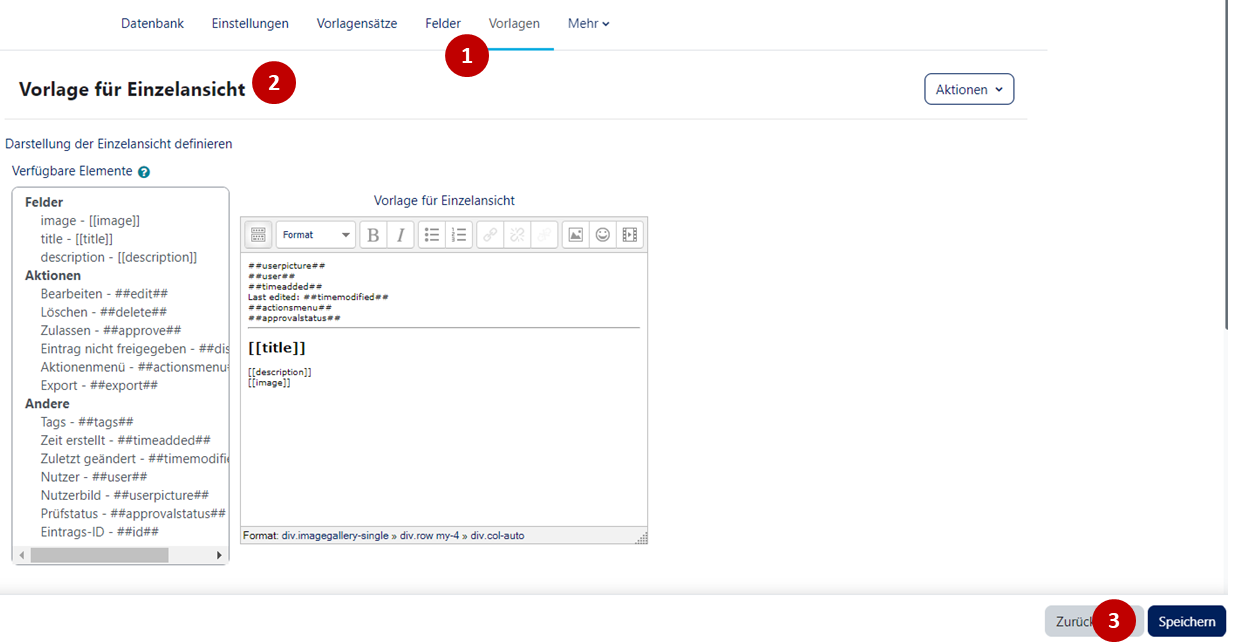
If, as in this case, a field has only just been created, the shape of the views must first be defined. To do this, call up the "Templates" item and define the view. In most cases it is sufficient to accept the templates for the view by clicking on "Save template".
Repeat this step for each view you want to create (list view, single view, ...)
Video Course Create database[Bearbeiten | Quelltext bearbeiten]
