The Group selection is a feature that allows students to register themselves in groups within a course. Lecturers set the maximum group size and determine which groups are available as options in the course.
What needs to be done?[Bearbeiten | Quelltext bearbeiten]
- Create Groups
- Activate editing
- Add material/ activity
- Create and edit group selection
Preparation[Bearbeiten | Quelltext bearbeiten]
Note: Groups must be created before this activity can be set up.


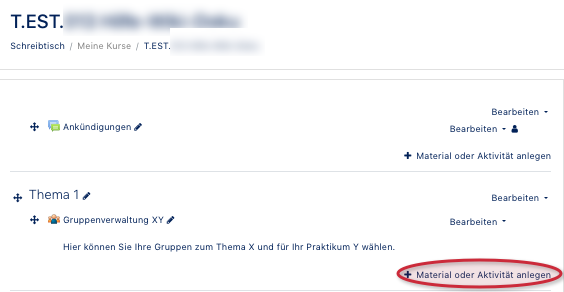
- First you have to select the desired course and then click on Enable Edit in the upper right corner.
- Then click on Add material or activity for your desired topic or date.
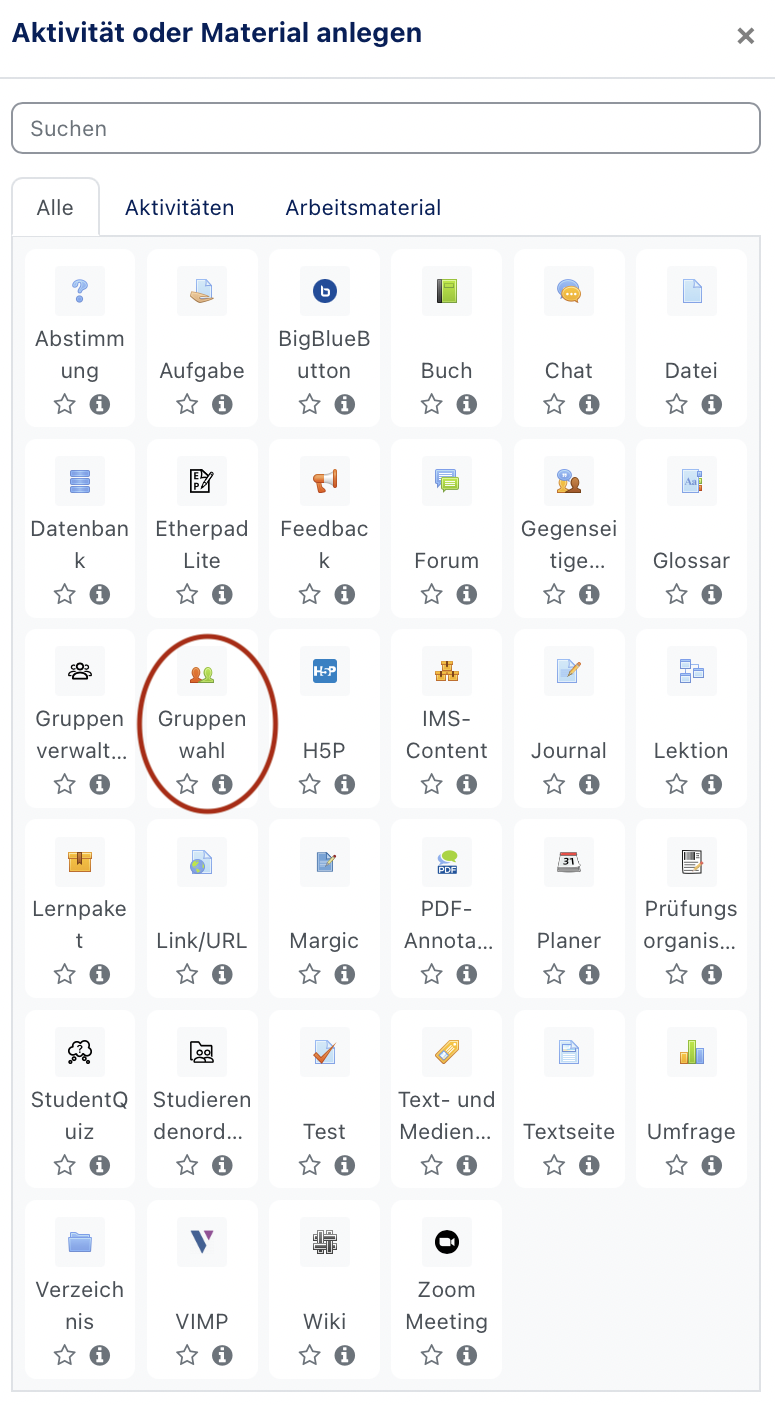
- In the window that opens you will find the group selection under activities. Select this and then click on Add.
Group selection settings[Bearbeiten | Quelltext bearbeiten]
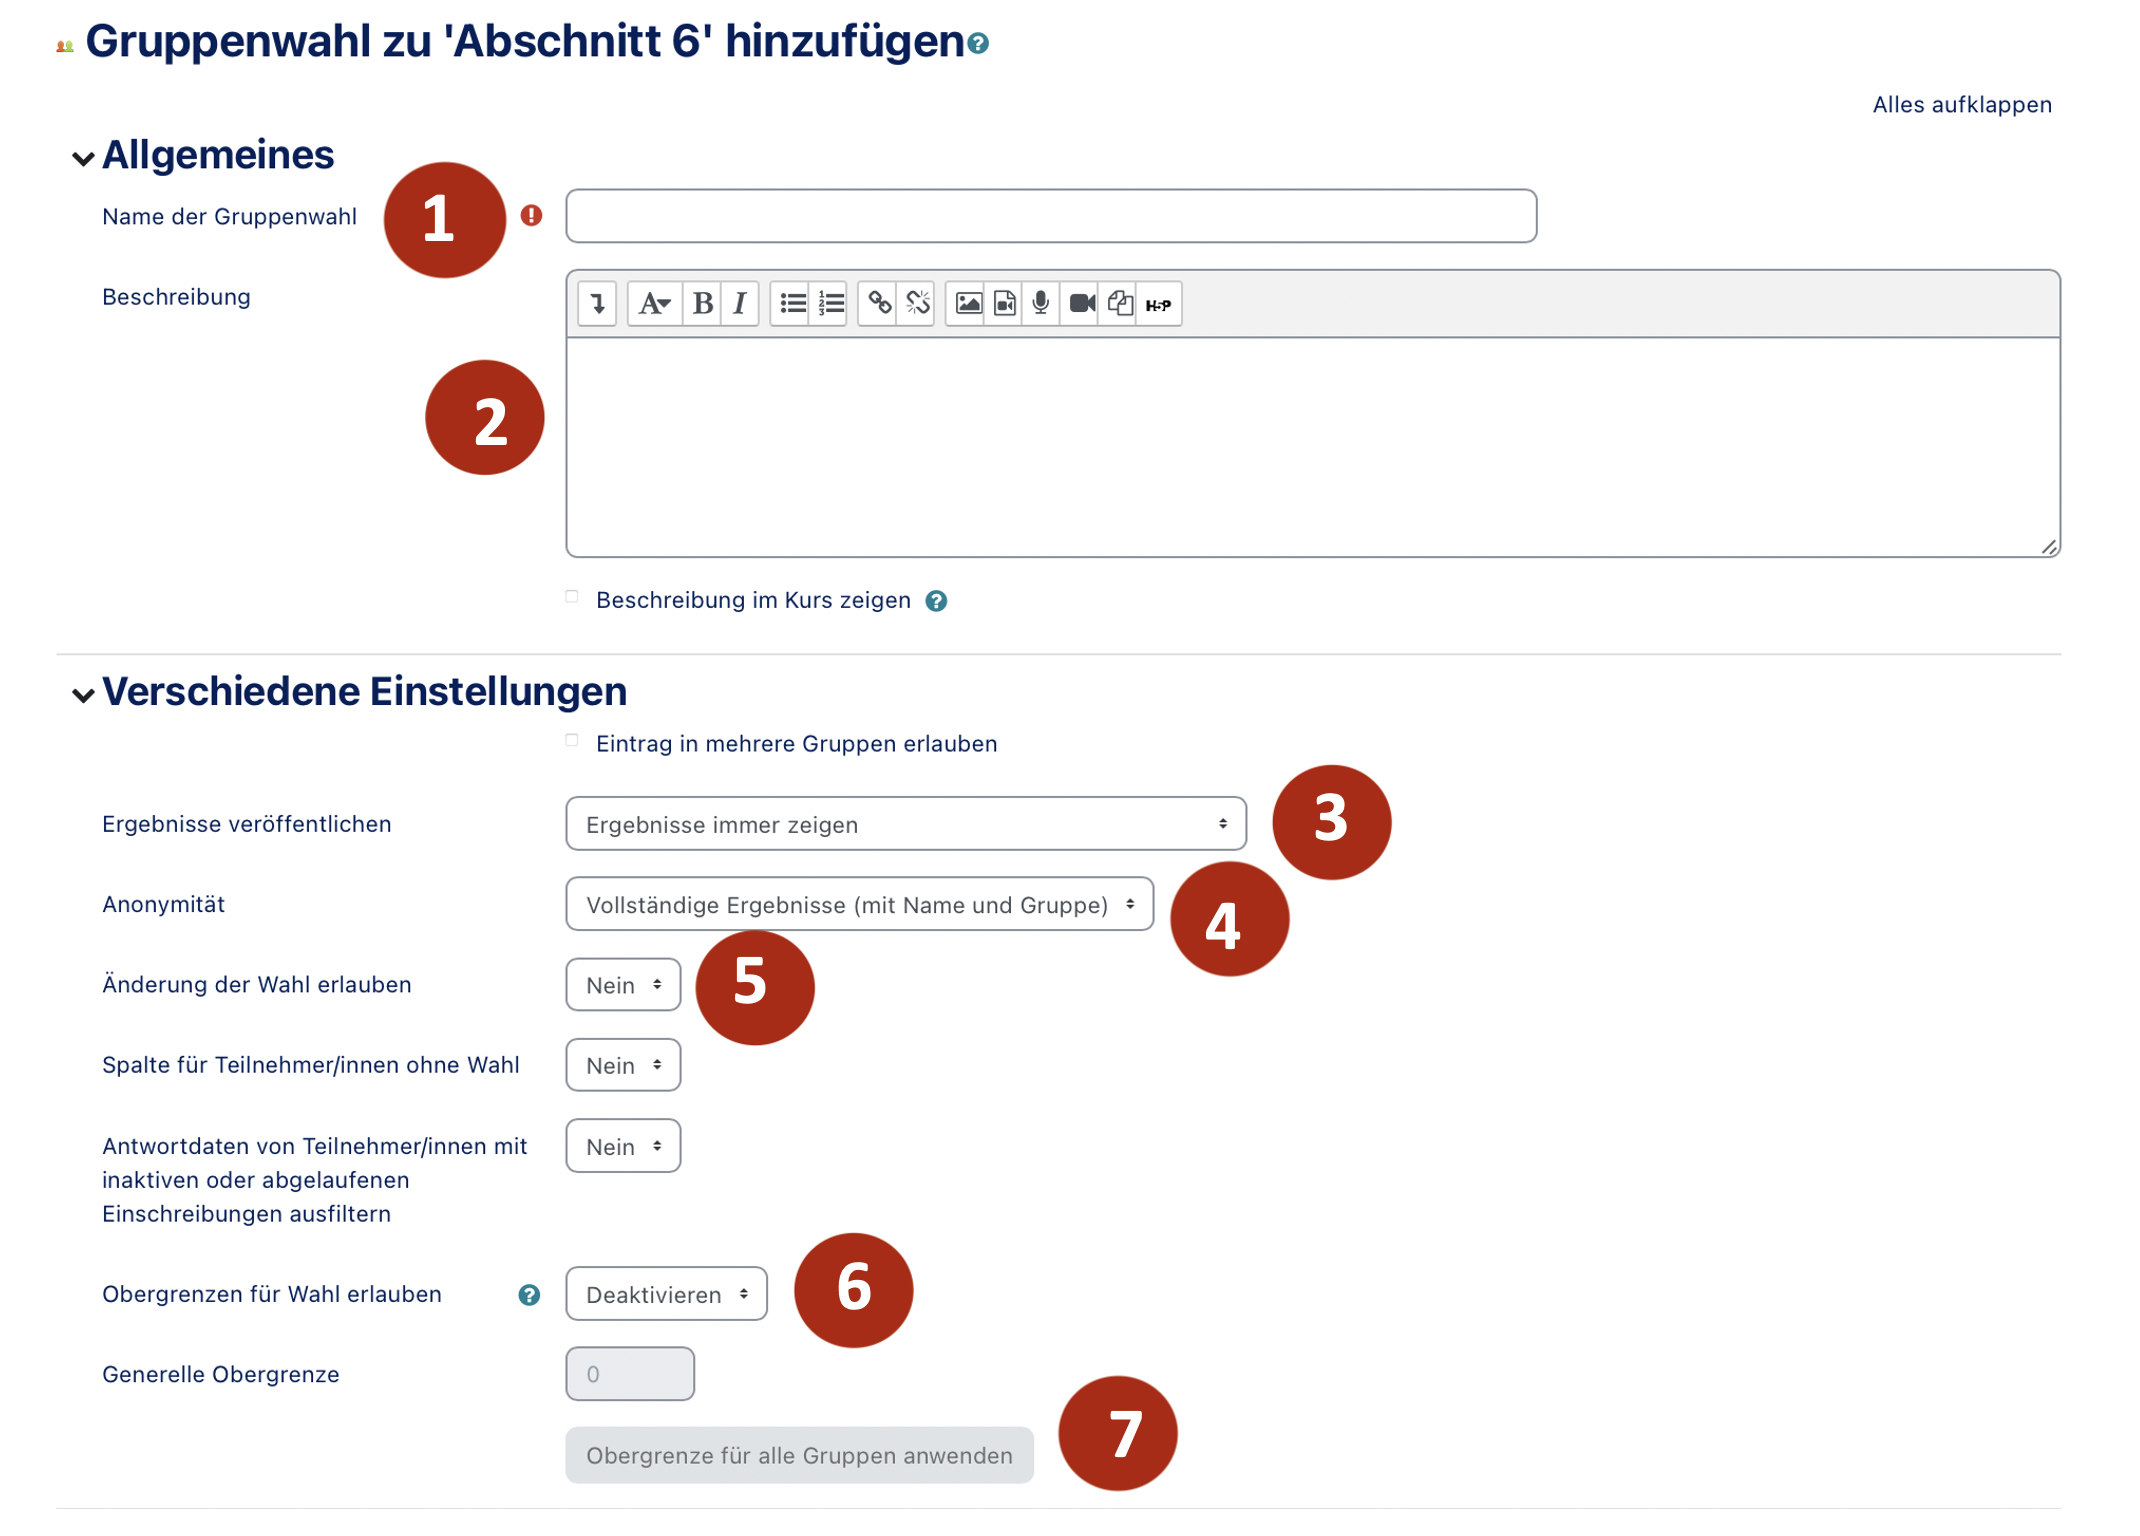
Now the various setting options will be explained.
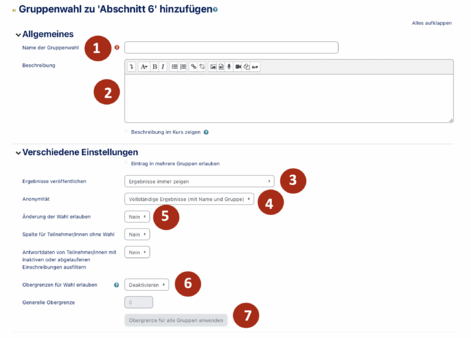
- Name of the group selection (1): Here you can name your group selection.
- Description (2): Here you can add a description to your group selection and select whether it should be displayed in the course.
- Publish Results (3): Here you can set whether students can see how many students are already in the selected group.
- In the next sub-chapter (Digression: Publishing Results) you can see how the different settings affect the students' view of the course.
- Anonymity (4): Here you can choose whether students can see other students in the group.
- Important: If you DO NOT turn on anonymity, your students will be able to see all other students' names!
- Allow change of choice (5): Here you can decide if students can change their choice again after they have already made a choice.
- Allow upper limits for choice (6): If you enable this you can enter a maximum number of students.
- Apply upper limit for all groups (7): Here you can set the upper limit for all groups.
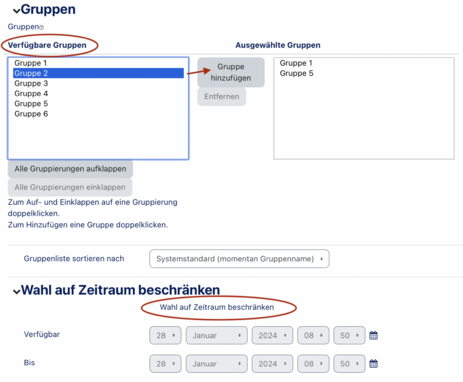
- Now you can select the groups you want and add them to your group selection.
- To do this, click on the group and then on Add group.
- Important: The groups must be created before. You will find instructions for this here.
- Your selected groups will be displayed on the right.
- If you want to limit the group selection to a certain period of time, select Limit selection to period of time below. You can then specify the time period.
- When you have set everything, click on Save below.
Digression: Publish results[Bearbeiten | Quelltext bearbeiten]
In this chapter we will show how the settings regarding the publication of results affect the participants' view.
The setting Always show results is the default setting and will cause all students to see all others.
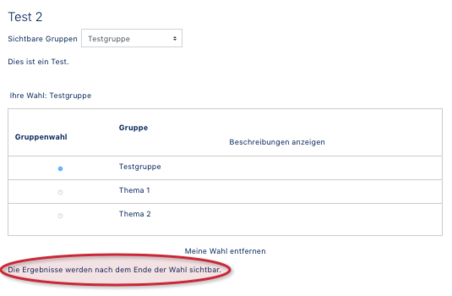
If you select Don't show results until the voting is finished, students will not be able to see the other names until the voting is finished. This is also noted below for the students.

The After own voting setting means that students cannot see the other names until they have chosen a group themselves.
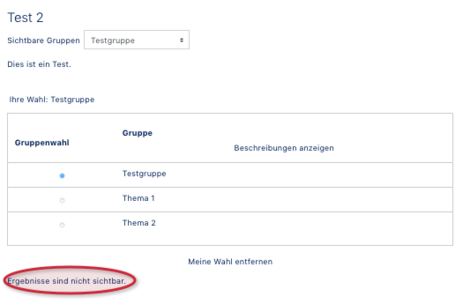
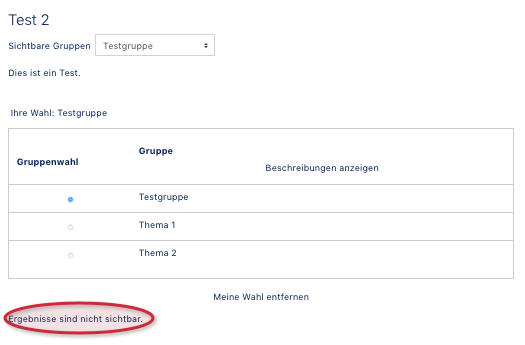
If you select the Do not publish results setting then no student will be able to see other students' names.
Participant view[Bearbeiten | Quelltext bearbeiten]
Register for group selection[Bearbeiten | Quelltext bearbeiten]
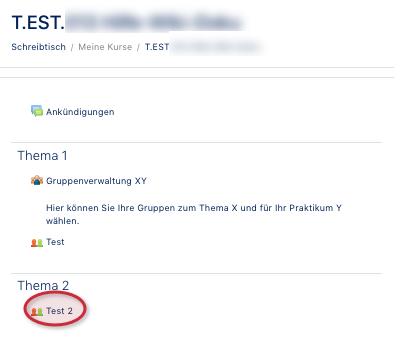
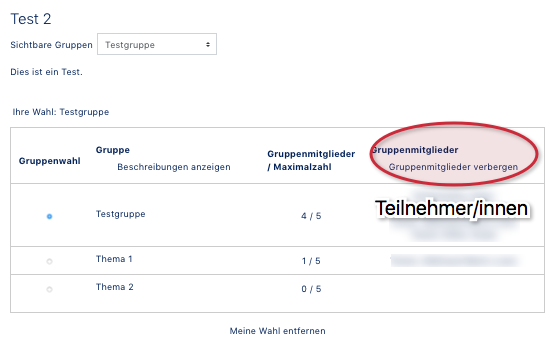
- To make a group selection as a participant, go to the corresponding course and select the desired group selection. In this example the group selection is called "Test 2".
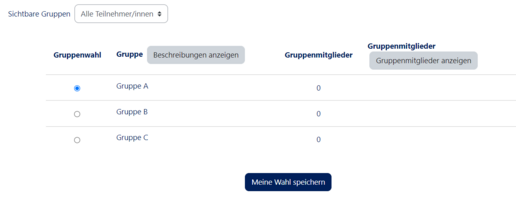
- After that you will be taken to the group selection where you can now register in a group. If you click on Show descriptions you can see a description text for the respective group - if available. Under Group members/ maximum number you can see how many students are allowed to join a group and how many students have already joined the group. In this example, 3 out of 5 possible students have registered for the "test group".
Video Course group selection[Bearbeiten | Quelltext bearbeiten]


