| (4 dazwischenliegende Versionen desselben Benutzers werden nicht angezeigt) | |||
| Zeile 30: | Zeile 30: | ||
<br> | <br> | ||
* Click on the displayed icon. | * Click on the displayed icon. | ||
| − | * Click on ''' | + | * Click on '''"User Selfcare"''' |
* Click on '''"Network Settings"'''. | * Click on '''"Network Settings"'''. | ||
<br clear=all> | <br clear=all> | ||
| Zeile 42: | Zeile 42: | ||
<br> | <br> | ||
* Name your certificate. | * Name your certificate. | ||
| − | * Choose ''' | + | * Choose '''"Version 1"''' as the data format. |
* Click on '''"Send Certificate"'''. | * Click on '''"Send Certificate"'''. | ||
<br clear=all> | <br clear=all> | ||
| Zeile 51: | Zeile 51: | ||
<br> | <br> | ||
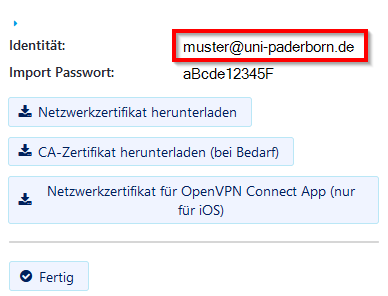
* A new certificate was created. | * A new certificate was created. | ||
| − | * Copy the '''Import Passwort'''. | + | * Copy the '''"Import Passwort"'''. |
* Click on '''"Download certificate"'''. | * Click on '''"Download certificate"'''. | ||
<br clear=all> | <br clear=all> | ||
| Zeile 57: | Zeile 57: | ||
[[Datei:Eduroam-unter-android-7.png|links|mini|ohne|350px]] | [[Datei:Eduroam-unter-android-7.png|links|mini|ohne|350px]] | ||
<br> | <br> | ||
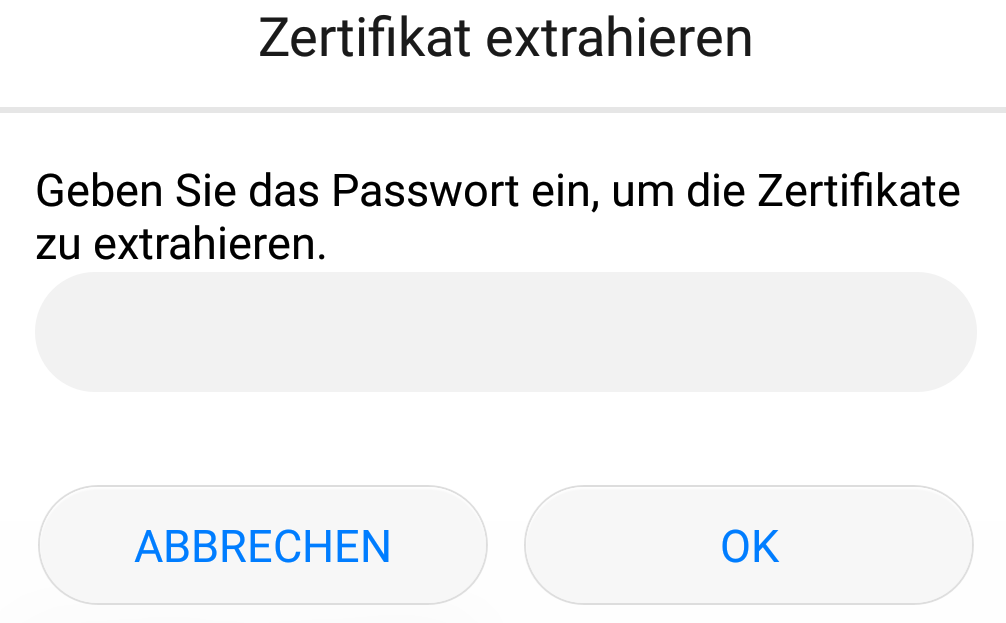
| − | * Use your '''Import Passwort''' to open the certificate. | + | * Use your '''"Import Passwort"''' to open the certificate. |
| − | * Click on '''Ok'''. | + | * Click on '''"Ok"'''. |
<br clear=all> | <br clear=all> | ||
| Zeile 72: | Zeile 72: | ||
<br> | <br> | ||
* Name your certificate in order to find it again - e.g. Eduroam'''. | * Name your certificate in order to find it again - e.g. Eduroam'''. | ||
| − | * Choose '''WLAN''' or '''Wi-Fi'''. | + | * Choose '''"WLAN"''' or '''"Wi-Fi"'''. |
| − | * Click on '''Ok'''. | + | * Click on '''"Ok"'''. |
<br clear=all> | <br clear=all> | ||
| Zeile 81: | Zeile 81: | ||
* We will need it in the next step. | * We will need it in the next step. | ||
<br clear=all> | <br clear=all> | ||
| − | |||
| − | |||
| − | |||
| − | |||
| − | |||
| − | |||
| − | |||
<br clear=all> | <br clear=all> | ||
| Zeile 135: | Zeile 128: | ||
[[Datei:Eduroam-Android-Telesec.jpg|links|mini|ohne|350px]] | [[Datei:Eduroam-Android-Telesec.jpg|links|mini|ohne|350px]] | ||
<br> | <br> | ||
| − | * '''EAP- | + | * '''EAP-Method:''' TLS |
| − | * ''' | + | * '''Identity:''' * '''Identitiät:''' Insert from clipboard. We copied it in the step before. Alterternatively, you can enter benutzername@uni-paderborn.de. Replace '''benutzername''' with your personal username for the Uni-Account. |
| − | * '''CA | + | * '''CA Certificate:''' Root UPB |
| − | * ''' | + | * '''Domain:''' radius.uni-paderborn.de |
| − | * ''' | + | * '''User certificate:''' eduroam |
</bootstrap_panel> | </bootstrap_panel> | ||
</bootstrap_accordion> | </bootstrap_accordion> | ||
| Zeile 149: | Zeile 142: | ||
==Alternatives== | ==Alternatives== | ||
| − | On Android 9 the CA certificate may not be needed. You can choose '''Use network certificates''' instead. | + | On Android 9 the CA certificate may not be needed. You can choose '''"Use network certificates"''' instead. |
==Troubleshooting== | ==Troubleshooting== | ||
| Zeile 158: | Zeile 151: | ||
* Deactivate and activate '''Airplane Mode''' | * Deactivate and activate '''Airplane Mode''' | ||
* Perform a '''restart'''. | * Perform a '''restart'''. | ||
| + | </bootstrap_panel> | ||
<bootstrap_panel heading="Certificate can't be installed" color="info"> | <bootstrap_panel heading="Certificate can't be installed" color="info"> | ||
| Zeile 171: | Zeile 165: | ||
</bootstrap_panel> | </bootstrap_panel> | ||
| − | <bootstrap_panel heading=" | + | <bootstrap_panel heading="Certificate: Password wrong" color="info"> |
Do you get the error message "Password wrong". Don't use the clipboard but type in the password manually. | Do you get the error message "Password wrong". Don't use the clipboard but type in the password manually. | ||
<br> | <br> | ||
Aktuelle Version vom 2. Juni 2024, 18:38 Uhr
The Radius server certificate was changed on 15/02/2024. You do not need to install a new user certificate! Most devices should continue to connect to eduroam automatically. If your device asks whether you want to trust the new certificate, you should check the fingerprint of the certificate.
SHA1 Fingerprint=F0:CB:92:A7:B6:2E:21:00:97:C7:00:88:F2:6D:CD:EB:D6:D6:D6:E5
SHA256 Fingerprint=40:96:14:4C:DA:39:8E:A5:15:85:5D:32:4A:04:E0:5C:E4:E1:9E:1E:EB:BA:DD:27:A0:30:8C:E4:20:52:48:48
SHA512 Fingerprint=00:B8:D3:4A:60:0A:7C:2A:AC:84:11:92:90:DA:C5:14:F7:05:79:86:23:4E:D2:44:F7:0D:D7:6A:FF:CA:26:A2:8E:AD:87:7F:79:5D:64:5E:24:8C:19:41:E0:0F:16:1F:97:AE:6E:93:61:E4:F1:93:3C:47:47:75:53:7C:F5:25
If your device does not connect to eduroam, continue here. Depending on your device, you may need to press and hold eduroam or click on the three dots.
This tutorial describes how to set up the Wi-Fi eduroam on android.
Android is used by many different manufactureres and therefore can look very different. We can't offer instructions for every device.
Step-by-step description[Bearbeiten | Quelltext bearbeiten]
Create certificate[Bearbeiten | Quelltext bearbeiten]
Bevore setting up eduroam, we must create and install a certificate. You can use mobile data for this. Otherwise use webauth.
Visit the Serviceportal and log in with your Uni-Account.
 We recomend using the "Google-Chrome-Browser". Other browsers may also work.

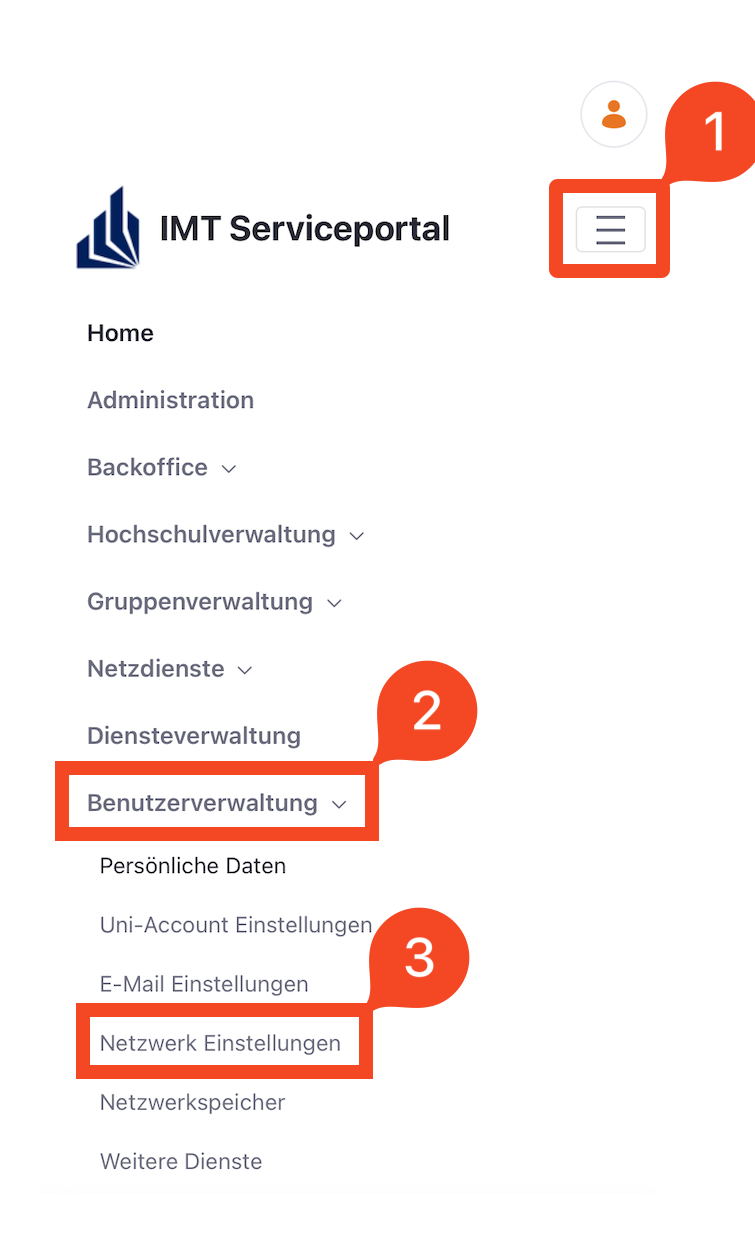
- Click on the displayed icon.
- Click on "User Selfcare"
- Click on "Network Settings".
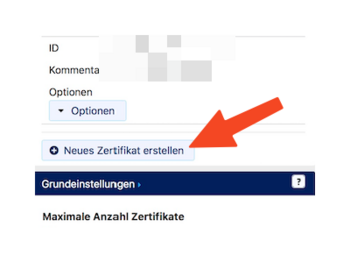
- Click on "Create network certificate".
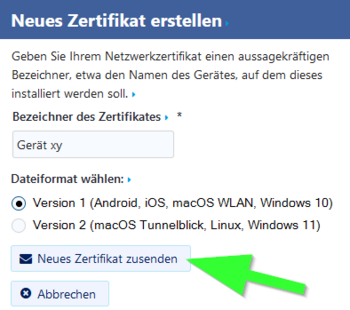
- Name your certificate.
- Choose "Version 1" as the data format.
- Click on "Send Certificate".
Hinweis: Create a certificate for every device. A device isn't used anymore? A device got lost or stolen? Retract your certificate!
Install user certificate[Bearbeiten | Quelltext bearbeiten]

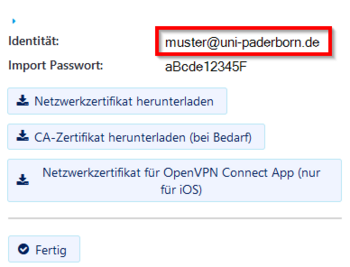
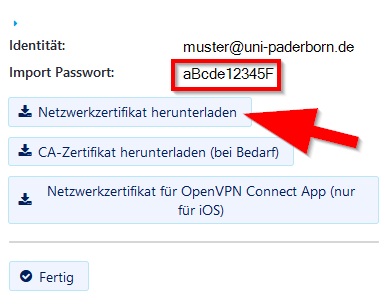
- A new certificate was created.
- Copy the "Import Passwort".
- Click on "Download certificate".
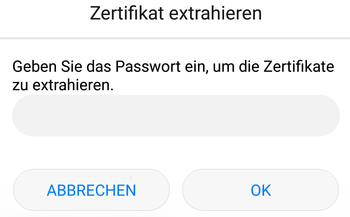
- Use your "Import Passwort" to open the certificate.
- Click on "Ok".
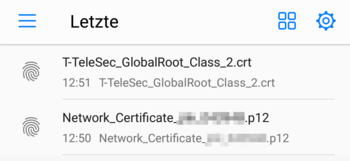
The dialogue is not displayed?
Normally, the certificate import assistant opens now. If this isn't the case: Swipe down from the top. Your certificate should appear as a download in the infocenter. Open it with a click.
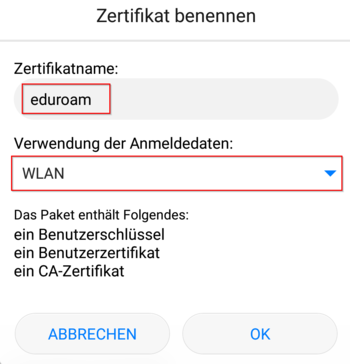
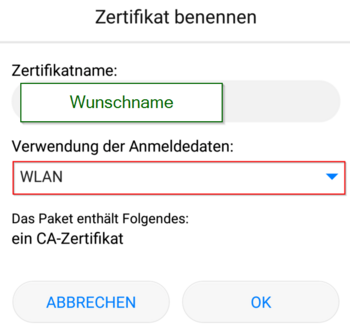
- Name your certificate in order to find it again - e.g. Eduroam.
- Choose "WLAN" or "Wi-Fi".
- Click on "Ok".
- Copy the identifier named "Identität".
- We will need it in the next step.
Set up eduroam[Bearbeiten | Quelltext bearbeiten]
After installing the certificate, you can set up eduroam.
- Open the Wi-Fi settings
- Select "eduroam".
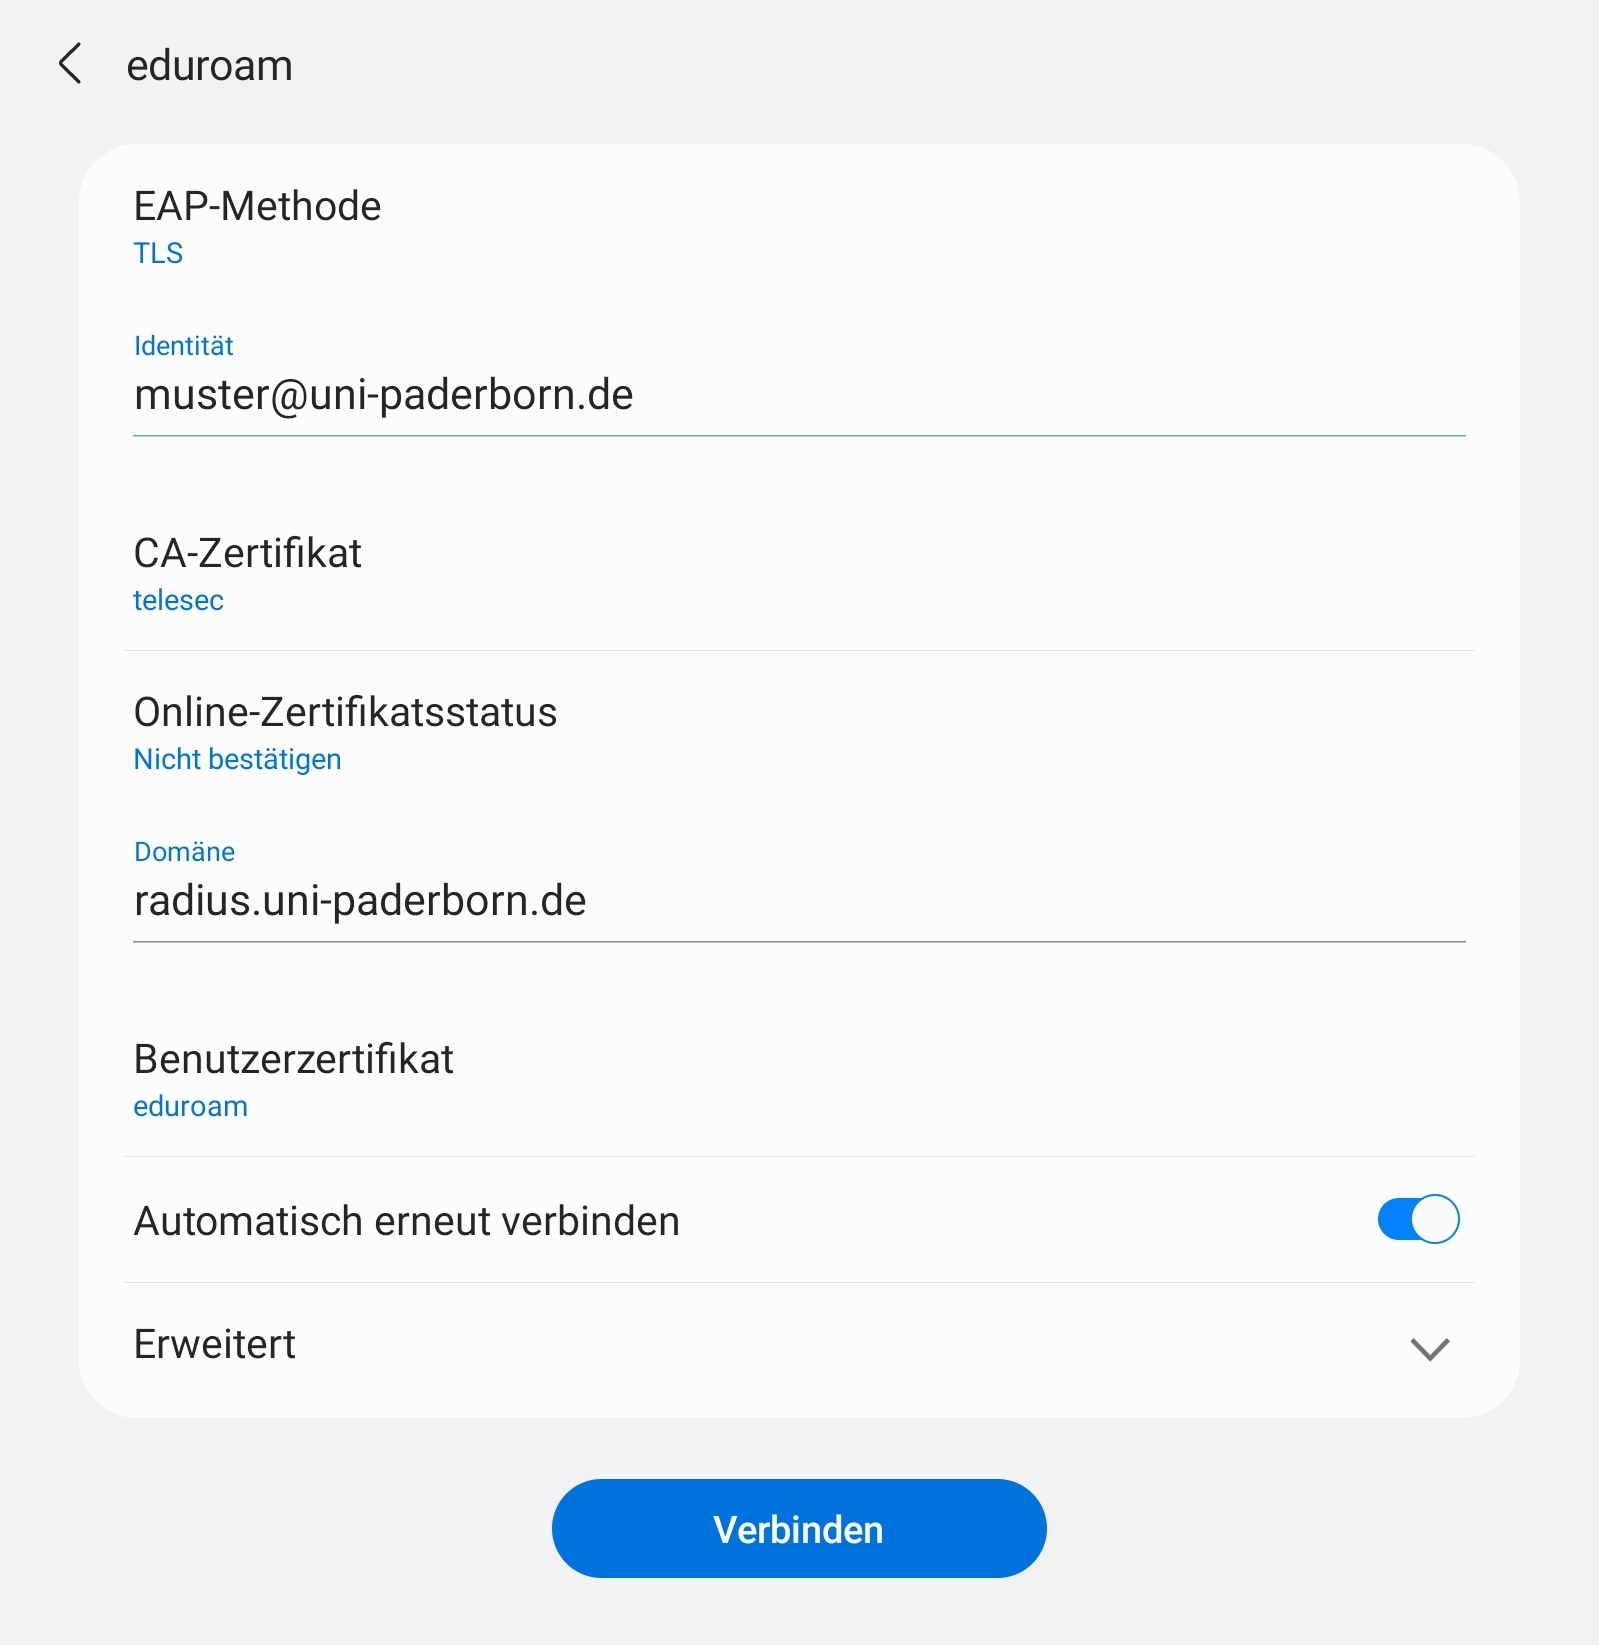
Choose the following settings:
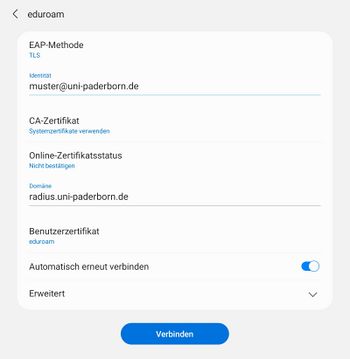
- EAP-Methode: TLS
- Identitiät: Insert from clipboard. We copied it in the step before. Alterternatively, you can enter benutzername@uni-paderborn.de. Replace benutzername with your personal username for the Uni-Account.
- CA-Zertifikat: Systemzertifikate verwenden
- Domäne: radius.uni-paderborn.de
- Benutzerzertifikat: eduroam
Info: If you can't find these setting - Click on Additional settings at first.
No entry Use System certificates?
If the option "Use system certificates" is not available, you need to install the CA certificate first. Visit
Install the T-TeleSec GlobalRoot Class 2 certificate.
- Name the certificate - e.g. Root UPB.
- Choose WLAN or Wi-Fi.
- Click on Ok.
To install a system certificate, your device needs to be protected by pin, fingerprint or a different safety method. Don't deactivate the safety method. Otherwise, you need to set up eduroam again.
After installing the certificate, you can set up eduroam.
- Open the Wi-Fi settings
- Select "eduroam".
Choose the following settings:
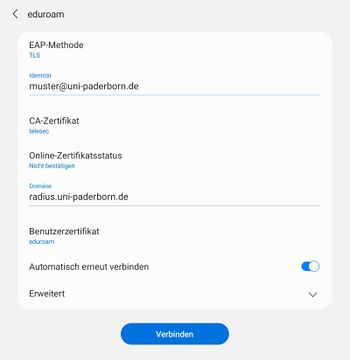
- EAP-Method: TLS
- Identity: * Identitiät: Insert from clipboard. We copied it in the step before. Alterternatively, you can enter benutzername@uni-paderborn.de. Replace benutzername with your personal username for the Uni-Account.
- CA Certificate: Root UPB
- Domain: radius.uni-paderborn.de
- User certificate: eduroam
Delete webauth[Bearbeiten | Quelltext bearbeiten]
- If you used webauth - Delete it afterwards.
- Log press on webauth and click on Delete.
- This can also be labled as Forget.
Alternatives[Bearbeiten | Quelltext bearbeiten]
On Android 9 the CA certificate may not be needed. You can choose "Use network certificates" instead.
Troubleshooting[Bearbeiten | Quelltext bearbeiten]
No connection to eduroam
Try the following steps:
- Deactivate and activate Wi-Fi
- Deactivate and activate Airplane Mode
- Perform a restart.
Certificate can't be installed
Do you get the error message "Certificate can't be read"? Try to install the certificate manually. Download the certificate. Ignore the error message.
Open the settings. The path can differ but open
Settings /Additional Settings / Security
Click on Install certificates from SD-Card and install the downloaded certificates.
Info: Can't find the option in the menu? Search for it.
Certificate: Password wrong
Do you get the error message "Password wrong". Don't use the clipboard but type in the password manually.
That does't help either? There is no fix for this problem yet.


