Mail einrichten in Apple Mail (macOS)/en
| (9 dazwischenliegende Versionen desselben Benutzers werden nicht angezeigt) | |||
| Zeile 17: | Zeile 17: | ||
<br> | <br> | ||
* In the top left corner click on '''"Mail"'''. | * In the top left corner click on '''"Mail"'''. | ||
| − | * Click on '''"Add account"'''. | + | * Click on '''"Add account..."'''. |
<br clear=all> | <br clear=all> | ||
[[Datei:Mail Account auswählen.png|links|mini|ohne|350px]] | [[Datei:Mail Account auswählen.png|links|mini|ohne|350px]] | ||
<br> | <br> | ||
| − | * Click on '''"Other Mail-Account | + | * Click on '''"Other Mail-Account"'''. |
* Click on '''"Continue"'''. | * Click on '''"Continue"'''. | ||
<br clear=all> | <br clear=all> | ||
| Zeile 29: | Zeile 29: | ||
[[Datei:Mail Daten eingeben.png|links|mini|ohne|350px]] | [[Datei:Mail Daten eingeben.png|links|mini|ohne|350px]] | ||
<br> | <br> | ||
| − | * | + | * Name: Your name - This will be displayed as the sender when you send emails. |
| − | * | + | |
| − | * | + | * Email Address: Your email address |
| − | * | + | |
| + | * Password: Password for your university account | ||
| + | |||
| + | * Then click on "Log in". | ||
| + | |||
<br clear=all> | <br clear=all> | ||
| Zeile 40: | Zeile 44: | ||
[[Datei:Mail Daten eingeben2.png|links|mini|ohne|350px]] | [[Datei:Mail Daten eingeben2.png|links|mini|ohne|350px]] | ||
<br> | <br> | ||
| − | * ''' | + | * '''Email Address: ''' Your email address |
| − | * '''Username:''' Username | + | * '''Username:''' Your university account username |
| + | * '''Password:''' Your university account password | ||
| + | * '''Username:''' Your university account username | ||
* '''Account Type:''' IMAP | * '''Account Type:''' IMAP | ||
| − | < | + | * '''Incoming Mail Server:''' <code>mail.uni-paderborn.de</code> |
| − | + | * '''Outgoing Mail Server:''' <code>mail.uni-paderborn.de</code> | |
| − | < | + | * <span style="color:green">Note:</span>Please double-check that your username is correct. |
| − | * <span style="color:green"> | + | |
| − | * | + | * Then click '''"Log In"'''. |
| + | |||
<br clear=all> | <br clear=all> | ||
| Zeile 64: | Zeile 71: | ||
== See also == | == See also == | ||
| + | * [[Mail]] | ||
* [[E-Mail Archivierung]] | * [[E-Mail Archivierung]] | ||
| − | |||
* [[Mail - Probleme mit veralteter SSL-Version]] | * [[Mail - Probleme mit veralteter SSL-Version]] | ||
Aktuelle Version vom 13. Januar 2026, 09:47 Uhr
Die deutsche Version finden Sie auf der Seite Mail einrichten in Apple Mail (macOS)
Apple's operating system includes Apple Mail, a program for sending and receiving emails. This guide explains how to set up your university email address there.
Step-by-step description[Bearbeiten | Quelltext bearbeiten]
Open Apple Mail[Bearbeiten | Quelltext bearbeiten]
- Open Apple Mail.
Add account[Bearbeiten | Quelltext bearbeiten]
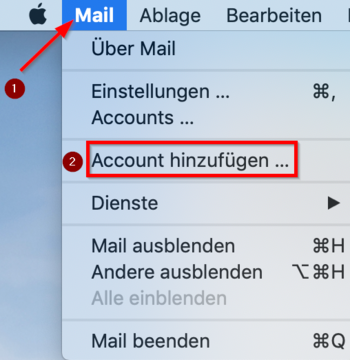
- In the top left corner click on "Mail".
- Click on "Add account...".
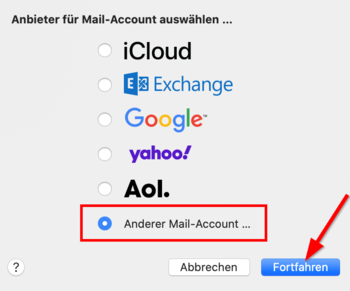
- Click on "Other Mail-Account".
- Click on "Continue".
Setup account[Bearbeiten | Quelltext bearbeiten]
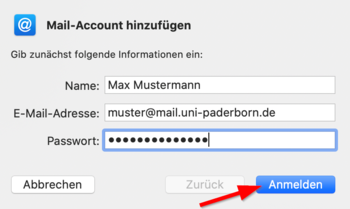
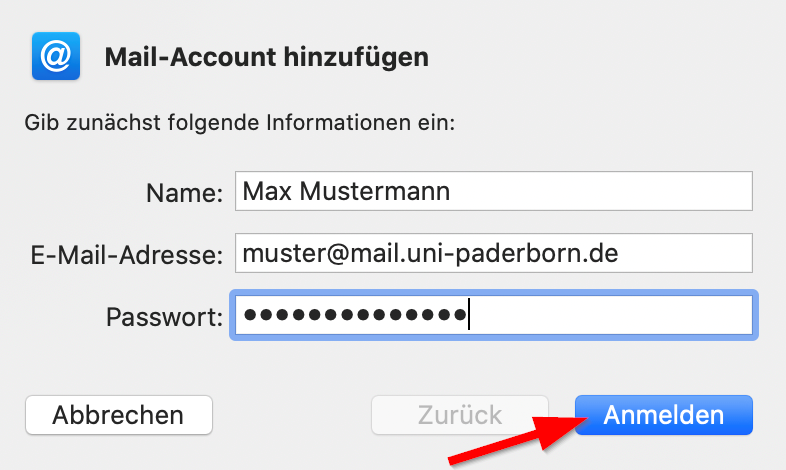
- Name: Your name - This will be displayed as the sender when you send emails.
- Email Address: Your email address
- Password: Password for your university account
- Then click on "Log in".
Further info: Which mail address do you have?
As student or employe you have the following e-mail adresses:
- username@mail.uni-paderborn.de
- username@campus.uni-paderborn.de
- username@mail.upb.de
- username@campus.upb.de
Employes have additionally the following E-Mail-Adress:
- name.surname@uni-paderborn.de
- name.surname@upb.de
- Contact the ZIM for additional E-Mail-Aliases.
All aliases are available in the same mailbox. Choose one as you like for sending an receiving mails.
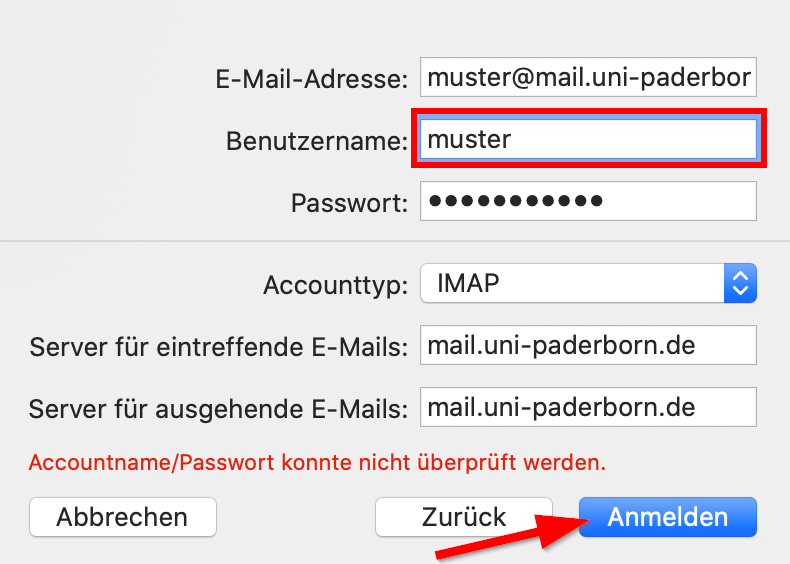
Check the following settings:

- Email Address: Your email address
- Username: Your university account username
- Password: Your university account password
- Username: Your university account username
- Account Type: IMAP
- Incoming Mail Server:
mail.uni-paderborn.de - Outgoing Mail Server:
mail.uni-paderborn.de - Note:Please double-check that your username is correct.
- Then click "Log In".

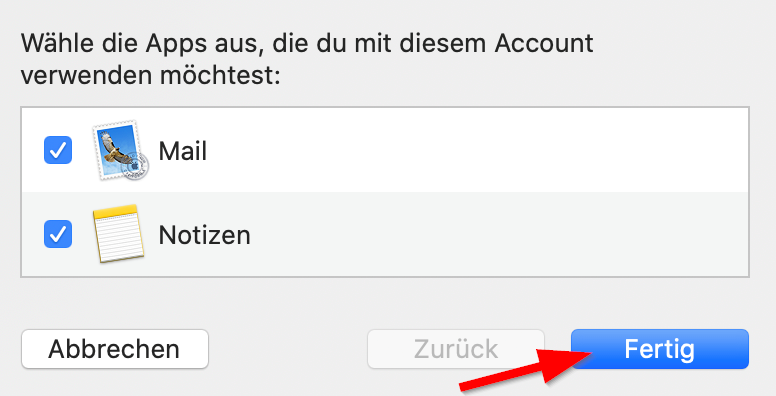
- Option: You can connect the Notes-App to your E-Mail-Account.
- Click on "'Finish".
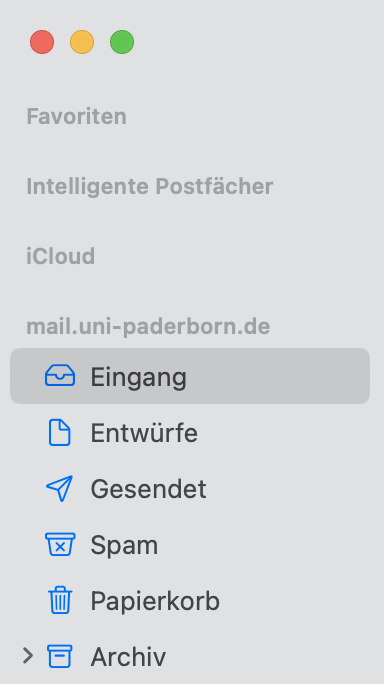
- The setup was successful.
- Apple Mail merges all your inboxes as default.
- You can access them individually by clicking here.


