Kurs: Studierendenordner/en
Die deutsche Version finden Sie auf der Seite Kurs: Studierendenordner
The student folder allows students to upload material and share it with other students according to their preferences. This article will show you how to create and use the student folder.
What needs to be done?[Bearbeiten | Quelltext bearbeiten]
- Activate editing
- Create student folder
- Make settings
Create student folder[Bearbeiten | Quelltext bearbeiten]
Add material or activity[Bearbeiten | Quelltext bearbeiten]
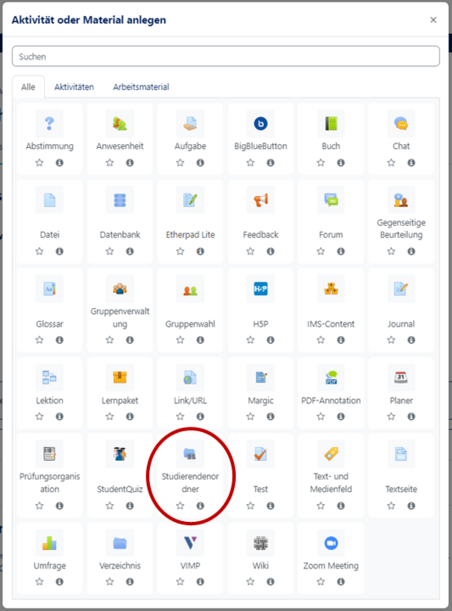
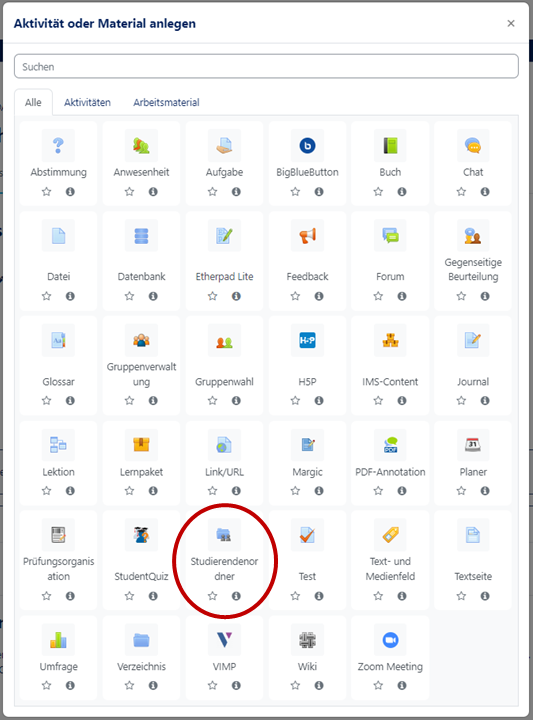
- To create a student folder, click on the desired course, then on Enable editing and finally on Create material or activity.
- Then select the Student folder and confirm your entry with Add.
Make settings[Bearbeiten | Quelltext bearbeiten]
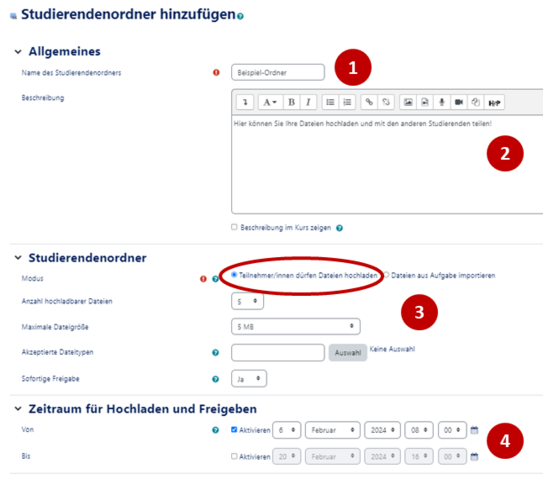
Mode: Students may upload files[Bearbeiten | Quelltext bearbeiten]
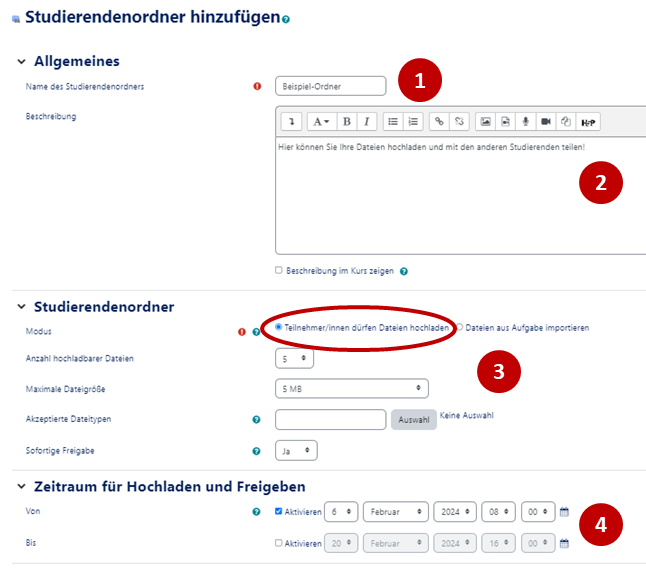
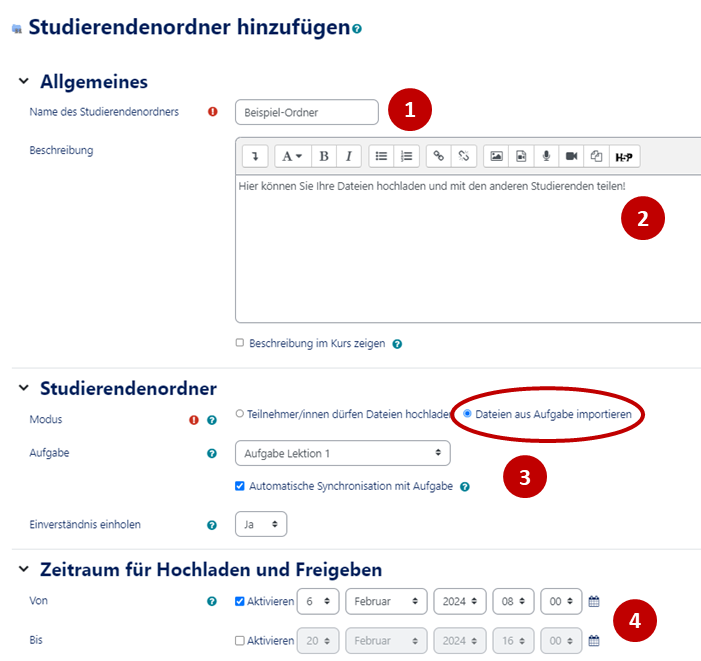
- Give the folder a meaningful Title (1).
- You can also add a Description (2).
- Under "Student folder (3)" you can select the mode. If you decide that students are allowed to upload files, you can also choose how many files can be uploaded, how large the files can be and what types of files are allowed.
- Then decide if you want the upload to take place immediately.
- Then set the Period for uploading (4).
- Finally, click on Save.
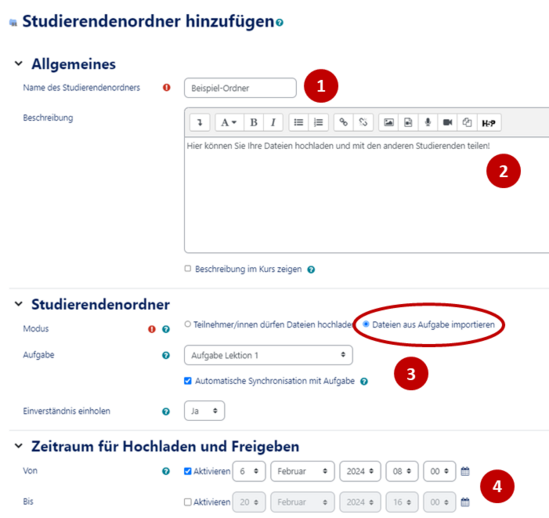
Mode: Import files from task[Bearbeiten | Quelltext bearbeiten]
- Give the folder a meaningful Title (1).
- You can also add a Description (2).
- Under "Student folder (3)" you can select the mode.If you decide to import files from a task, first select the corresponding submission. If you select the "automatic synchronization with task", new submissions will be imported into the student folder immediately.
- Decide afterwards whether you need student approval.
- Then set the time period for the upload option (4).
- Finally click on Save.
Views[Bearbeiten | Quelltext bearbeiten]
View as lecturer[Bearbeiten | Quelltext bearbeiten]
Mode: Students may upload files[Bearbeiten | Quelltext bearbeiten]
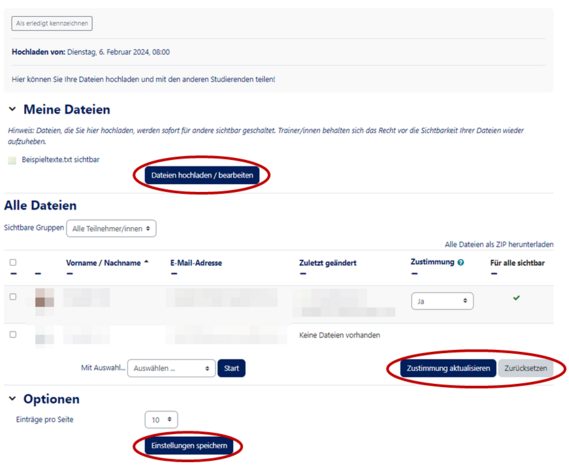
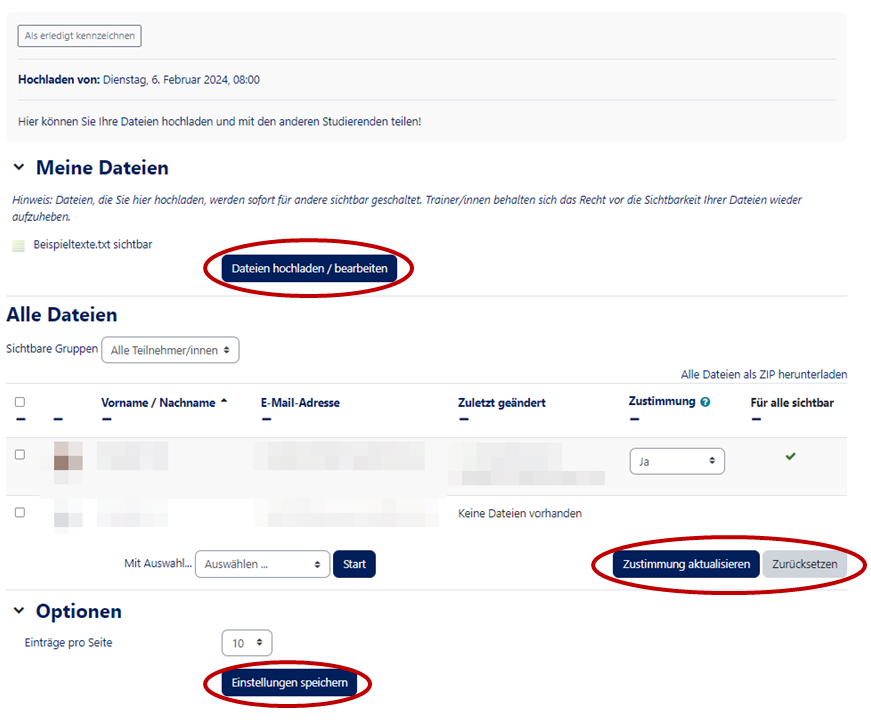
- After you have clicked on "Save" you can see all the students.
- You can also see who has already uploaded something.
- You can also upload files yourself.
Mode: Import files from task[Bearbeiten | Quelltext bearbeiten]
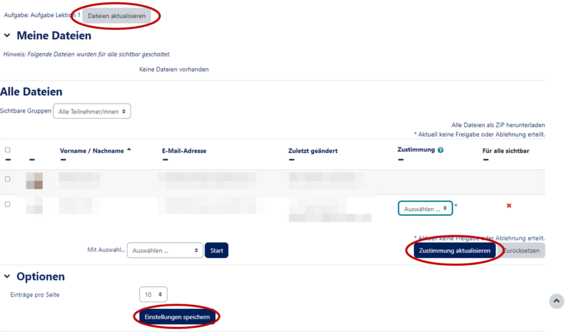
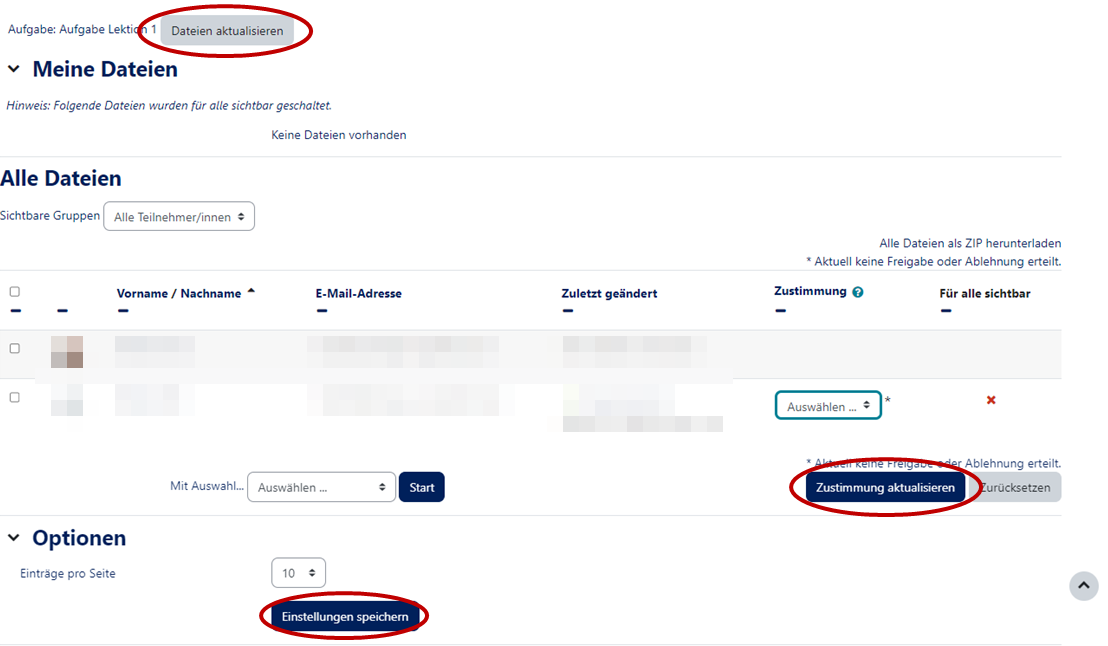
- Here you can choose whether the files uploaded by the students can be seen by others.
- * Select "yes" or "no" under Approval.
- * Then click on Update approval.
- * If you wish to withdraw your consent, click on Reset.
View as participant[Bearbeiten | Quelltext bearbeiten]
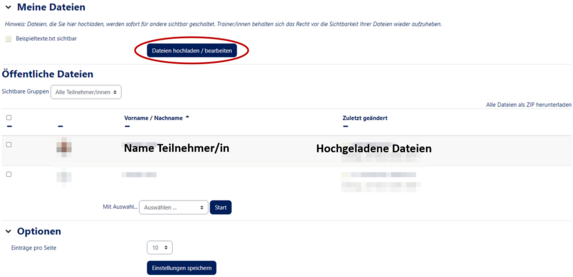
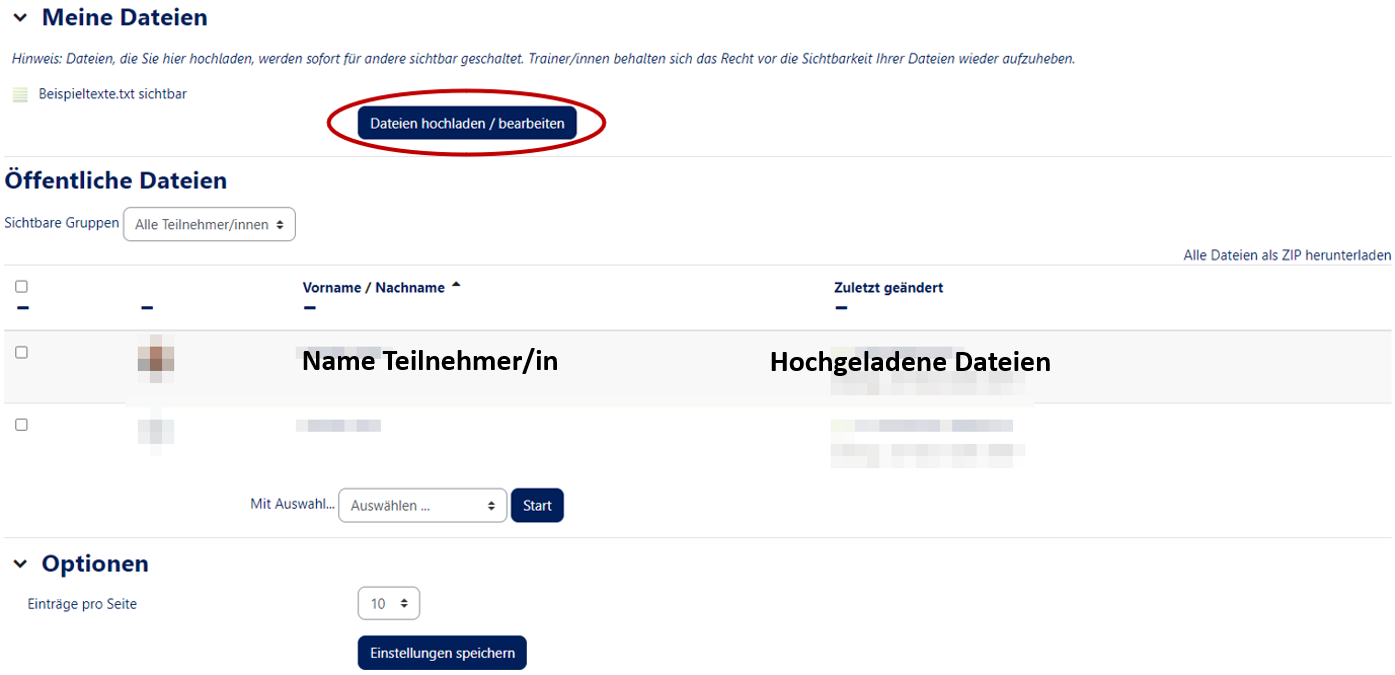
- As a student you will see the names of the other students and the respective uploaded files.
- If you are in "Students can upload files" mode you can also upload files yourself by clicking on "Edit/Upload files".
Video - Create student folder[Bearbeiten | Quelltext bearbeiten]
